Thursday, 16 September 2010
Releases between the Glass and the Dam
An alternative to fibre papers or kiln wash separators between the dam and the glass is to use iridised glass. This of course, only works on pieces with straight lines on the sides. If you place the iridised side toward the fibre paper, you will get a clean release with a minimum of texture. If you do decide to use iridised glass as the release, you must not use Thinfire. It will cause awful pitting in the iridised glass.
Sunday, 12 September 2010
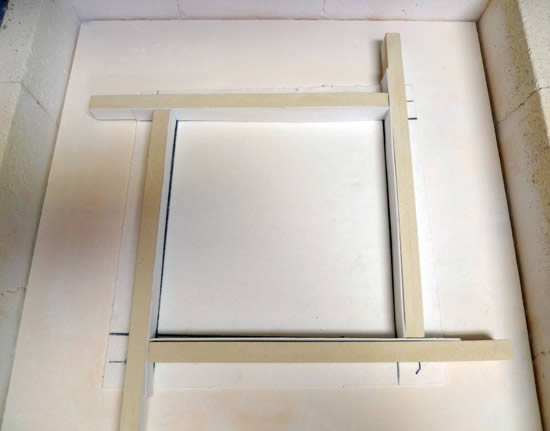
Lining Dams
Dams should normally be lined with Thinfire and fibre paper to get the best release. If you are using fibre board that has not been hardened, you do not have to line, but you will get smoother edges if you do.
The lining papers should be about 3mm shorter than the expected final thickness of the finished panel. I find that 3mm paper against the dam provides the required standoff between the dam material and the glass. The lining of the fibre paper with Thinfire provides a smoother surface than just the fibre paper. Both of these liners should be the same height – 3mm less than the final height of the finished piece.
To calculate the expected final height you need to do a few calculations in the metric system. Weigh the glass in grams. Divide by specific gravity (2.5) to get the number of cubic centimeters. Divide the cc by the area enclosed by the dams in square centimeters. This will give the fraction or multiple of centimeters thick the glass is predicted to be.
Example:
The weight of glass = 500 gms
The specific gravity = 2.5
The area is 10cm by 10 cm = 100 square cm.
Divide 500gms (the weight) by 2.5 (the specific gravity) = 200 cubic centimeters. Divide 200 (the volume in cc) by 100 (the area) = 2 cm thick final piece for the amount of glass put into the pot.
This indicates the fibre paper should be 1.7cm high to allow enough space for the bullnose edge to form.
 |
| As described by Helios |
To calculate the expected final height you need to do a few calculations in the metric system. Weigh the glass in grams. Divide by specific gravity (2.5) to get the number of cubic centimeters. Divide the cc by the area enclosed by the dams in square centimeters. This will give the fraction or multiple of centimeters thick the glass is predicted to be.
Example:
The weight of glass = 500 gms
The specific gravity = 2.5
The area is 10cm by 10 cm = 100 square cm.
Divide 500gms (the weight) by 2.5 (the specific gravity) = 200 cubic centimeters. Divide 200 (the volume in cc) by 100 (the area) = 2 cm thick final piece for the amount of glass put into the pot.
This indicates the fibre paper should be 1.7cm high to allow enough space for the bullnose edge to form.
Wednesday, 8 September 2010
Height of Dams
Dams can be of any height available, but if it is easy to adjust the height, you should consider the ease of working with the glass inside the dams and the possibility of anything falling off the dams onto the glass.
The dam should be higher than the glass in its un-fired state. It should be high enough to contain the moving glass should anything go wrong, so it cannot be the same height as the fibre paper liners – those being 3mm shorter than the glass is high. As a rule of thumb, when I have the choice, I would make the dams at least 6mm higher than the unfired glass. This allows you to handle the sheets of glass and any components without having to reach over high walls. It also ensures containment should anything go wrong.
The dam should be higher than the glass in its un-fired state. It should be high enough to contain the moving glass should anything go wrong, so it cannot be the same height as the fibre paper liners – those being 3mm shorter than the glass is high. As a rule of thumb, when I have the choice, I would make the dams at least 6mm higher than the unfired glass. This allows you to handle the sheets of glass and any components without having to reach over high walls. It also ensures containment should anything go wrong.
Saturday, 4 September 2010
Damming Irregular Shapes
The assumption is that these pieces will be open-face thick fusings/castings rather than enclosed castings.
There are two basic types of dams: a shape cut from a single surrounding piece, or multiple pieces held in place.
Single piece dams
A large, thick fibre board with shape cut out will confine the glass. If very thick, you may need to weight the fibre board, as it is lighter than the glass.
Another variation is to use thick fibre paper cut out to shape and layered up to the desired height with stainless steel pins to hold the whole in place. This also may need to be weighted down. A variation on this is to place the whole on a fibre board and pin the layers of fibre paper into the fibre board to maintain the position of the fibre dams. This will not normally need weighting.
Multiple piece dams
If the shapes are not extreme, you can use pieces of fibre board or fibre paper backed up with kiln furniture, bits of broken kiln shelf or any other heavy material that will withstand the heat of fusing.
You can use thick fibre paper held in place with kiln furniture, if the piece is not thick. You do have to be careful that the glass does not float the fibre paper and run underneath, so about 10 mm is the maximum for this kind of damming. It also helps if this kind of dam is made larger than the glass – or alternatively the glass smaller than the dam. This allows the glass to flow out toward the dam, giving nice curved edges.
Moulds, stainless steel and other refractory materials can be specially made for shapes that will be repeated.
Note that all these variations will benefit from being lined with Thinfire backed up with fibre paper. This gives a smoother edge and also gives some cusioning between the dam and the glass.
Monday, 30 August 2010
Coating Metal Moulds
Most metal moulds are stainless steel as it spalls less while at forming temperatures. The techniques here can be applied to any metal, although spalling will be a common occurrence on any metal other than high grade stainless steel.
On many single curve moulds, such as a partial cylinder, you can just lay fibre paper over the form and place the glass on top of that.
Metal moulds that have more complex shapes require a separator that will conform to those shapes. Applying liquid kiln wash requires you to heat the steel to somewhere between 150 and 200C before applying the kiln wash. Any hotter and the kiln wash will boil off on contact, leaving an uneven coating.
The kiln wash can be applied with a brush or by spraying. Spraying gives a smoother less streaky application. After giving the mould the first coat, return the mould to the kiln and re-heat the mould. Repeat this until you have covered the whole mould with a thin layer of separator. Be careful and avoid applying too much kiln wash at once, as that will cause the separator to run and reveal bare spots on the mould, causing you to need to clean and begin again.
Thursday, 26 August 2010
Cleaning Glass
Glass with dust, oil or other residues promotes devitrification. So first try to remove any excess of these.
Cutting without oil can avoid introducing more oils. Specially formulated cuttings fluids are available that are not oil.
Wash with only a few drops of washing up liquid of the kind without additives to keep you hands soft, or smell good. If there are soap bubbles on top of the water, you are using too much soap.
Window cleaning products are not usually appropriate, especially if they contain ammonia. A few products do not have additives that promote devitrification. One that works well for me is the Bohle aerosol cleaner (but not the concentrate).
Be careful about your rinsing water. If it has mineral salts in it, it can form nucleation points for devit.
Polish dry using plain paper towels or microfiber cloths. Change frequently and wash without softeners.
If you are grinding the edges, clean immediately before any part dries to avoid the powdered glass filling the scratches caused by grinding. Some put the ground pieces into a bowl of water immediately to keep the edges wet until cleaning can be done.
Sunday, 22 August 2010
Moving Pieces
To keep pieces from moving about as you solder them, use pins or nails to keep them in place. The best is to assemble the whole panel and then keep them in place with a frame or lots of nails/pins around the outside. This keeps pieces from moving and also keeps the panel to the original size.
The type of nail or pin will depend on the work board you are using. Softer boards allow push pins of various sorts to be used. Harder boards will need nails.
If you don’t like assembling the whole before soldering, you can confine the pieces you are currently soldering with nails/pins in the same fashion as for the whole panel.
It also helps to do a little tack soldering before the process of running a bead begins. A small amount of solder on the copper foil where pieces join will keep the pieces in exact alignment while you are running a bead.
Wednesday, 18 August 2010
Devitrification of Edges
Devitrification often occurs on the edges of glass, and can be seen as a thin line of devitrification -often looking like smudges that won't wipe off - where the edge has flattened during the fusing. There are some ways to avoid this.
Avoid grinding if at all possible.
If you must grind, use fine heads/grits. Then clean immediately before any part of the glass dries. You may need to clean part of the glass piece before the grinding is complete to avoid any drying of the powder on the edge of the glass.
Clean well with a minimum of soap and rinse with water that does not have a lot of minerals in it. Polish well with plain paper towels or frequently changed microfiber cloths.
Window cleaning products are not usually appropriate, especially if they contain ammonia.
Avoid introducing oils from the cutter by scoring with a dry cutter or use a specially devised cutting fluid. Cleaning solutions that have additives to be kind to hands or scents should be avoided.
The edges of some glasses devitrify more easily than others. If this continues to be the case after all cleaning efforts have failed, then use a devitrification spray, but continued cleaning is still necessary. There are no short cuts in cleaning.
Saturday, 14 August 2010
Effect of Variations in Size on Bead Annealing
When annealing beads with varying thicknesses, I apply a rule of thumb to be safe.
I take the difference between the thickest and the thinnest part and add that to the thickest part to get the diameter at which I should anneal.
So a bead with a thickest part being 8mm and the thinnest 2mm, gives a difference of 6mm which I add to the 8mm (thickest) part giving 14mm as the diameter to which I anneal.
Tuesday, 10 August 2010
Annealing Beads of different sizes and shapes
It is possible to anneal beads of different sizes and shapes at the same time, if you anneal for the beads which require the most care. It will not matter for the smaller beads or easier shapes if they are annealed longer than the minimum requirement.
Subscribe to:
Posts (Atom)