Showing posts with label Records. Show all posts

Wednesday 2 November 2022

Making Test Tiles

Creating samples or tests provides both references on firing profiles and knowledge of the characteristics of the kiln. 

General samples

 Sample tiles are normally a series of tiles with the same lay up but fired at different temperatures.  These are likely to be intervals of temperature from a sharp tack to a full fuse.  A suitable interval might be 10°C as it is easy to interpolate between these for a slightly different profile than the tiles show. This is the basic arrangement.

 You can make this more informative by including tiles in the same basic lay up but with hot and cool colours, opalescent and transparent, black and white, strikers, etc.  The addition of these will give a richer bank of information.

 Of course, these tiles must be labelled with glass types and code numbers and the temperature used.  This is not all the information required though.

 Many sample tile sets do not include the firing rate.  The heat work required to attain a specific profile is dependent on time, temperature and hold.  These are the time to get to the working temperature, the temperature, and the soak time.  If you do not record the ramp rate used, you will have incomplete information.  It is not that you have to record the entire schedule.  But the rates and any soaks on the way to the top temperature need to be recorded. This means you can take account of any slower rate of heating, any additional holds on the way up, and the length of the soak at top temperature.  Then when contemplating something more complicated than the conditions under which the tiles were made you have better information.

 It is a good idea to maintain a photographic record of the sample tiles to avoid storage problems.  These can be made from the individual tiles and photographed from several angles. 

 Another way of keeping records - without making tiles for each temperature - is to photograph the tiles through peep holes as the set temperatures are achieved.  This means the tiles need to be placed in the kiln so they can be seen from the peep hole. You will only have a physical sample for the top temperature. The other profiles will have a photographic record.  The firing conditions for these need to be recorded just as for the series of physical tiles.

 This photographic record may not be suitable for your way of working and so require making the sets of multiple tiles.  Both these methods provide a generalised record of heat work to achieve given profiles.  Note that you will need to prepare sample tiles for each kiln, as each has different characteristics. 

Specific samples

 However, there will be cases where the general conditions exemplified by the reference tiles are to be exceeded.  In this case you will need to make a sample specific to the piece you are planning.  This can be a general representation of the piece, or a scaled mock-up. 

 The general test tile may be small scale or relatively large.  It will contain only the components in terms of height and shape that will be in the planned, but more complicated piece.

 A more rigorous method is to make a full scale – or nearly so – mock-up of the piece. This is usually done in clear. Fire it to the proposed schedule to determine the exact effect.


Sample making gives confidence in preparing work for the kiln and scheduling to get the desired profile.

Wednesday 23 February 2022

Fused Glass Project Sheet


Why is a project record sheet useful?

Some kind of record helps to set down the client and maker agreements, estimate quantities, determine prices, review past practices for successes and record possible changes for the future.  

Even if you do not have clients, comparing the record sheets over a period can give you information on how quickly you work, the amount of glass you use in relation to size and complexity, information for costing, etc. It can give you confidence in stating - and sticking to - your prices.

These purposes are clearly different from a kiln log or firing record.  This is much more for assessment of elements for costing and pricing.  You can, of course, include this with your firing log or vice versa.

What should be included?

Desirable elements include the following.  You may have others to add according to your individual practices.  

Initial project information
·        Project description - including dated sketch or photo or reference to the cartoon.
·        Intended location – autonomous, primary glazing, encapsulated, attached, etc.
·        Dimensions for both two- and three-dimensional projects.
·        Delivery date. This may be an estimated or firm date.
·        Price or estimate – indicate which.

Materials and Equipment
·        Glass types and codes that you will (or have) used, in case additional glass is required.
·        Amount and cost of glass used during completion. This is not simply the amount used, but also the amount you did, or would require to, buy to complete the project.  
·        Glass separators – kiln wash, fibre paper, etc., including their cost.
·        Kiln use. The number and amount for each firing of the kiln should be added to account for maintenance, supplies, and depreciation.
·        Mould use.  A notional figure should be added for each use of a mould similar to the use of the kiln.
·        Miscellaneous materials including their costs.


Time
The time used to complete the project should be noted as you go along.  It can be divided into various process – such as cutting, firing, cold working, cleaning – or as a simple cumulative amount of time on the whole project.

Description of project results
A critique of the project including what might be done differently, the successes, the discoveries, should be written up at the end of the project.


What does all this record keeping provide me?
Recording this kind of information provides a record of how various projects went, how you met any difficulties, what the successes were.  This is useful to look back on when similar projects arise.

This information is invaluable in assessing materials costs, and time required for various styles and complexity of projects.  It enables a quick and assured way of estimating the costs of a project when a commission is requested.  It gives you assurance about your pricing and valuation of projects you have completed for craft fairs or friends. You don’t have to be apologetic about the price of items, because you know the costs.


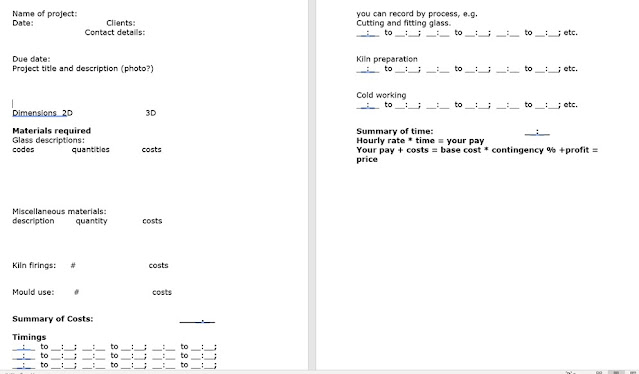
A possible form might look like this:


Project information

Name of project:
Date:                           Clients:  
                           Contact details:


Due date:
Project title and description (photo?)


Dimensions  2D                           3D

Materials required
Glass descriptions:       
codes              quantities            costs


Miscellaneous materials:  
description        quantity             costs


Kiln firings:     #                           costs


Mould use:       #                           costs


Summary of Costs:                                 ____.__


Processes
The starting and finishing time, including any attention to equipment should be recorded for each working session on the project.  The actual hours and minutes can be added up later.  You can simply record the times for each project regardless of process, e.g.:
__:__  to __:__;  __:__  to __:__;  __:__  to __:__;

Or you can record by process, e.g.
Cutting and fitting glass.  
__:__  to __:__;  __:__  to __:__;  __:__  to __:__; etc.


Kiln preparation
__:__  to __:__;  __:__  to __:__;  __:__  to __:__; etc.


Cold working
__:__  to __:__;  __:__  to __:__;  __:__  to __:__; etc.


Summary of time:                                   __:__
Hourly rate * time = your pay
Your pay + costs = base cost * contingency % +profit = price


You will, of course, develop your own form of recording for your project materials, costs and time used.  But it is important to keep some record of what amount of effort and cost has gone into each project.  With the passage of time, things seem easier and less costly than they did at the time.  A record of the project reminds you of the actual costs, difficulties, processes and time.


Wednesday 7 April 2021

Firing Records

Bullseye Glass Company


To develop your fused glass practice, you need to record lots of information about your firings.  This tells you what has gone well and not so well.  It hones your expectations about how you should be preparing, scheduling, and analysing your experiences.  It becomes your detailed memory bank of results and gives directions for the future.  This should be done whether fired in your own kiln or someone else’s.

Categories of information for the record
There is quite a bit of information that needs to be included in such a record.  This is my view of what needs to be included  in your logbook for future reference.

Date
Record the date of the firing as that will give you historical information on similar projects.  It can show you what you have changed over time and the variations you have introduced.

Glass used
This is not only the type of glass (Bullseye, Float, Oceanside, Wissmach, Youghiogheny, etc), but the colours used.  This should include the manufacturer’s code numbers to enable you to replicate the glass used.

Lay up
This can be a description, a drawing or pictures of the set-up of the piece prior to firing.  This is vital to later understanding what you did in this firing.  Record any glues or stabilising elements you use. Any frits or powders used should be recorded. The placement in the kiln is important - centred, one corner or another, level/ height in kiln, etc., can affect the results.  You can make a sketch or take a photo to attach to the record rather than writing separate descriptons. How it comes out is recorded later.

Dimensions
The dimensions (h x w x d) including any variations in height are needed to compare with other projects.  This might be included in the lay-up diagrams or pictures, but it is most useful to have the dimensions and their variations recorded as numbers too.  You might think in terms of layers, but remember to record the thickness of each layer/piece (e.g., 2mm, 3mm, 4mm, 6mm, etc)

Kiln used
This is especially important if the kiln is not yours. Every kiln has variations and it is important to compensate for that in scheduling and placing of the piece in the kiln.

Process
This is essential in gaining an understanding for planning any modifications.  The process can be described by standard terms - e.g.,  sinter, slump, tack, contour, full fuse, casting, melt – or by your own terminology (if it is consistent).

Description
A statement of your project and aims is very useful for the future.  It is a reference point to use in comparing what you wanted with the results of the firing.

Support system
This includes essential information affecting the firing – shelf type (e.g., fibre, mullite, ceramic tile), mould type (e.g., ceramic, fibre, steel), and a description or sketch including any reference codes.

Kiln furniture. The kind and quantity of kiln furniture (dams, stilts, posts, etc) can affect the firing results, so need to be recorded.

Separators
This includes kiln wash (type, whether new or the number of uses), fibre paper type and amount, mould coatings, and anything else you may use to keep the glass from sticking.

Schedule
This is the thing most everyone remembers to record.  You need to record it each time you use it – even if you have used it many times before.  You need to record each step of the program.

So many times, people report that “it [the schedule] has always worked before”, only to discover that some element had been intentionally or accidentally altered from past firings.  I normally write the schedule in a logbook and then enter it into the programmer. I use the written record to check against what I have entered into the controller.  Then I know I have programmed what I intended.  I can also check on earlier, similar firings to see the variations I have used in the past.

Results
Drawings or pictures of the finished item are essential.  A description of the results is also needed as a picture does not tell the whole story.

Comments on results
You should also give a commentary on the results of the firing.  This should include successes as well as disappointments.  Thoughts for future similar firings should be written down.  They will be forgotten soon, if you don’t.

How to keep all this information
As you can see there are many elements that need to be recorded as they each can affect a firing. I see these as a minimum, and you will add elements important to you for this list.

It does not matter much in what form you keep the information.  It can be a ledger, spreadsheet, database or your phone or tablet that you carry with you always.  There are several apps for recording the kiln firings that can be used.  What is important is that you can record the information immediately, or as you prepare the work for the kiln, into the chosen form of recording.  I use a logbook and convert that in my leisure moments to a spreadsheet (usually at new years day).  This allows me to compare information over time and especially the kinds of firings that I rarely do.  It also allows me to search by various processes.

It is important that you back up any electronically held information to the cloud or other device to protect against loss or corruption. 

Forms
It is useful to have a form for compiling this record.  A number of elements of the records can be reduced to tick boxes to ease the recording.  It helps to remind you of the information you need to log for each firing.  Bullseye have an excellent form that you can use or adapt to your needs. There are a few apps that can be used on phones or tablets which are useful for those who record everything on their phone.  Remember to back it all up to the cloud for preservation in case of loss or damage.

Wednesday 27 March 2019

Observation

The importance of Observation (and recording)


Observing what you, or the kiln, is doing whether you are using a cartoon, or a schedule obtained from elsewhere – including the kiln manufacturer – means that you will learn much more quickly as you progress.  You will be able to alter things as you go.  This applies to all stages of the piece from design to removing the piece from the kiln.

The Design

Once you have made your design – whether as a drawing or a mock-up – look at it.  Really look at it.  Look at it from a distance, climb a ladder if you can’t pin it on a wall and look down on it.  Look at it from the sides so you have an oblique angle view.  Turn it upside down to confuse your expectations and so see what is really there.  Look at it, using a mirror to see if it still looks good. Make the alterations you need as you go along to get the look you want and then repeat the process until you are happy.

Assembly

Observe how you have put the piece together.  Do the pieces fit?
Is everything in the right place? Are the colours right? Does it match your vision – symmetrical or asymmetrical?   Do these things as you progress, so you become aware of the process and its rhythm.

Firing

Once you have determined your schedule, you cannot just leave the piece. If you are new to fusing, you need to observe the stages of firings to begin to understand what is happening to the glass at various temperatures and rates of advance. You would not put a cake into the oven and leave it without checking on it from time to time. Why would you fail to observe a much more expensive process?

Even when you are experienced  - observation of new layups, new processes and anything you haven’t done several times before - you need to know how things are progressing during the firing.

Observing a firing is relatively simple.  You need to check on two things:

·   Check for a too rapid rate of advance.  Peek into the kiln at around 540C to see if the piece is still whole.  If not, you can abort the firing and progress to fixing or move on to another project.

·   Check to see when the desired shape has been achieved.  Peeking to see if the slump is complete or needs more time is important to getting the shape right.  Peek to determine if the tack fuse has been achieved.  When it has, advance to the next segment to avoid over firing.  If it hasn’t, add time to the schedule to get it right.

Recording

It is not enough to simply observe.  You need to record what you intended and the results you achieved.  That includes what you did to get things right as well as wrong.  What did you do to correct elements?  These are all things that you will need to refer to in the future.

The key to rapid learning is observation and recording what you see.