Showing posts with label Volume control. Show all posts

Wednesday, 25 October 2023

Spikes on Frit Castings

Credit: The Crucible.com


It is frequent to have castings from frit with spikes, needles, or prickles around the edges. 

Causes

These spikes result from the glass touching the edge of the mould or separator during the hottest part of the firing. The glass particles first begin to compact as the glass rises toward the fusing temperatures. As the temperature increases toward the casting temperature it begins to expand both horizontally and vertically from that compact mass. As it cools, the glass sinks down and retreats from the edge. This movement leaves some small bits of glass stuck to the sides. The glass contracts as it cools, leaving the spikes as it contracts from its hottest state. 

Avoidance

The usual recommendation is to mound frit in the middle and let it flow to the outside. Still, the glass flows to the outside of the mould at casting temperature and it touches the sides. Leaving the risk of creating spikes. Accurate measuring of the amount of glass to charge the mould with is important. With the right amount of glass, the mould will not be overfilled and so, reduce the spiking. 

Measuring the weight of glass for the mould is not difficult. In many cases, the manufacturer of the mould has done the work for you. If you need to calculate the weight of glass required for the mould, it is not difficult. A method is given hereIn short, you use a dry fill of the mould. Measure the volume (using the metric system) and multiply by the specific gravity to get the weight in grams. 

Larger chunks of glass tend to produce fewer spikes than smaller frit. Usually longer soaks at top temperature are required to fully form the glass with smaller frit. It is also possible to drip glass into the mould from a pot suspended above the mould. Accurate measurement of the weight will still be important. But add 100gms/4oz. to the amount to allow for the glass that will stick to the pot.

My view is that with dams, it is better to use a straight sided shape with fibre cushioning around the outside. When annealed and cool, clean it well. Then fire polish with a slow ramp to 540°C/1000°F followed by a quick ramp to the fire polish temperature. This will polish the sides of the piece that were in contact with fibre paper.

Wednesday, 1 June 2022

Preventing dog boning

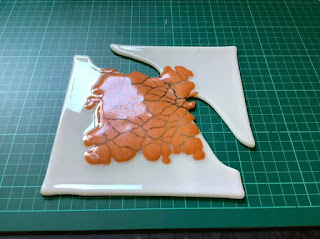
Firing a single layer, even with decorative elements on top, is most likely to “dog bone” due to lack of volume.  With a single layer you are always going to have difficulties with volume control. 

Photo credit: Paul Tarlow

Unless you are satisfied with an angular tack fuse at the lower end of the tack fusing range, you will always run the risk of dog boning. All the other variations of tack fusing use increased temperatures causing the glass to begin to pull in along the long sides to a greater or lesser extent (more with contour fuse, less with angular tack fuse).

Dog boning occurs because as the glass softens and the edges begin to round, the viscosity takes over from the solid phase of glass as a major force.  Viscosity can be thought of as an approximation of surface tension. 

Glass is a material with a plastic range over several hundred degrees.  This means that the hotter the glass becomes, the less stiff it becomes, and the viscosity force thickens the glass toward 6-7mm in the kilnforming temperature range. The greater the temperature, the more the glass pulls into a ball shape, or in the case of sheets, thickens at the edges and thins in the middle.  Higher temperatures reduce the viscosity to the extent that it becomes as thin as one millimetre.

Trick the glass

To avoid dog boning on tack and full fusing, you have to trick the glass with some special scheduling.

The trick employs the concept of heat work.  The nature of glass allows you to put a lot of heat work into a piece by soaking for a long time at a low temperature.  You might think of it as a kind of sintering.

A description of sintering:

The atoms in the [glass] diffuse across the boundaries of the particles, fusing the particles together and creating one solid piece. [This can be done by heat at low temperatures with extended soaks.]  Examples of pressure-driven sintering are the compacting of snowfall to a glacier, or the forming of a hard snowball by pressing loose snow together.   https://en.wikipedia.org/wiki/Sintering

By sintering (sometimes called fuse to stick) or - in kilnforming terms - by the use of heat work you can achieve the result you want without dog boning.

By taking the temperature slowly to about 700°C to 720°C and soaking there for two to four hours you can achieve a rounded tack fuse without dog boning.  You will have to experiment with the exact temperature and length of soak to get exactly what you want.

The length of soak time or exact temperature is not vital.  The two in combination will achieve the effect you want.  The importance of observation of your firing is re-enforced in the cases of sintering.  You cannot be sure until you check during the firing whether the edges of the glass are rounded enough for your purpose. That observation will also tell you whether a slightly raised temperature would be useful.  You will learn the time required to achieve the effect by recording the soak time when you advance to the anneal soak and cool.

Further information is available in the ebook Low Temperature Kiln Forming.


By the use of heat work in kilnforming you can achieve tack fused pieces without dog boning.

Wednesday, 19 January 2022

Tack Fusing Difficulties

Many novice kilnformers tend toward the use of tack rather than full fusing in their work.  This is a bit perplexing, as tack fusing is more difficult than full fusing to complete successfully.


Why is tack fusing more difficult? 
The single most important reason is that the pieces of glass on top of the base shade the heat from the area underneath. And they do that unevenly over the base glass. Additionally, the tacked pieces are not fully incorporated into the base and so tend to behave as separate pieces, especially on angular tack fusing.  Both these factors require greater thought and care in scheduling.

Evidence
The evidence for the statement that tack fusing is more difficult than full comes from several areas.

There is a lot of evidence on social media of failed tack fused projects.  It may be argued that it is natural for the difficulties to be highlighted on the self-help groups. And the successes are not so widely shared.  There are other pieces of evidence.

Breaks of base sheet while the overlaying pieces remain intact.  

 This is a result of the overlaying glass shading the heat from the lower layers.  Some writers describe the effect as glass “seeing” heat.  The glass reacts more quickly to radiant heat than to transmitted heat from the air.  As a result, the glass exposed to the radiant heat absorbs heat more easily than the shaded areas.  This leads to uneven heating during the rise in temperature and a build-up of stress which frequently causes breaks from expansion differences in the base glass.

Breaks along the borders of the thick and thin areas of pieces are common in tack fusing.  

 This usually occurs during the cooling.  Thick and thin areas take different amounts of time to release the stored heat.  As in heat up, if the temperature differential is too great, the glass will break.  Research by Bullseye has shown that significant stress can be built up by temperature differences greater than 5°C across the piece.  What temperature difference is required to develop enough stress to cause a piece to break is unknown, although it does relate to the degree of variation in thicknesses and areas of base covered.

Scheduling as for thicker pieces.

 Further evidence is given by several sources stating that tack fusing projects need to be scheduled as though between 1.5 and 2.5 times the actual thickness to be successful.  This need for more careful firing is supported by the success of this strategy which increases the heat work as applied to tack fusing.

Further information is available in the ebook Low Temperature Kiln Forming.


Tack fusing requires more care than flat fusing because of heat shading and thickness differences.  There are some scheduling approaches that can minimise the risks of breakage.

Wednesday, 10 November 2021

Single Layer Circle with Decorative Rim


A question arose:

If you fuse a single 20cm diameter sheet of 3mm glass to full fuse, [with a decorative rim] what happens? … Would the lack of two layers in the centre be a problem for the 6mm rule?

This layup risks trapped air and a large central bubble.  The explanation involves the combination of volume control and weight.

Volume control

The volume control relates to the single 3mm layer in the centre.  The glass will thin in the centre and thicken at the perimeter.  This leads to the risk of thinning to the degree that bubbles are created in the centre.  The edges will also draw in as the viscosity - surface tension - of the glass pulls the glass toward a 6mm thickness.

Weight

The explanation is also about weight.  The decorative rim adds weight to the outside of the piece.  This weight will “seal” the rim of the glass to the shelf, reducing the possibility of air escaping from under the central portion of the piece.  This weight effect on the rim increases the risk of a large central bubble.

Profile

Another influence on the result of the fuse is the degree of fuse.  At full fuse the viscosity of the glass is less and so resists the force of expanding air much less than when cooler. Even at rounded tack fuse, the glass will be unable to resist the formation of bubbles. As the glass thins and viscosity decreases, any air at all will cause a bubble.

Changes for the future

Avoidance of bubbles in this piece relate to design, scheduling and technique.

Design

It is possible to design a piece of this nature to avoid the volume control issue.  The base piece could have a smaller circle or rectangle centralised on top inside the proposed perimeter.  The rim can then have the decorative elements placed.  If they are spaced widely, frit can be used to fill significant gaps.  The piece can then be placed in the kiln for a full fuse.

Scheduling

You can also fire the piece as originally described very slowly to a low temperature.  This uses the concept of heat work. By applying the heat over a long period, you can achieve the same effect as would be achieved by a faster rate of advance to a higher temperature. 

There are at least two ways to increase the heat work.  You can use a very slow rate of advance to a point slightly above the softening point of the glass.  This will be the lower end of the slumping temperature range of your glass.  The soak may be for hours.  You will need to observe when the effect you want is achieved.

You also can choose the same lower slumping temperature and reach it in your standard fashion.  This will require an even longer soak time to achieve the same result.

In both these low firing approaches, you will need to observe to determine when the piece is finished.

Technique

The “flip and fire” technique may also work on the single layer with an added rim.  To do this you build the piece upside down on the shelf.  It helps to draw an outline of design on Thinfire, or Papyros.  Place the decorative elements and cap them with the clear.  Take the whole to a rounded tack fuse.  When cool, clean well and fire to a tack fuse again.  This will give something less than a full fuse, but it will be more than a tack, as the heat work is cumulative.

Further information is available in the ebook Low Temperature Kiln Forming.

Summary

A single layer piece with a decorative rim is most likely to produce bubbles in the centre.  There are some ways to overcome this: design, scheduling, and technique. Design is the most likely to be successful.

Wednesday, 15 September 2021

Digest of Principles for kiln forming

Some time ago people on a Facebook group were asked to give their top tips for kiln forming.  Looking through them showed a lot of detailed suggestions, but nothing which indicated that understanding the principles of fusing would be of high importance.  This digest is an attempt to remind people of the principles of kiln forming.

Understanding the principles and concepts of kilnforming assists with thinking about how to achieve your vision of the piece.  It helps with thinking about why failures have occurred.

Physical properties affecting kiln work

Heat
Heat is not just temperature. It includes time and speed.

 Time
       The time it takes to get to working temperatures is important.  The length of soaks is significant in producing the desired results.

 Gravity
       Gravity affects all kiln work.  The glass will move toward the lowest points, requiring level surfaces, and works to form glass to moulds.

 Viscosity
       Viscosity works toward an equilibrium thickness of glass. It varies according to temperature.

 Expansion
       As with all materials, glass changes dimensions with the input of heat.  Different compositions of glass expand at different rates from one another, and with increases in temperature.

       Glass is constantly tending toward crystallisation. Kiln working attempts to maintain the amorphous nature of the molecules.

 Glass Properties
·        Glass is mechanically strong,
·        it is hard, but partially elastic,
·        resistant to chemicals and corrosion,
·        it is resistant to thermal shock except within defined limits,
·        it absorbs and retains heat,
·        has well recognised optical properties, and
·        it is an electrical insulator. 

These properties can be used to our favour when kiln working, although they are often seen as limitations.

Concepts of Kiln Forming
Heat work
       Heat woris a combination of temperature and the time taken to reach the temperature.

 Volume control
       The viscosity of glass at fusing temperatures tends to equalise the glass thickness at 6-7mm. 

 Compatibility
       Balancing the major forces of expansion and viscosity creates glass which will combine with colours in its range without significant stress in the cooled piece.

 Annealing
       Annealing is the process of relieving the stresses within the glass to maintain an amorphous solid which has the characteristics we associate with glass.

 Degree of forming
       The degree of forming is determined by viscosity, heat work and gravity.  These determine the common levels of sintering, tack, contour, and full fusing, as well as casting and melting.

 Separators
       Once glass reaches its softening point, it sticks to almost everything.  Separators between glass and supporting surfaces are required.

 Supporting materials
       These are of a wide variety and often called kiln furniture.  They include posts, dams, moulds, and other materials to shape the glass during kilnforming.

 Inclusions
       Inclusions are non-glass materials that can be encased within the glass without causing excessive stress.  They can be organic, metallic or mineral. They are most often successful when thin, soft or flexible.

A full description of these principles can be found in the publication Principles for Kilnforming


Wednesday, 1 September 2021

Texture moulds


"I could use some help here please. I’ve tried this sun mould 3x and as you can see all 3x I get a hole.  If you could tell me what I’ve done wrong I would greatly appreciate. They were all full fused to 1430F (776C)."
Example of the problem


There are a range of views that have been given on how to make texture moulds work without the glass developing bubbles.

closer view of one example

These are a summary of the suggestions made to the enquirer.

Not enough glass thickness. The view is that glass needs to be 6mm thick to be used on texture moulds, as the viscosity of glass tends to draw glass to that thickness, robbing from other areas making them thin and prone to bubbles.

Glass always wants to go to 6mm.  Not always.  It depends on temperature.  The kiln forming temperatures we use results in a viscosity that tends to equalise the forces at 6 – 7 mm.  Hotter glass will flow out more thinly, until at about 1200C, the glass is 1mm or less thick.

Full fuse two sheets first.  The object is to avoid placing two separate sheets on top of the mould, creating the potential for more bubbles between the sheets, as they may slump into the mould at different rates.

Too hot. As the glass increases in temperature the viscosity is reduced and can no longer resist the air pressure underneath the glass.

Use a lower temperature. The idea is to keep the glass relatively stiff to resist bubble formation.

Bubble squeeze needed to avoid trapped air.  Another way to reduce the amount of air under the glass is to allow the glass to relax slowly at a temperature below which the glass becomes sticky.

Elevate the mould.  The idea is that hot air circulating under the mould will help equalise the temperature of the mould and the glass.

Drill holes at low points. This gives air escape routes under the mould, assuming the mould is slightly elevated.

Go lower and slower.  Use a slower rate of advance toward a lower top temperature with longer soaks to avoid reducing the viscosity, but still get the impression from the mould.


Now for a different viewpoint.

None of the views given above are wrong, but they all (except in one case) fail to consider the fundamentals of obtaining texture from such a mould.

It is apparent that the temperature used was too high because the glass had low enough viscosity to allow the air underneath to blow the bubble.  The suggestions of thicker glass, bubble squeezes, lower temperatures, drilling holes and elevation of the mould are ways of reducing the amount of air or resisting the air pressure.  They are not wrong, but miss the fundamental point.

That fundamental point is that you need to raise the temperature slowly on these texture moulds to allow the glass to fully heat throughout. By doing this most of the air has a chance to filter out from under the glass before it conforms to the edges of the mould.  It is simpler to use the slow advance rather than a quick one with a slow-down for a bubble squeeze.  The glass is more certain to be the same temperature throughout by using a slow rate of advance.  Glass with an even temperature can conform more easily to the undulations and textures of the mould.

Mostly, the recommendations given are to use two layers, or 6mm of glass that has already been fused together.  This gives greater resistance to bubble formation and reduces the dogboning and needling of the edges.

However, you can form in these moulds with single layers.  There are of course certain conditions:
  • You must advance the temperature slowly.  A rate of 100C per hour will be fast enough.
  • You can add a bubble squeeze soak of 30 minutes at about 630C as additional assurance of removing most of the air.  The bubble squeeze is done at a lower temperature than usual, as the glass is less viscous because the slow rate of advance has put more heat work into the glass.
  • The top temperature should not go beyond 720C. Beyond that temperature the viscosity of the glass drops quickly and so becomes subject to bubble formation.


The soak at the forming temperature will need to be long and observation will be needed to determine when the glass has fully conformed to the mould. Quick peeks at intervals will show when the design is visible on the top of the glass. The time will vary by:
  • Mould texture complexity 
  • Type of glass (opalescent or transparent),
  • Heat forming characteristics of the glass,
  • Viscosity of the glass or colour,
  • Etc. 

Be knowledgeable about how to extend the soak or to advance to the next segment of the schedule to take advantage of your observations.

Your observation may show that you can do the texture formation at a lower temperature in future. This will provide results with less separator pickup and better conformation to the mould without excessive marking. 

You will need a long soak in either circumstance. This will be in terms of hours not minutes.  If you do these texture moulds at slumping temperatures, you will probably need at least twice your normal soak.

You can do a lot to fool the single layer glass into doing what you want by using low temperatures and long soaks. See Bob Leatherbarrows's book on Firing Schedules.  He gives a lot of information on how to manipulate glass through heat work - the combination of temperature and time.  You might also consider obtaining my book - Low Temperature Kilnforming.


Most of the search for the right temperature, fails to note that the important element is how you get to the temperature. You can get the same result at different temperatures by using different rates of advance.

Kilnforming is more than temperature, it is also about time and the rate of getting to the temperature. By concentrating on temperature, we miss out on controlling the speed and the soak times. You can do so much more to control the behaviour of the glass at slow rates, significantly long soaks, and low temperatures.

Wednesday, 11 August 2021

Needle Points


Often fused glass has prickles or needle points around the edges and especially at corners after firing.

This illustration is from Glass Fusing Made Easy

The nature of glass and its interaction with the separators is the cause.  As you heat glass it expands. Once the cooling starts, the glass contracts. Often a particle of the glass sticks to the separator while the rest continues to contract. This dragging of the glass along the separator results in the creation of little sharp points developing as the glass retreats to its final dimensions.

The best solution I have found to reducing the points at corners is to blunt any points or corners before assembly. Only a tiny amount of glass needs to be removed from the corners to reduce the possibility of these points being developed.

Small needle points can also develop along the sides of the glass too.  These are more difficult to avoid.  The most successful method for me is to use a loose separator.  This can be Thinfire, Papyros or a fine dusting of alumina hydrate or powdered kiln wash.  Although less widely available, talc can be used. Talc is known to be carcinogenetic with high exposure, so breathing protection is needed. All these powders provide enough lubrication to allow the runny glass to slide without sticking. 

Of course, you can use boron nitride, which is very slippery, but the cost of it makes it expensive in comparison to the other methods, including using fine diamond pads to remove the needles.

An additional consideration is the temperature you use.  The higher the temperature, the more the expansion.  Expansion rates are almost exponential above the brittle phase of the glass.  Reducing the temperature by 20C and doubling time or more means the glass does not expand so much and the additional time allows the desired profile to be achieved.  

Of course, paying attention to volume control - using 6mm or more thickness - will help to reduce the needle points.  A 3mm sheet both expands and becomes thicker at the edges by drawing more glass from the interior and the edge while attempting to reach 6mm.  This means there is an increase in the needling effect.  Although a 6mm piece retreats on cooling, it does not have the additional thickening effect of a 3mm piece.  Even a 9mm piece retreats on cooling, although the final piece has a larger area than at the start. 
- - - -
There are various preventive measures that can be taken to avoid needle points on fused glass.  These range from altering the edges of the glass, using fibre papers that turn to powder, using refractory powders, or boron nitride. Post firing solutions relate to cold working.

Tuesday, 5 January 2021

Expansion at Edges of Tack Fused Stacks

How much will my glass expand if I put glass pieces on top of 6mm base?  

I ran some tests for both 6mm and 3mm bases. These showed that the distance from the edge is important.  The amount of glass in the stack has a big influence on expansion.  So does the tack profile and the thickness of the base.

The most expansion for any thickness and at any tack profile is when the stack is placed at the edge.  The further away from the edge, the less the expansion. There is no noticeable expansion of size when the tack stacks are placed 20mm from the edge.  In most cases there is only a little expansion at 10mm from the edge.  Although not tested, it seems that 15mm is a safe distance from the edge to avoid changing the edge.

The amount of glass in the stack being tacked to the base has an effect on the amount of expansion.  This is to be expected based on the concepts behind volume control.  Two tack layers can vary from two to three times that for a single tack layer depending on the profile of the tack.

The tack profile has an effect on the amount of expansion.  At contour there is a greater expansion than at rounded or sharp tack fuse.  This is to be expected, as there is less heat work at sharper tack profiles than at contour.

The thickness of the base has an influence on the amount of expansion too.  Thicker stacks promote greater deformation of the edge at all tack levels.  Thicker stacks need to be placed further from the edge to avoid changing the perimeter.  Thicker stacks create greater change in the edge on single layers than double layers.


The setup and results are given here.


Setup for 2 layer base and 1 and 2 layer stacks at various distances from the edge.


Contour fuse test, 6mm base
1 layer placed at edge, at 10mm from edge, at 20mm from edge, and at 30mm from edge.  2 layer stacks placed in the same way.  
 
Fired results, outlined for clarity

1 layer placed at edge – expansion of 2.5mm
1 layer placed 10mm from edge – expansion of 0mm
1 layer placed 20mm from edge – expansion of 0mm
1 layer placed 30mm from edge – expansion of 0mm

2 layers place at edge – expansion of 9mm
2 layers placed 10mm from edge – expansion of 2mm
2 layers placed 20mm from edge – expansion of 0mm
2 layers placed 30mm from edge – expansion of 0mm
 

Rounded tack test, 6mm base
1 layer placed at edge, at 10mm from edge, and at 20mm from edge.
2 layer stacks placed in the same way.
 
1 layer placed at edge – expansion of 3mm
1 layer 10mm from edge – expansion of 0mm
1 layer 20mm from edge – expansion of 0mm

2 layers place at edge – expansion of 7mm
2 layers placed 10mm from edge – expansion of 1mm
2 layers placed 20mm from edge – expansion of 0mm
 
Fired result of 6mm base with 1 and 2 tack layers, rounded tack.


Rounded tack test, 3mm base
1 layer placed at edge, 1 at 10mm from edge, 1 at 20mm from edge, 1 at 30mm from edge.  2 layer stacks placed as above.  
 
1 layer placed at edge – expansion of 2.5mm
1 layer 10mm from edge – expansion of 1mm
1 layer 20mm from edge – expansion of 0mm
1 layer 30mm from edge – expansion of 0mm
 
2 layers placed at edge – expansion of 3mm
2 layers 10mm from edge – expansion of 1mm
2 layers 20mm from edge – expansion of 0mm
2 layers 30mm from edge – expansion of 0mm
 
Fired result of 3mm base with 1 and 2 tack layers.

Note: the single 200mm sheet contracted to 195mm in uncovered areas.  Measurements were based on the amount of expansion from the fired dimensions. Even with the greatest expansion the piece was still 2.5mm smaller after firing than at the start.
 

Sharp tack test, 6mm base
1 layer placed at edge, 1 at 10mm from edge, 1 at 20mm from edge, 1 at 30mm from edge.  2 layer stacks placed as above.  
 
1 layer placed at edge – expansion of 1mm
1 layer 10mm from edge – expansion of 0mm
1 layer 20mm from edge – expansion of 0mm
1 layer 30mm from edge – expansion of 0mm
 
2 layers placed at edge – expansion of 2mm
2 layers 10mm from edge – expansion of 0mm
2 layers 20mm from edge – expansion of 0mm
2 layers 30mm from edge – expansion of 0mm


More detailed information is available in the e-book: Low Temperature Kilnforming.

Sunday, 11 August 2019

Specific Gravity

This is an important concept in calculating the amount of glass needed to fill a pot melt, and in glass casting.  This will also help in the calculation of the amount of glass required to fill a given area to a defined thickness.

Specific gravity is the relative weight of a substance compared to water. For example, a cubic centimetre of water weighs 1 gram. A cubic centimetre of soda lime glass (includes most window and art glass) weighs approximately 2.5 grams. Therefore, the specific gravity of these types of glass is 2.5.  

If you use the imperial system of measurement the calculations are more difficult, so converting to cubic centimetres and grams makes the calculations easier. You can convert the results back to imperial weights at the end of the process if that is easier for you to deal with.

Irregular shapes

Water fill method
Specific gravity is a very useful concept for glass casting to determine how much glass is needed to fill an irregularly shaped mould. If the mould holds 100 grams of water then it will require 100 grams times the specific gravity of glass which equals 250 grams of glass to fill the mould.

Dry fill method
If filling the mould with water isn't practical (many moulds will absorb the water) then any material for which the specific gravity is known can be used. It should not contain a lot of air, meaning fine grains are required. You weigh the result and divide that by the difference of the specific gravity of the material divided by 2.5 (the specific gravity of soda lime glass). 

This means that if the s.g. of the mould filling material is 3.5, you divide that by 2.5 resulting in a relation of 1.4   Use this number to divide the weight of the fill to get the amount of glass required to fill the mould.   If the specific gravity of the filler is less than water, then the same process is applied.  if the specific gravity of the filler is 2, divide that by 2.5 and use the resulting 0.8 to divide the weight of the filler.  This only works in metric measurements.

Alternatively, when using the dry fill method, you can carefully measure the volume of the material.  Be careful to avoid compacting the dry material as that will reduce the volume.  Measure the volume in cubic centimetres.  Multiply the cc by the specific gravity of 2.5 for fusing glasses.  This will give the weight in grams required to fill the mould.  If you compact the measured material, you will underfill the mould. The smaller volume gives a calculation for less weight.


Regular shapes

If you want to determine how much glass is required for a circle or rectangle, use measurements in centimetres.  

Rectangles
An example is a square of 20cm.  Find the area (20*20 =) 400 square cm. If you want the final piece to be 6mm thick, multiply 400 by 0.6cm to get 240 cubic centimetres, which is the same as 240 grams. Multiply this weight by 2.5 to get 600gms required to fill the area to a depth of 6mm.

Circles
For circles you find the area by multiplying the radius times itself, giving you the radius squared.  You multiply this by the constant 3.14 to give you the area.  The depth in centimetres times the area times the specific gravity gives you the weight of glass needed.

The formula is radius squared times 3.14 times depth times specific gravity.   R*R*3.14*Depth*2.5
E.g. 25cm diameter circle:
Radius: 12.5, radius squared = 156.25 
Area: 156.25 * 3.14 = 490.625 square cm.
Volume: 490.625 * 0.6 cm deep =294.375 cubic cm.
Weight: 294.375* 2.5 (s.g.) = 735.9375 gms of glass required.  
You can round this up to 740 gms for ease of weighing the glass.

Wednesday, 29 May 2019

Hot Spots in the Kiln


You may suspect you have hot spots in your kiln because of bubbles or one side of the piece being more fully fused than another. A good method for determining the temperature distribution across the kiln is given on the Bullseye site.  It does not require any sophisticated equipment – just supports equal distances apart and strips of glass equally wide and long – to be witnesses for the hotter and cooler parts of the kiln.  You fire slowly to a very low slump temperature – ca. 620C - for only 5 minutes.  Go as fast as possible to the annealing point and soak for 15mins. Then you can turn the kiln off, and let it cool as fast as the kiln can.

This test will show where the hotter areas are.  You will see from the test results that there is a gradual change of temperature across the shelf, rather than small hot areas that would be required for localised large bubbles originating from under the glass.  It will tell you where the cooler areas are, so you can avoid placing pieces in that area when you need precise profiles on the finished piece.

There is little to no relation between hotter areas of the kiln and localised bubbles.  Do not think hot spots are the cause of large bubbles.


Bubbles more often relate to:

Bubble squeeze


Do not be lead into the idea that mistakes are automatically art, or that all of them can be rescued.


Rapid firing rates
Firing rates need to be adjusted to the materials you are firing.


As fast as possible firing rates can cause problems.

High temperature rapid firings can also cause problems.

Rapid firings are more likely to harm the glass than the kiln.


Damaged shelves
Distortions or damage to shelves can trap air and so cause bubbles to form between the shelf and the bottom of the glass.


Volume control
Varying volumes within the piece can give problems.

There are a variety of related things that can cause large bubbles.


Glues
Glues and adhesives have a variety of effects and dangers, especially if generous amounts are used:

There are a variety of glues each with their own characteristics.


Uneven layers/layup
You must think of ways for the air to escape from the interior of the glass and from under the glass.  Most often we set up things in a way that creates bubbles. There are two main ways that we do this.

Encased items
When we put glass or other materials between an upper and lower sheet of glass we are creating conditions for bubbles to form.  The encased items hold the upper glass above the lower glass by an amount related to the thickness of the inclusion.  Routes for the air to escape must be planned. 

One of the ways to reduce the height of the space taken up by the enclosures, is to fire upside down with the inclusions on the shelf. This allows the glass -which will be the bottom layer - to form around the materials, reducing the air space between the bottom and capping layer.  This is known as flip and fire.

You then clean the face which will be capped very thoroughly.  Place the capped piece on fiber paper – which can have Thinfire placed over it, or coat with kiln wash.  This is to allow the air in the uneven bottom surface to escape from underneath through the fibre paper.

Weight
Even when there is no encased material, the weight of the glass pieces on top can create areas where the air can be trapped.  On a single layer the arrangement of pieces can create areas where the glass cannot resist the air pressure that cannot disperse from the pockets caused by the glass on top.  Very clear and generous exits for the air are required.

This can happen with two layers as well, although usually a higher temperature is required.  A means of avoiding large bubbles when there is glass – powders, frits or pieces of glass – placed on top is a two-stage firing of the piece.  First fire the base layers together at full fuse so they become one whole.  Then add the decorative elements on top and fire.  Remember to fire more slowly than for two unfired layers.  The main piece is now 6mm thick and needs a slower rise in temperature.  The additional heat work this entails may mean that a lower top temperature, or a shorter soak will be required than normal.  You will need to peek at intervals to check on the progress of the firing.

There is a multiplicity of ways that bubbles large and small can be created.  Careful layups, bubble squeezes, slower rates of advance and lower top temperatures can minimise, but not always eliminate, bubbles.