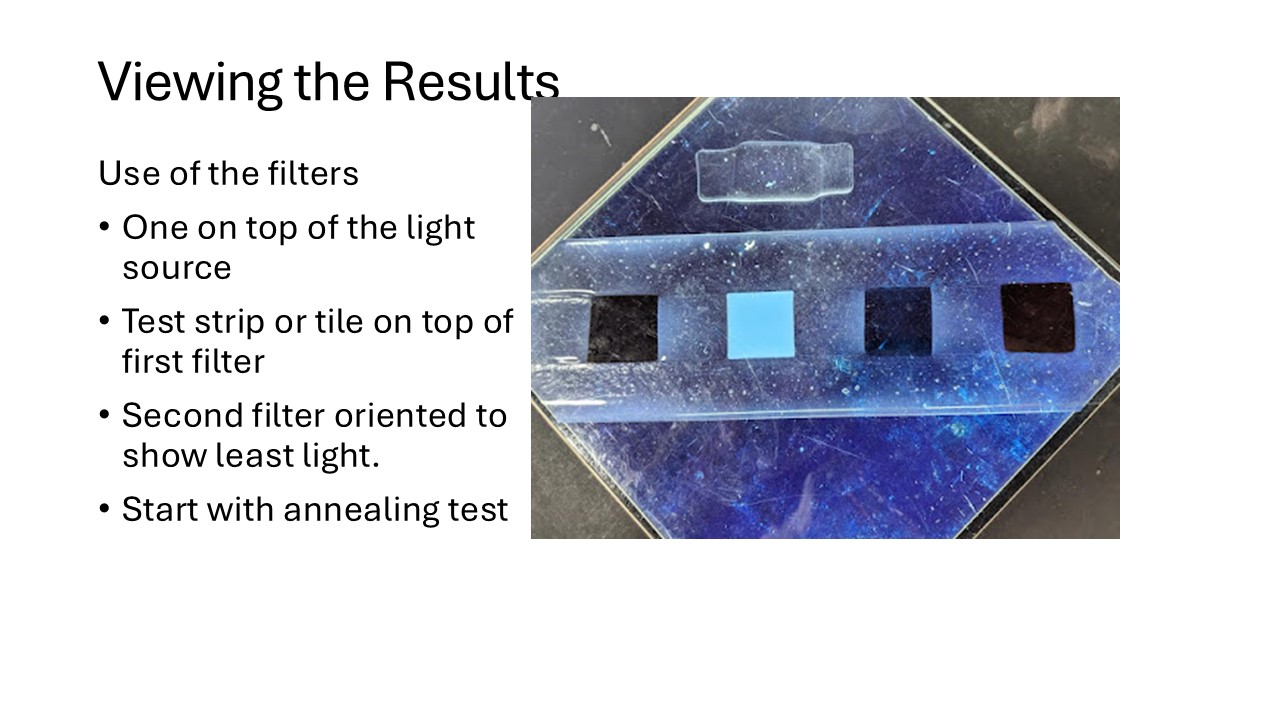
Showing posts with label polarised light. Show all posts

Wednesday, 16 April 2025

Testing for Stress

Testing for stress is one of the most important elements in kilnforming.  It may not look like there is stress when there is considerable amounts.  The non-destructive tests are outlined in this Power Point presentation, prepared some time ago, to describe why and how stress testing can be conducted.  There is no commentary.


Wednesday, 26 February 2025

Stress Analysis of Broken Glass

Will stress still show with polarised filters on cracked and broken glass?


It's not a straightforward answer.

I was looking at some broken fused float glass a few years ago.  I had always subscribed to the idea that a fracture relieves the stress. Not always. The broken float glass had been slumped, and the pieces still showed stress.  This turned out to be a compatibility problem, although both layers were float.  

The stress of inadequately annealed glass is likely to remain visible through the filters, because inadequately annealed glass will have stress distributed across the whole piece.  But glass that has been cooled too quickly and suffered thermal shock, is more likely to show minimum stress because the break relieved most of it.

It is likely stress will show on the tree piece pictured because it has not completely broken a[art. And even when it does break, it may still show a residue of stress.

It is sensible when trying to diagnose the problem to perform a strip test of the glasses for compatibility of the glasses concerned to be sure what is happening. If no stress shows on the test strip, the stress showing on the cracked piece is unlikely to be from incompatible glass, and other factors need to be considered.

Photo credit:  Debi Frock-Lyons 

Wednesday, 16 November 2022

Notes on Polarised Light Filters

Polarised light filters are used to detect stress in a non-destructive testing method in kilnforming.  The use of the filters is described in this blogTo produce consistent reliable results, there are certain conditions.

 The light source needs to be diffused in such a way that it is even across the viewing area.  An intense, single point light makes it difficult to determine the relative intensity of apparent stress. Another tip is that you can use your phone or tablet as a source of diffused light and as the bottom filter.  It emits polarised light, meaning only a top filter is needed.

Stress halos from broken and fused bottles

 It is important that the glass being tested is of the same temperature throughout to get a meaningful result.  This was emphasised to me when I was running a series of tests. I got in a hurry to test for stress to be able to start the next trial quickly.  I began to notice inconsistencies in the amount of stress I recorded for results of the series of tests.  Going back to the stressed test pieces, showed different stress levels when they were cold from when they were warm.

 The conclusion is that the glass to be tested for stress must be the same temperature throughout.  Even if it is only slightly warm, the apparent stress will be exaggerated.  It may be that the testing can only be done 24 hours after removed from the kiln.

 Stress will be more evident at points and corners.  The light will be brighter at highly stressed points, and even at extreme stress exhibit a rainbow effect.  More generalised stress is evident in a lighter halo.

Stress points in a drawing square illustrating the concentrated stress at corners


 It is much more difficult to check for stress in opaque areas of a piece.  If there are transparent areas, the stress will show there, although the stress may originate in the opaque ones. To be aware of potential stress in the combination of opaque glass, strip tests must be conducted on samples of the glasses. 

 Remember to include an annealing test too, as the stress test does not distinguish the type of stress.  If the annealing test shows stress, the annealing was inadequate. It is of course, possible that the glass is stressed because of incompatibility.  But the only way to determine that is to fire another test with a longer soak at annealing.

Sunday, 3 June 2018

Polarising Filters


Using polarized light filters to show stress works on the principle that stressed glass rotates the polarisation direction of the light as it comes through the glass. As polarized light filters placed at right angles do not allow any light through, only unstressed glass will continue to appear dark. 


If there is stress the light is rotated slightly and becomes visible through the filters.  


You can buy stress testing kits that incorporate a light source. You can also make your own. You need polarizing lighting gels. These come in sheets and are available from theatrical lighting sources. You will need to frame these in stiff card to keep them flat.

You use them over a light source. Place one filter down above the light source. Place the piece to be tested on top. Then orient the top filter so that the minimum amount of light shows through the filters. Any stress will show up as a light source.  The amount of light rotation depends on the stress direction, magnitude and light path length. The greater the intensity of the glow, the greater the stress the glass is exhibiting.   The amount light visible through the filters is wavelength dependent, as the filter transmits light with a particular polarisation direction. If there is large stress, different colours will be visible. 


This example shows extreme stress by the rainbow effect of light rotated in multiple directions

Note that the surface through which the light comes should be rigid, as any deformation of the surface will give a false reading.  The light filters through the slight curve and gives a stress reading, which may not be true at all.  Thus a firm flat surface is required, especially if you have a large light table for your light source.

Also note that the filters are normally on plastic sheets and easily scratched, so the glass should always be lifted and placed, rather than slid, to a new position.

A description of the compatibility test can be seen here.

revised June 2018