Showing posts with label Stainless Steel. Show all posts

Wednesday 3 January 2024

Stainless Steel Stringer Pots

Credit: Paul Gardner httpswww.facebook.com


 It is a consideration in stringer and murrini work that the pot be re-usable. This has led to the development of stainless steel square pots.  The thorough cleaning of these is difficult even with a lot of banging. Containers with removal bases have been developed as a result.

 The importance of a container with an integrated bottom is to ensure the glass is contained within the pot. To be reusable, the pot can be lined with fibre on sides and bottom. However, fibres can be drawn from the lining into the stream of glass.

Credit: Paul Gardner

 If you have a stainless-steel square with a removable bottom, the pot can be cleaned more easily and does not need the fibre lining. It also allows easy switching of bases with different hole sizes and shapes.

 However, some people have had the difficulty of the glass flowing out between the sides and bottom of the pot and onto the floor of the kiln. Glass is heavy and can float the much lighter stainless steel off the base, allowing the glass to flow sideways as well as through the hole in the base.

 This indicates that the stainless steel square should be weighted down. Placing kiln furniture on top of the pot can avoid it being floated off the base piece. These can be dams made from kiln shelves, dense fire brick, a small shelf, ceramic tiles, or other kiln furniture. Putting the furniture on two opposing corners will be enough to counteract the floating of the pot and still allow radiant heat to reach the glass.

Pots can be made from refractory materials too, such as vermiculite.

Liners for pots

Wednesday 29 November 2023

Stuck Kiln Wash


Moulds

Kiln wash on ceramic moulds lasts a very long time. But sometimes you want to use a different separator. First you need to prepare yourself and the area for the process.

Preparation

It is best to wear a mask while removing kiln wash or other separators to reduce the amount of dust you inhale. Wearing an apron or other outer wear will keep the dust off your clothing.

Spread a cloth, newspaper or other covering around the area. This is to be able to easily gather the removed kiln wash and place it in the waste.  Have a vacuum sweeper at hand to remove powder rather than blowing it around the workspace.  Of course, if you can do this outside, there is much smaller risk of contamination.

Removal Methods

The method of removing kiln wash depends in part on what the mould material is.

Metal

You can sandblast, manually sand, or wash off the kiln wash from metal moulds.

Ceramic


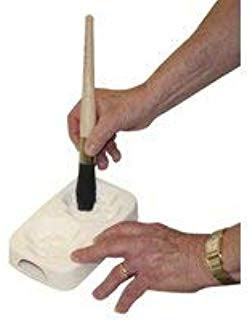
Sandblasting is not a safe method for ceramics, as it is so easy to damage the surface of the mould. Removing the kiln wash while dry is a good first approach. It saves having to wait long times for air drying and long kiln drying of the damp mould. You can lightly sand off the kiln wash from smooth surfaced
moulds, and for detailed areas use rounded point wood and plastic tools. This can be backed up with a stiff nylon brush to clear out the narrow or detailed areas.

When these dry methods are insufficient, there are wet approaches. I recommend dampening the kiln wash rather than immersing the mould in water. The same tools can be used as for the dry removal.

Soaking or washing the mould does not remove the kiln wash as easily as you might think.  It is especially to be avoided where the mould has an internal hollow, as it may take days to dry sufficiently to apply other separators.  To put it in the kiln risks breaking the mould by the steam build up during the initial rise in temperature.

If you must soak the mould, I recommend that you use a 5% solution of citric acid because it has a chelating action on the kiln wash.

More information on removing kiln wash from moulds.

Remember that once the mould or shelf has been coated with boron nitride, it is almost impossible to go back to kiln wash again.  The boron nitride irreversibly fills the porous element of the ceramic, making it difficult for the kiln wash to adhere to the mould.

Shelves

The easiest surfaces to remove kiln wash from are flat or ones nearly so.

Dry Methods

Abrasive methods work well with a variety of tools. They can range from large paint scrapers to smaller ones with a Stanley blade inserted. 


Coarse open mesh plaster board (dry wall) sanding sheets are very useful. There are frames that you can fix them to, but sanding without the frame works well too.
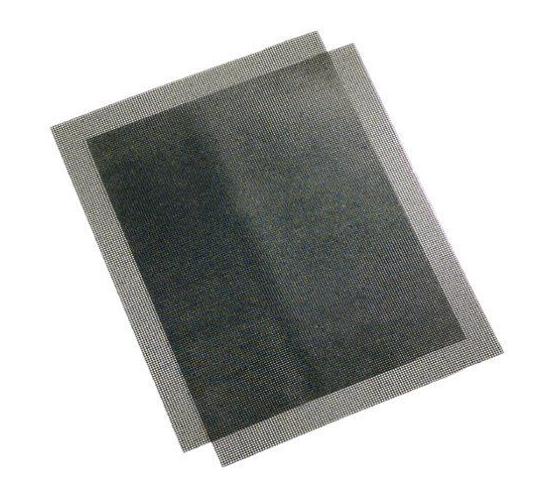

Using power tools to sand the shelf is not advisable.  It is too easy to remove lots of material, including the surface of the shelf – even the hard, ceramic ones.  This leads to minor depressions in the shelf and consequent bubble difficulties when firing.

Do not be tempted to sandblast either, as that can easily create the small depressions in the surface of the shelf that subsequently lead to bubbles. 

Wet methods

Wet methods can be used if you are concerned about the dustiness of the process.  You can dampen the kiln wash on the shelf and sand or scrape as with the dry methods.  You will create a paste or slurry which can be bagged and put in the waste. You can also use the green scrubby washing up pads.  Unless you frequently rinse the pads, the kiln wash builds up and clogs the pads. making them ineffective.


Some people use vinegar or chemicals such as lime away with the water. The material that makes the kiln wash stick to the shelf is China clay and the separator is alumina hydrate. Both of these elements are almost impervious to the chemicals available to kiln workers. Instead, use citric acid. It has a chelating action which will incorporate the particles of the kiln wash. This will require some scrubbing, but avoids the smells of vinegar and the risks of other chemicals.

Do not be tempted to use pressure washers. Yes, they will remove the kiln wash. But it will also leave divots in the shelf which will cause later problems with bubble creation.

A big drawback to using wet methods, is that the shelf becomes wetted throughout and needs careful drying before use. 

Both the wet and dry methods can be used on smooth, gentle curved moulds. These include wave moulds, shallow moulds without flat bottoms, cylinder moulds, and such like.

More information on Kiln Wash Removal from shelves is available here,

and here.

Boron Nitride

A note on the reversibility of boron nitride. This is sold under a variety of trade names such as Zyp, More, MR97, etc., and sometimes under its chemical name.

Some people are applying boron nitride to ceramic moulds for the "smoother" surface.  Boron nitride is an excellent separator for metal moulds and casting moulds whether metal or ceramic. But it has limitations, including the price and the requirement for a new coating at each firing.  Some are beginning to wonder if they can go back to kiln wash after having used the boron nitride.

The general experience has been that you can't apply kiln wash on top of the boron nitride. It just beads up and flows off, because the boron nitride creates a non-wetting surface that survives relatively high temperatures. The kiln wash which is in water suspension has no opportunity to adhere to the mould.

The most accepted way to get rid of the boron nitride is by sandblasting. Sandblasting risks pitting the mould. Manual sanding seems to enable the ceramic mould to accept kiln wash. Perhaps enough of the surface is removed to reveal the porous nature of the ceramic mould. You do need to be cautious about taking the surface of the mould away when using abrasive removal methods. The ceramic is relatively soft in relation to the abrasive materials.

The difficulty of removing boron nitride from ceramic moulds means that you must think carefully about which moulds you coat with it.  If the mould has delicate or fine detail, removing the boron nitride risks the removal of the detail.  This indicates that this kind of mould, once coated, should not be taken back to the bare mould.

If you are using boron nitride to get a smoother surface to the object, consider using a lower slumping or draping temperature. This will minimise mould marks very effectively. And without the expense of boron nitride.

More information on removal of boron nitride is given here. 

More information about mould treatment is available in the ebook: Low Temperature Kiln Forming and at Bullseye ebooks

Wednesday 8 November 2023

Steel Moulds

Credit: Slump and Fuse


Do steel moulds need to be kiln washed for slumping?

Some prominent people in the kilnforming milieu like to promote the extremes of the craft. The argument seems to be that the glass does not get hot enough to stick to the metal at slumping temperatures. It could be argued in the same way that it is possible to slump glass on bronze or unglazed ceramic moulds.

This proposal may come from glass blowing where glass is pressed into metal moulds. The difference is that the glass is in contact with the metal for a short time. And in industrial processes the steel is water cooled.

Also, the higher the slumping temperature, the “softer” and “stickier” the glass becomes. The metal is also heating up and expanding, unlike in glass blowing. If the glass adheres to the metal at all, the greater contraction of the metal during cooling will ensure the glass is stressed and likely break. Therefore, it is usable only in low temperature slumping – below about 630˚C/1167˚F – or for short times. The break patterns that occur when slumping on bare steel show glass most often sticks to the steel and becomes crazed or even shatters on cooling.

Bare steel as a slumping mould is always a risky practice. Just because it can be done - or is done - in glass blowing and other industry settings, does not mean it should or can be done in studio settings. The practice comes with high risks of failure.

To be safe, a separator needs to be used between any supporting structure and the glass. Why risk glass into which you have put significant amounts of work for a few pennies worth of kiln wash, fibre paper, or boron nitride?


Wednesday 14 September 2022

Home Made Frit Maker


Recently, when looking for a small frit maker, no shop had one in stock.  Having heard of making one from plumbing pipes, I went in search of material.  I came across stainless steel pipe and caps.


The practical size seemed to be 50mm.  Short sections of threaded pipe were available with matching caps.  That forms the containment cylinder.


A threaded 25mm pipe and cap can be fitted loosely into the larger one, and so forms the plunger or piston.


There needs to be a handle.  It could be a turned piece of wood to fit the inside of the pipe.  In this case, I obtained a reducing connector to fit a 12mm pipe to the plunger and topped it with another cap. 


The whole was put together in less than a minute, once all the parts were assembled.

The completed frit maker


Galvanised pipe would be cheaper but carries the possibility of introducing zinc into the frit.  Stainless steel risks introducing non-magnetic particles into the frit.  As I sieve out powder from my own frit making before washing, I am not too concerned about steel contamination.  If you want powder, use uncoated mild steel so the contamination can be drawn out with a strong magnet.

Wednesday 26 January 2022

Trapped Glass


Glass can be trapped in or on moulds in various circumstances. These usually relate to the relative expansion and contraction characteristics of the glass and mould.  The two materials most usually concerned are steel and ceramic.

Releasing glass from steel


Frequently when using steel as dams around glass, the glass becomes stuck inside the steel.  The cause of this is the greater contraction of the steel than the glass.  On cooling, the steel compresses the glass tightly. 

Another circumstance where glass is trapped is while slumping glass into a steel vessel.  If the draft of the sides of the vessel is steep, the glass cannot slip upwards as the steel contracts against the glass, so trapping the glass.

Most successful attempts to remove the glass from the steel are like removing a metal lid from a glass jar.  Heat the metal and try to keep the glass cool.  You can run hot water on the steel while keeping the glass cool.  This will most often allow the glass to be pulled from the steel surround, assuming there was a glass separator applied to the steel.

Putting the whole assembly in the freezer will only increase the grip of the steel as it will contract even more than the glass.


Prevention of trapping the glass involves placing a cushion between the steel and glass.  This is usually 3mm fibre paper.  Sometimes this has a layer of Thinfire added to give a smoother edge to the glass.  Other times, the fibre paper is coated with boron nitride.  There is no need to use both Thinfire and boron nitride, of course.


Releasing glass from ceramic


The difficulty of glass trapping ceramic occurs during draping.  Ceramic expands and contracts less than glass.  This means that the glass will trap a kiln washed ceramic shape with a steep draft.  The glass on cooling, contracts more than the ceramic which means the glass is tightly encasing the ceramic. 

A ceramic draping mould from which  it may be difficult to remove the glass.

Most successful attempts to remove the glass from the ceramic form include either gently warming the glass or freezing the whole assembly.  You could place the glass in a bath of warm water.  This encourages the glass to expand, but does not heat the ceramic.  This usually provides enough gap to ease the glass from the ceramic form.

The other approach is to put the whole into the freezer.  This is utilising the greater contraction of the ceramic to release the glass. This is less immediate than the warming of the glass, of course.

Prevention of trapping glass on ceramic with shallow drafts involves covering the form with 3mm fibre paper to provide a cushion during the contraction.  The fibre paper may need to be attached to the form by binding with high temperature wire, as glues will not survive the heat of draping.

Further information is available in the ebook: Low Temperature Kiln Forming.

Wednesday 6 October 2021

Removing kiln wash from moulds

“How do I remove kiln wash from a mould that I have decided would work better with ZYP?”

Once coated with kiln wash, slumping or draping moulds do not need to be re-coated until the surface is damaged.  Then it is best to remove all the kiln wash to prepare a new smooth surface for the kiln wash.  You may, of course, as the enquirer above states, want to use a different kind of separator.  The cleaning of the kiln wash from the mould will be the same process whatever you want to do with the mould next.

There are many ways to get the old kiln wash off.  Some of them depend on the material from which the mould is made.

Metal

If the mould is made of stainless steel or other metal, the easiest method is to sandblast with lots of air and a minimum of grit.  You can also use sandpapers or open weave sanding screens. The methods used on ceramic moulds, as described below, can also be used on metal.

Ceramic

Sandblasting is not safe to use on ceramic moulds, as the sandblast medium can erode the surface very quickly and often unevenly.

Preparation for manual removal of kiln wash.

It is best to wear a mask during this process to reduce the amount of dust you inhale. Spread a cloth, newspaper or other covering to be able to easily gather the removed kiln wash and place it in the waste.  Have a vacuum sweeper at hand to remove powder rather than blowing it around the work space.  Of course, if you can do this outside, there is much smaller risk of contamination.

Dry

I suggest that removing the kiln wash while the mould is dry should be the first stage. 

Flat surfaces can be cleaned with a straight edged wooden stick, or wooden clay modelling tool.  Firmly push it along at a slight angle from the vertical to remove most of the kiln wash. 

On curved surfaces you will need a rounded tool such as a plastic burnisher or all nova tool for the coarse work.  This can be followed up by using a stiff sponge to clean up any stray kiln wash still adhered. If the kiln wash is persistently sticking to the mould, you can cut a small piece from an open weave sanding screen and use it to gently remove the most difficult remaining kiln wash.  Do not use more than light pressure, as with heavy pressure, the screen can begin to remove the surface of the ceramic mould.


Texture moulds and those with a lot of detail or right-angle corners need a bit more attention.  You can use a variety of non-metal tools to get into areas of detail.  Some of these are a rounded chopstick, a wooden skewer, a plastic knitting needle, and other similar items with rounded points.  These can be backed up with a small stiff nylon brush.  It is while working on these detailed areas that the vacuum sweeper will be most useful to clear out the debris and enable you to see how well the kiln wash is being removed.

Wet

Some people do not like the idea of the dust created from the removal of the kiln wash being in the air at all.  And sometimes, the dry removal is not complete.

My recommendation is to dampen the kiln wash that is on the surface of the mould.  This will cause some difficulties in removal, because a slurry is created along with the flaking of the baked-on kiln wash.  The same tools can be used to clean the mould as when dry.  The vacuum sweeper will not be of use though.  Once the kiln wash appears to be cleaned away, the mould needs to dry to enable removal of the remaining kiln wash.  Once dry, you can use dry sponges, or the small nylon brush to clean the remaining film of kiln wash from the mould.  This cleaning may reveal areas where the kiln wash is still adhering. These can be dealt with wet or dry, although I prefer dry.


Soaking or washing the mould does not remove the kiln wash as easily as you might think.  It is especially to be avoided where the mould has an internal hollow, as it may take days to dry sufficiently to apply other separators.  To put it in the kiln risks breaking the mould by the steam build up during the initial rise in temperature.

If you must soak the mould, I recommend that you use a 5% solution of citric acid because it has a chelating action on some of the components of kiln wash.


Remember that once the mould or shelf has been coated with boron nitride, it is almost impossible to go back to kiln wash again.  The boron nitride fills the porous parts of the ceramic making it difficult for the kiln wash to adhere to the mould.


Further information is available in the ebook: Low Temperature Kiln Forming.


Wednesday 12 May 2021

Materials for making dams


Rectangular or straight sided shapes


Broken shelves
Accidents happen to mullite shelves causing breaks or cracks.  Rather than throwing them out, you can cut them into rectangles or 50mm strips with a tile saw.  The resulting shapes need to be kiln washed to keep glass from sticking.  They can be used flat or stood on their edges with supports on the outside.

Thick ceramic tiles can be used in much the same way.  You do need to remove the glaze from the tile to make sure they don’t stick to the glass.  Or you could use the unglazed side toward the glass. Again, the tiles need to be kiln washed.

Stainless steel can be used as a dam.  It will need treatment with a separator such as boron nitride or kiln wash.  In addition, it needs to be lined with refractory fibre paper to cushion the force of the greater contraction of steel than glass.

These materials cannot easily be adjusted in length to fit the size of the glass piece being dammed.  Instead, arrange them in a swastika like formation. 


This photo also shows how shorter lengths can be incorporated to make the whole dam.

Vermiculite board is a refractory material that can be used to form dams by cutting with a wood working saw.  The saw you use to cut the vermiculite will be dulled and only be useful for cutting vermiculite in the future.  Do not use any expensive cutting equipment!  
Credit: Bullseye Glass Company


Refractory fibre board is available in many thicknesses.  It can be cut with craft knives even though it dulls the blades quickly.  The thicker boards can be used without rigidising.  This avoids the need to kiln wash and allows adjustments in length.  If you do rigidise fibre board, you must coat it with a separator such as kiln wash or boron nitride.

Weighted fibre paper can be used.  It is sometimes the quickest and easiest to use, as there normally is a stash of scraps around the studio.  It is easily cut with a craft knife.  You can build up the thickness of the dam by layering pieces on top of one another.  Sometimes people put metal wire or pins in the layers to ensure there is no movement between the layers. I’ve found that if weighted, the fibres interlock enough that the layers do not shift.  But you need to line the layered fibre paper dams with vertical strips of fibre paper, so the glass does not take up the layered dam profile on its edge.

Note that you need to use breathing protection when cutting all these materials.


Curved and circular pieces


Many times, the shape to be dammed is not formed of straight lines.  Different materials need to be used in these cases.

Formed stainless steel is a good durable and reusable material.  You need to line the shape with fibre paper if it completely contains the shape, because it contracts more than the glass and can crush the piece.  It is expensive to have made and so needs to have multiple uses to justify the cost.  A cheaper alternative is to make your own shape using stainless steel strapping as used for shipping crates and pallets. 

Fibre paper is an excellent material for damming irregular shapes.  It can be cut into complicated shapes, and it can be layered to attain the required height. You can weight it if you are taking things to a high temperature and fear that the glass will flow under the fibre paper.

You can also use the thicker fibre papers upright by backing up with multiple pieces of kiln furniture to maintain the shape you desire.

Vermiculite board is a good material for making shapes, although not as complicated ones as possible in fibre paper.  Vermiculite can be shaped with wood working materials, but cheap ones should be used as they are quickly dulled. You can rough out a shape with a jigsaw and refine it with various wood working tools, including coarse sandpaper.  Because it is a relatively rigid material, a lot of inventiveness can be used in forming the edges by altering angles from the vertical, incising designs into the edge, etc.  Be certain that you have adequately kiln washed or put other separator on the board, as it will stick to the glass if left bare.

Fibre board is a less rigid material than vermiculite, but is easier to work with simple craft tools.  It is simple to use for a unique one-off shape. It only needs smoothing and does not have to have a separator applied because it does not stick to the glass.  If you create a shape that you will want re-use, you can rigidise the board after shaping, but it will require separators then.


Note that when working with refractory materials, you need to wear respiratory protection and clean surfaces with a HEPA vacuum or by dampening dusty surfaces and wiping them clean.  Dispose of cleaning materials safely.

Wednesday 13 May 2020

Strong Frames for Stained Glass Panels


Metals
Zinc is a popular material for framing copper foiled or leaded glass panels.  It is stronger than lead – up to eight times.  It gives a feeling solidity to the edges of the panel. 

However, it does have some disadvantages.  It is difficult to patina evenly and obtain the same colour as patinaed solder.  It resistance to progressive corrosion is weaker than lead. It requires special tools to fit around curves, making it best for rectangular panels.  It does need a saw to cut evenly, but so do a lot of the stronger metals.  A look at other options is worthwhile.

The strongest option is stainless steel.  This is difficult to cut and has special welding requirements, so is only useful in large and high corrosion installations.

Mild steel is widely available and cheap.  In certain circumstances – mainly small, thin profiles – it can be soldered.  The most secure joining is done with welding.  This requires equipment that stained-glass workers do not usually have.  However, there are a large number of metal workers that can to the work for you.

Brass is more expensive than mild steel.  It is an alloy of copper and tin and so can be soldered with the tools we normally use.  It is about half the strength of stainless steel, but three times the strength of zinc.  The tin content leads to a better patina result than zinc.

Copper is up to twice the strength of zinc, but the price fluctuates more than zinc.  It can be soldered. It requires different patina solutions than used for solder.

Aluminium is the same strength as zinc, but requires different joining methods as aluminium welding is a specialist activity.  Still, it will work on rectangular items with screws at overlapping joints.

More information on the relative strengths of various metals is given in a post on metal strengths.


Strengthening lead came
Lead is weaker than lead but can be bent to conform to curves and indentations for irregular perimeters.  If copper wire is incorporated and attached to the foiled glass, the soldering of the lead came to the joints at the intersections of the solder lines and the coper/came combination will provide greater strength than the zinc alone. 

When wanting to strengthen the perimeter of rectangular or shaped perimeter leaded panels, you can use 10mm “H” lead came soldered as usual to the whole piece as an alternative to soldering the wire to the panel.  Run the copper wire in the open edge of the “H”.  Pull the wire tight at the bottom and sweat solder at each corner.  Run the wire to the top on each side, where you can make a loop for attaching hanging wires and sweat solder the wires there too.  Then close the two leaves of the lead with a fid until they come together forming a single straight line.  If you want, a “U” or “C” edging came can be soldred to the outer edge of the "H" came to cover the line created by folding the leaves.

This post gives more detail about the process of incorporating copper into the perimeter of a leaded panel.


Tuesday 29 October 2019

Damming Ovals

There are various ways of damming oval shapes in kiln forming. Some of these are outlined here.

One set of methods depends on having a soft surface such as ceramic Fibre board or vermiculite.

Photo from Clearwater Studio


You can wrap your shape with fibre paper. For this you need to cut a strip or strips 3mm narrower than the height of the piece you are wrapping. You then stick sewing pins down through the fibre paper and into the shelf of fibre board or vermiculite. This will be easiest if you use 1 to 3mm thick fibre paper, as the pins must not contact the glass – the pins will stick to the glass if they do.


You can cut a form out of ceramic fibre board and use that as a dam. You can pin this to the base fibre board or allow it to merely rest on the board. It is possible to cut arcs from fibre board and place them around in sections. In this case they will need to be pinned together so they do not move apart. Staples can form the attachments. You can make your own – larger – ones from copper wire.

You can buy stainless steel banding which needs to be lined with any separator – batt wash or fibre paper.

Bonny Doon stainless steel dams


You also can layer fibre paper up to the height required – remember 3mm less than the thickness of the piece. You then need to fasten the layers together to avoid movement between the layers.


If you are firing on ceramic kiln shelves the same materials can be used but need to be supported a little differently.

If you are wrapping the piece on mullite shelves, use some pieces of kiln furniture to block the strips up against the glass. The thicker the glass, the more weight will be pushing out against the dams and the sturdier the dams will need to be. Make sure the strips contact the shelf evenly- if you have gaps, you'll have leaks.

The disadvantage to this method is that the glass can take up the irregularities of the kiln furniture.

You can use fibre board with a void cut out to the shape required and place it on the shelf.


You can also use layers of fiber paper around the shape and pin the layers to each other. This is the same method as used on ceramic fibre board.

Again stainless steel can be used to form the dam. Remember to line the steel with fibre paper that is 3mm narrower than the height of the piece.


In all these cases of dammed forms, the edges will be of varying degrees of roughness and some cold working will be required.

Wednesday 9 January 2019

Formers


This post is not about the materials that go into the making of glass, but about ways of forming glass once melted or dripped into a space.

Formers are a bit different from moulds.  They are more like the formers used in concrete structures – they are there to resist the movement of the contained materials and give the form or shape desired rather than a natural flow.

These formers can be of anything that can resist the firing temperatures of the process.  Some of the materials are stainless steel, ceramics, fibre board and paper, vermiculite, kiln brick, and I am sure there are others.

Refractory Fibre
Most of these require a separator between themselves and the glass.  The ones which do not are untreated refractory fibre board and fibre paper. 

Most paper is not sufficiently strong to stand on its own. Instead it is used flat and the shape cut out of it.  It can be made in several layers and pinned together to achieve the height desired.  It should be lined in the interior with a thin fibre paper to avoid seeing the layers of the former in the edge of the glass.

For thicker work, fibre board can be used with the shape or form cut from it. Alternatively, it can be used on its side backed up by kiln brick or other material to resist movement. More information on methods and safety are here

If hardened, refractory board and paper will need separators between glass and former, just as most other materials will.

Sometimes the fibre board and fibre paper are not heavy enough to resist the flow of the glass.  You can use weights to help resist the movement.  At other times, the glass flows under the fibre and then you need something heavier.  Fortunately, there are a number of refractory materials that can be used.

Other common formers

Vermiculite board is another refractory material that can be cut and shaped much like fibre board.  The vermiculite needs to be covered with kiln wash where it might come into contact with glass or be lined with fibre paper or another separator.

Calcium silicate board can be used in much the same way.  It also needs a separator but does not stand up to such high temperatures as vermiculite.

Ceramics, especially in the form of cut up kiln shelves can be used as straight formers.  They have the advantage, over refractory fibre paper and boards, vermiculite and calcium silicate, of being heavy.  They can resist the movement of thick glass. They need to have a separator and usually a 3mm fibre paper, cut 3mm shorter than the final thickness of the piece, will provide the cushion in the movement that the glass needs.

Kiln brick is an often forgotten former.  The bricks can be cut and formed in many ways, even if not so freely as fibre board and paper.  The bricks do need fibre paper separators to keep the glass from getting into the pores of the brick.

Stainless steel is a common former too.  These are usually formed into an already determined shape and so are not so adaptable as many of the other formers.  Steel contracts much more than glass and needs a cushion of fibre paper, usually 3mm thick to avoid sticking to the glass.

More information on most of these formers can be found here.

Wednesday 9 March 2016

Stainless Steel Magnetism

Is all stainless steel non-magnetic?  The answer is “No”. 

The scientific answer is of this nature:

“The magnetic behaviour of stainless steels varies considerably, ranging from the paramagnetic (nonmagnetic) in fully austenitic grades to hard or permanent magnetic behaviour in the hardened martensitic grades.

“All austenitic stainless steels are paramagnetic … [but the magnetic] permeability increases with cold work due to deformation-induced martensite, a ferromagnetic phase.  For certain grades such as types 302 and 304, the increase in magnetic permeability can be appreciable, resulting in these grades being weakly ferromagnetic in the heavily cold-worked condition.  The susceptibility of a particular grade to becoming ferromagnetic when heavily cold-worked depends on the stability of the austenite, which, in turn, depends on chemical composition and homogeneity.”

From https://www.cartech.com/techarticles.aspx?id=1476


The layman’s explanation is of this nature:

Stainless Steels are identified by series numbers ranging from 100 to 600.  Each series is organised by the alloy and grain structure.  The ones we are interested are mainly the 300 and 400 series.  The 300 series have an austenitic grain structure and the 400 series has a martensitic structure. 
"In the martensitic structure at the atomic level all the iron atoms are acting as mini magnets aligned in the same direction.  Cumulatively they are all adding to the overall magnetisation of the material, this is known as ferromagnetism.  However the addition of nickel disrupts this regular structure giving it an austenitic nature, so inhibiting the magnetism of the stainless steel."  

This makes the 300 series in its un-worked state non-magnetic and the 400 series magnetic.

A relatively general characteristic of the 300 series is the approximate 18% chromium and 8% nickel (among other alloying elements) content.  There is an interplay between the chromium and nickel content.  Chromium allows the stainless steel to have a magnetic structure, while nickel reduces the magnetic properties of the steel.  The 300 series mostly contain enough nickel to make them non- magnetic or only weakly magnetic. 

However, cold working to form the sheets into vessels or other objects can break down the non-magnetic structure of the steel by aligning the atoms together.  So some highly worked 300 series steels can become magnetic, although their corrosion resistance does not change.  The 316 stainless steel contains higher amounts of nickel than others and exhibits almost no magnetism in its cold worked state.  But 304 with less nickel does become mildly magnetic. Another advantage of high nickel content is that assists the chromium to form a passive surface layer, so resisting corrosion. This is of assistance to kiln formers, as it reduces spalling.  But note that magnetic response is a function of the metallic structure, not the corrosion resistance formed by the chromium and nickel (as well other trace metals) content.

Based in large part on: Magnetism and Other Properties of Stainless Steel, by Gregg V. Summers, P.E. Director of Product Development, Peninsula Components Technical Bulletin http://www.pencomsf.com/wp-content/uploads/2012/08/TB_MAG_SS.pdf 


The addition of nickel in the 300 series eases the workability and welding of stainless steel over the 400 series. You are more likely to find the 300 series in worked vessels and other kitchen equipment.  But the stainless steel knives are much more likely to be of the 400 series.  Both of these stainless steels have a high degree of corrosion resistance.