Composition
Kiln wash generally is made up of a mix of aluminium hydrate and kaolin, although some contain vegetable extracts instead of the kaolin (china clay).
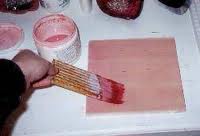
Application
The kiln wash mix should be applied in at least four directions with a soft brush, such as a hake, one immediately after the other. The object is to have all the layers incorporating into one smooth layer. There are fuller descriptions elsewhere in this blog.
Drying of layers
Some people suggest drying after each direction of application. This is not recommended because the following layers of kiln wash drag at the dry layers and create an uneven surface. A full description is given here.
Air drying the shelf before use reduces the amount of moisture introduced to the kiln and extends the life of the metal structure of the kiln. This can be done by air drying on top of the heated kiln if you have two sets of shelves, or simply by leaving in a ventilated room for 6 – 8 hours. Drying in the kiln could be done more efficiently with the glass on the prepared shelf – the moisture will be driven out before the glass has reached its strain point., so the glass will not be affected by a damp shelf.
Performance
A Bullseye video suggests the kiln wash should be completely removed and renewed every time it is fired over 730°C/1350°F. The reason for this is that the kaolin in kiln wash changes its form – with added heat – from its slippery platelets to a crystalline structure. It is the crystalline form of kaolin that sticks to the glass on a second fuse. Removal involves cleaning all the kiln wash off, down to the bare shelf before applying the new layers. Continual painting over old kiln wash builds up the thickness of exhausted kiln wash and risks cracking and flaking which is mirrored on the back of the glass.
Freshly applied kiln wash prevents it sticking to the glass. However even fresh kiln wash is prone to stick to opalescent glass at full fuse temperatures. It is easy to remove the adhered kiln wash by using a solution of citric acid.