Showing posts with label Leaded Glass. Show all posts

Wednesday 31 March 2021

Darkening leads

There are several ways to darken the leads in leaded panels. Three are to:
use patina on the leads,
brush with on stove blackening with a soft brush, and
simply brush after cementing.

A certain number of people use black patina to darken the leads after cementing and cleaning the panel.  This certainly gives a black result, but it introduces an acid to the panel. I do not do this, nor do I recommend it.

Another method of darkening is to apply stove blackening or black oil paint to the panel to make the leads dark.  I recommend that you put very small amounts on a soft brush and then brush over the leads.  It might have to have a little more colour added for a large panel, but that is better than having to clean up large areas of smudged black over the glass, especially with painted glass.

credit: PicClick UK

But...
You can darken lead came without patina or black colour.  You finish the panel with the scrubbing brush to push whiting against the fillet of lead light cement against the leads as normal.  This has the effect of cleaning the glass as well as stiffening the cement at the edge of the cames. Remove the excess whiting as normal.

But, before picking out all the excess cement once the scrubbing brush process is finished, use a soft brush, such as a shoe brush, over the whole panel.  This can be mechanised by using a soft bristled mop in a drill motor on a slow to medium speed.  This will pick up colour from the cement and spread it evenly over the lead and solder joints. It will give a dark grey appearance to the whole of the leading and solder joints as well as polish up the glass. 

The degree of shine will be dependent on the amount of time you wish to spend, but can be a polished to a very dark grey to black colour.  This will last longer than simple black colour brushed onto the leads, as it is bound by the linseed oil in the cement to the surface of the leads. Also, it quickly dries so that not so much black is transferred to your hands as you handle it.


Making lead cames black during the finishing of a leaded panel is as simple as brushing over the cames before picking out all the excess lead light cement.

Sunday 29 March 2020

Cementing Leaded Panels, part 3

Polishing Lead Cames

Use a soft brush to polish lead came. Don't pick out the cement until the polishing is done, as it provides the colour for darkening and polishing the lead and solder joints. The action with the polishing brush should be gentle and rapid, much like polishing shoes. If the shine does not come, you can use a very little stove blackening (carbon black mixed with a little oil) If you use a lot, you will have a big clean up job. A little stove blackening spreads a very long way.


realglasspainting.com


Before turning the panel a final time, put down paper or cloth, to avoid scratching the solder joints while polishing the other side. The result should be shiny a black came and solder joints that does not come off the way a final buffing with stove blackening does.


Finally, pick out any remaining cement.


Rest horizontally with weather side down for traditional installations. If the panel is going into a double or secondary glazed unit, you may want to reverse this. The reason for having the smallest exposed cement line on the outside is to allow the water to run off the window with the minimum of area to collect. In a sealed unit or for secondary glazing, you may want to have the smallest amount of cement showing inward for appearances, as there is no weathering reason for the traditional method.


Rest for a day. Pick out the cement again. If the cement was stiff enough, there should be no need to do any more picking at the cement after this.

Cementing Leaded Panels, part 2

Part 2: Setting Up the Cement

After the pushing the cement under the cames on both sides, flip the panel over and begin a firm rubbing to push addidional cement into the gaps between the lead and glass on this side. Sprinkle the used dust from the bench top over the panel and rub in all directions. This begins to set up the cement by helping to provide a stiff skin over the more fluid cement. Brush until the whiting is largely off the panel. Turn the panel and do the same for the other side. Several applications of whiting/sawdust are required to give a sufficiently thick skin to reduce the amount of spreading, leaking or weeping cement.


Once both sides have been done a couple of times, begin to concentrate the brush strokes along the lead lines rather than across. This will begin the cleaning phase and also begin to darken the came. Repeat this on the other side.


After a few turnings, most of the cement will be cleaned from around the leads. Don’t try to get all of it away, you will need that colour for polishing. The glass will be shining, and any felt tip marks you made on the glass will have gone too. Clean up the dust from the panel and bench in preparation for polishing.


Part 3

Cementing Leaded Panels, part 1

Part 1: The Start

Cementing panels is as old as leaded glass - about 1,000 years - so it is a time-proven process using simple materials. The object of cementing is to make a leaded panel weather/water tight and sturdy. It can be messy and dusty, so putting on an apron and a dust mask are a good idea.


Start on the side that is already facing up after soldering. This normally will be the rough side. This way you do not have to move the panel much until it has stiffened with the addition of the cement.


Cover all open bubbles, rough glass (waffle, ice, etc.) and all painted glass with masking tape. Put the tape over all the relevant areas of the panel, then use a sharp knife (X-acto, scalpel) to cut the tape at the edges of the came. The cement will go under the came, but not into the texture of the glass. This will make the clean up of the glass much easier after cementing.


You can purchase commercially made lead light cement or you can make your own.

With the panel on the bench, put a dollop of cement on the glass and rub it in all directions with a stiff, but not hard, bristle brush to force it under the lead. 


Bovardstudio.com

When the cement has been pushed under all the cames, but with a slope of cement showing, spread a little fresh whiting or sawdust on the panel and gently push it against the cement under the leads. This begins the setting process and keeps the spreading cement from sticking hard to the glass or bench.


bovardstudios.com


Turn the panel over to cement the second side the same way as the first. If the panel is a large one, you may want to use a board to support it in these early turning stages. No gaps can be tolerated in the cementing. Cement leaking out the other side is good evidence that all the gaps between the glass and the came are filled. Again, after cementing, sprinkle new whiting/sawdust over the second cemented side and rub it gently into the exposed cement.


Part 2
Part 3

Friday 27 March 2020

Inserting Glass into the Came

If you have consistent difficulty in sliding the glass into the came, you should consider dressing the came before use. Dressing the came consists of running a fid or other hard material along each of the four flanges of the came. In doing this, you are pressing each flange in turn down against the bench or other smooth surface.


Dressing the cames gives a slight bevel or ramp for the glass to slide over the edge of the came and into the channel of the came. You can dress the whole length at once, or as you cut the pieces off from the main length. Dressing shorter pieces is less likely to bend the came.


Of course there is a second stage of dressing the lead came upon completion of the soldering.

Structural Reinforcement


Leaded light panels often require additional support against wind pressure or vibration. Whether this is needed depends on the size and location, e.g. if in a door or a ventilating window that is constantly being opened and shut.  Large leaded glass windows need some bracing against the force of wind and rain. This can be achieved by using one of the following supports:
  • Saddle Bar
  • Reinforcing Bar (Rebar)
  • Steel Core or Steels
  • Zinc Section

Saddle Bars are the strongest method of support and are used in large external windows for preventing panels from bowing inwards. They resist wind pressure in exposed situations. Saddle bars form part of the latteral support structure of the window. These bars are attached to the panel with copper or lead ties.  These ties are soldered to solder joints across the narrow width of the panels.  The bars are fixed to the perimeter of the opening either by the mouldings or by being inserted into holes in the frame. The sides of the opening provide the ancor points for the bar.  The panel is fixed to the bar by twisting the ties around it.


A saddle bar fixed in position at the side and the ties being twisted around the bar.


Sometimes the opening is divided by sideways "T" bars.  Generally the leg of the "T" faces outwards and the panel is set onto the ledge formed by the leg of the "T".  This leg often has a series of holes drilled in the leg, for pins to be inserted to hold the panel in place until the sealant has cured.


An example of "T" bars being used on a small side opening window


Rebar is another external support.  It generally is a zinc coated steel strap about 2mm by 10mm and asl long as needed to cross the panel.  This tends to be soldered directly to the panel at the solder joints either on the inside or outside. One advantage of this material is that it can be bent to conform to the lead lines of the panel.  In consequence it is not as stiff as saddle bars are.


Steel core
Steel cores take two forms - either steel-cored lead or steel strips fitted into the lead cames when leading.  The steel cored lead came is less available nowadays.  They are mainly used in domestic glazing where support is required particularly in leaded lights with diamond panes when they are inserted in continuous diagonal leads. The steel cores are not adaptable to significant curves.


Steel cored lead came cut away to show the steel core


Zinc

Zinc section came is often used to frame a panel that is not glazed into a window or frame. It has been used in the past for both straight and curved lines.  Using it for curves requires a came bending machine to give good, regular curves.  It gives a panel strength for ease of handling, but does not resist sagging or bowing at the centre.  The other disadvantage of zinc is that it corrodes much faster than lead.


Image showing a variety of zinc came

Monday 24 February 2020

Lead Light Cement

You can make your own lead light cement as the materials are fairly common and safe to use.  I have altered the original recipe through experience.  Too much of mineral spirits dries out the mix so quickly that the linseed oil cracks early in its life.  This results in the possibility of water leaking through the cracked cement.  One third or less of the dryer (mineral spirits) reduces the chance of too rapid drying.  I no longer use a drier at all.  This is my modified recipe.

Recipe

7 parts whiting/chalk
2 parts boiled linseed oil
(measured by volume)
1-2 Tablespoons colorant
This can be lamp black (carbon), black poster paint, concrete colorant powders, or black oil paint in sufficient quantity to give a black or dark gray colour to the otherwise off-white colour of the whiting and linseed oil.  

Do not use water based colorants, such as acrylic paint.  This does not mix with the linseed oil. Instead it forms a collodial mixture that interrupts the formation of the long linseed molecular chains that make it so good as a long term sealant.

The mixed leaded light cement


Method

Add the whiting (reserving about one quarter) to the linseed oil. Mix this well, by hand or with a domestic mixer capable of mixing bread dough. When these are mixed thoroughly, check the consistency. It should be like molasses on a cold morning - barely fluid.  At this point, add the colorant, so you will know the current colour and can adjust to make it darker.

Add more whiting as required to get the consistency you want. Experiment a little to find what suits you best. If you have to deliver the panel quickly, for example, you need to increase the proportion of whiting to make it stiffer. 


Comment

You should make only what you will be using on the current project, as the whiting separates from the linseed oil and sinks to the bottom in only a few days. The commercial cements have emulsifiers to keep the whiting from settling and so extend the life of the product. Since making your own is cheap and quick to make, there is no saving in making a lot.


Lead light cement is a simple, inexpensive sealant for leaded glass that you can make for yourself.

Wednesday 5 February 2020

Leading - the First Glass Pieces

After establishing the perimeter lead cames, place the first glass piece into the corner formed by these cames. 


You only need to establish one vertical and one horizontal came to begin with. The other two will be placed at the conclusion of the leading.


Normally, you will be working from the lower left corner toward the upper right corner of the pattern if you are right-handed. The reverse is the case for left-handed people. 


Hold each piece of glass in place with some scrap lead and nail. The scrap lead will prevent the nail from chipping the glass. It's important all glass is held in place with nails so no shifting occurs while working in another area of the panel.


Fitting the rest of the glass to the cartoon is described here


Revised Feb 2020

Tucking Lead Came

It is most usual in many countries to butt lead cames against one another. In continental Europe the tucking of cames is more common. In this process, which has the advantages of speed and accuracy, the came is first fitted to the glass and then cut at the edge of the glass.

The first step is to cut the came to the appropriate angle to meet the lead to which it is to be joined. However before presenting the cut came to the joint, one end is lightly tapped with a small hammer to slightly curve the end of the came. This allows it to slip inside the leaves of the came to which it will be soldered.


The came is then shaped to the glass as normal. However, rather than removing the came for the next cut, the came is cut to the length of the glass, often using the glass as a guide. This end is then supported on the lead knife and tapped with the hammer to curve the end, ready for tucking into the next piece of came. Care is required so that you don’t crush the came and break the glass, nor miss the came and hit the glass or your fingers. With practice, there are few accidents.


Diagramatically, the tucked lead looks like this:


Tucking lead provides very accurate joints with no gaps for solder to fall through. Some argue it provides a stronger panel as the hearts of the jointed cames almost meet. The main immediate gain is quicker soldering.

Tuesday 4 February 2020

Polishing Panels with Paint and Enamels on the Glass

Do not use black patina on the lead/solder lines on your finished work if there is any painted glass into the panel whether leaded or foiled. This relates to traditional painting on glass, using vitreous paints, fired at ca. 670C and to cold paints often cured in a domestic oven.

When using enamels within the painting, do not let any patina come in contact with the finished production. The patina will etch out all the enamel colour. The patina will etch off the outer layer, either removing the shiny top layer of paint, or the delicate lines of detail work altogether. Copper patina takes a little of the paint off, but not nearly as badly as the black.


Instead, brush the panel with a natural bristle brush, as used for putty clean up, and polish.


Silver stains that have been properly held at the maturing temp, should withstand any patina application, as they have become incorporated at the molecular level with the glass.

Turning Panels

Panels should be turned by supporting as much of the panel as possible. In general this means that the panel should be moved until about half of it is off the bench and supported by one hand. Then pivot the panel on the edge of the bench until it is vertical. During this process, the other hand should be supporting the other edge.  Pivot until vertical.  Lift and set it on the bench. Turn it around, keeping it vertical. Lift it off the bench and set the middle against the edge of the bench with one hand on each otherwise unsupported edge. Pivot the panel on the edge and slide it back on the bench.


If the panel is going to be a large one, make it on a board placed on top of your bench. Then when it is time to turn the panel, you can tip the board, set the panel together with the board on the floor. Move the board to the other side of the panel, turn the board around, placing it against the edge of the bench and raise it while pivoting it on the bench. Additional help is to have two short pieces of wood on the floor to set the panel and board on, so you can get your fingers under easily and without getting them trapped.


If you have the space and spare boards, you can place a second board on top of the panel. Make sure the panel is at the edge of the boards next to you. You can then, with the help of another person, turn the whole panel in one movement (although your arms will be in a bit of a twist). This removes the danger of the panel wobbling too much while shifting the supporting board.


A panel of any size with one or more long lines going through the panel should be made on a board, so that it can be turned without the danger of breaking any of the glass or of the panel folding along the lead lines.

Straightening the came

Before using the came it is important to straighten it. This increases the stability of the came during the leading process. Most often nowadays, you use a lead vice. This operates similarly to a cleat on a sailing boat. The more strain that is applied, the tighter the vice grips the came.

You place the end of the came into the vice so that the came appears at the back of the vice. Give the top of the vice a firm tap with your pliers to set the teeth into the came. Grasp the other end of the came with the pliers, and put one foot behind you to brace yourself if the came does slip out of the vice. Draw the came toward yourself until you can see the lead is straight and any kinks have straightened.


Take the came out of the vice and keep it straight. You transport it by grasping each end and keep the came under tension until you get it to the destination. It is often easiest to cut the full length in half before moving it, as it will not then be longer than your arms can stretch.


Remember, this process is to straighten the came to give pleasing lines in the leaded panel. It is not stretching the lead. Stretching the came can weaken the lead.

Sunday 2 February 2020

Dressing the Cames - part 2

Of course, it is not enough just to dress the came at the start. There is an analogous procedure after the whole panel has been leaded, soldered and cemented.

In this instance the term ‘dressing the cames’ means to close or bend the leaves/flanges of the came toward the glass. It provides a neat rounded appearance to the lines, traps the cement you have already added, presents less area for the rainwater to collect, and makes polishing easier. It is also the time when you may break the glass by putting too much pressure on the glass, so be careful!


Dressing the cames is done with an oyster knife or fid. It is best to avoid metal and better to use wood sticks or plastic tools. The pressure is placed on the came rather than the glass. Run the fid lightly at a shallow angle along each flange of the came. It is helpful to use a finger of your other hand to guide the fid along the cames. You may want to do this several times, as repeated light pressure will cause the flanges of the came to move gently toward the glass with less risk of breaking the glass. This can only be done while the cement is pliable. If it is done after polishing, you will need to re-do the polishing, as it will make the edges of the came silvery rather than shiny black.


Thursday 2 January 2020

Snugging the Came to the Glass

It is important to have the came fit snugly to the glass (assuming the glass to be the right size and shape). If it does not, the panel is likely to grow beyond the intended dimensions.


To ensure the came is tucked snugly against the glass, you use a fid of firm material (wood or plastic, for example) to press against the heart of the lead. You can press directly toward the glass, or make multiple passes along the length of the came to ensure the heart is touching the glass all along its length.

You should avoid steel tools, because you may cut the lead, and if the blade is long you will not find it easy to fit along all of the curves.

Fitting the Glass to the Cartoon

Often you find that the next piece of glass does not fit properly. Possibly it rocks a bit in the came’s channel. Possibly it is simply just a little too big.  Wait! Don't adjust the piece just yet. It may not be the problem.

The first thing to do is to take the too-large piece of glass out and remove the came it fits into, to ensure the previous piece of glass is not too large. The glass should not overlap the cut line. If you have drawn your cut lines to 1.2mm (1/16”) you should see only the faintest line of paper between the glass and the dark cut line. 


If the glass seems too large, check that it is firmly in the channel of the previous came, as sometimes the glass catches on the edge of the came and does not go into the channel.


If that piece seems too large, the next check is to determine whether the apparently too large piece of glass really fits the cartoon cut lines. Place the glass inside the cut lines. You should see a faint line of paper between the glass and the cut line.


When you are sure both pieces of glass are the correct size, put the came back between them and check again. If the glass is still too large, check the length of the came. Make sure the came butting onto the came separating the glass is not too long. This is a common reason for lead panels to grow beyond their initial dimensions.


If the glass is the correct size and the butting cames are correct, replace the came. Put the too large piece of glass into the came and position it so it has the best fit to the next cut line. 


Do not be tempted to start reducing the glass at the visible portion.  After all, you cut it to the right size. It may be that the fit under the came is not very good.

To check use a felt tipped pen (Sharpie) to run along the edge of the came, marking the too-large piece of glass. Take it out and check on where the line is farthest from the edge of the glass. That is where you need to reduce the piece.


The nail points to the area that needs adjustment

When you have reduced the "high" spots on the glass so it fits under the came evenly along its length, you can begin to adjust the outer edge, if necessary.

Leading Tight Curves

Sometimes it can be difficult to get the lead came to conform to the curves of the glass, especially on compound curves.  This is a method to make the leading more accurate.

When leading tight inside curves, bend the came into a tighter curve than is needed for the glass. Then roll it into the glass. Finally, run your fid or stopping knife along the heart of the came to ensure it is firmly against the glass. All this helps the came to fit snugly into the curve.


Wednesday 13 March 2019

Textured Side


There is a little concern about whether the textured side of the glass pieces in leaded and copper foiled glass should be towards the inside or outside.

The traditional advice is to have the textured side toward the inside.  This is based on the piece being used as a window. It is easier to keep the weather side clean if the smooth side is on the outside. The same thinking leads to the recommendation to allow the cemented panel to rest with the smooth (outside) down.  This minimises the thickness of the putty and so allows less water to collect on the outside horizontal leads.

If the window is not primary glazing, it does not matter which side, nor how consistent you are in placing the glass.  It becomes a matter of aesthetics – which ever way you prefer is fine if it gives you the effect you want.

There is a small visual effect if you are using transparent glass.  There is slightly more dispersion of light if the textured side is outwards. 

Placing the textured side inwards can be useful if you wish to indicate a rough surface contrasting with a smoother one.

These considerations show that the placing of the textured side is largely determined by the function of the panel and the aesthetics applied.

Wednesday 29 August 2018

What Cartoon Lines Represent


A frequently asked question by novice glass workers is whether to score at one side of the line or in the middle.  This question revolves around the meaning of the cartoon lines.  What do the lines of a cartoon represent?


Meaning of Cartoon Lines
The lines on a cut line cartoon represent the space required between pieces of glass.  This will vary, depending on the style in which you are working.  In most glass working, a matrix of lead or foil is used.  The space required by these materials needs to be represented in the cut line cartoon. You may have other cartoons for other purposes – painting, came width, foil width, etc., but the lines in the cut line cartoon are there to represent the space required between pieces of glass.

An example of a cartoon for painting


Lead Came
In general, a 1.2mm line is required for standard lead came. This is close to the line made by a new bullet pointed felt tipped marker. If you are working with high heart cames, you will need a 2.8mm wide line. Some chisel point markers, if used on the sharp edge have this approximate width.

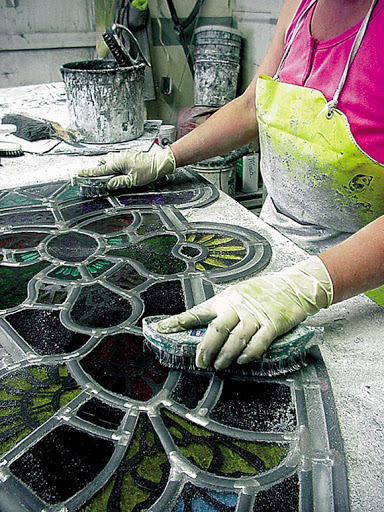
The glass is scored at the inside edge of the cartoon line.  This can be done by scoring directly on top of the cartoon, often with a light underneath.  You can make pattern pieces when the glass is too dense for enough light to come through.  If you must, you can draw the score line on the glass. You can score around pattern pieces, but if your scoring wheel goes over the pattern in any place, the scoring pressure will not be delivered to the glass.


Example of came varieties


Copper Foil
In copper foil, a much thinner line is used as the space between pieces of glass needs only be approximately 0.4mm. This is approximately the width of a sharpened pencil or ball point pen line.

The scoring is at the edge of the line as for lead came.  Also, you can score directly over the cartoon, draw on the glass, or make pattern pieces as for lead came projects.


Fusing Cartoons
When preparing a cartoon for fusing, the lines need to be as fine as possible.  The pieces of glass require no space, as they will be butted against each other.  However, unless cutting by computer controlled instruments, the cutting cannot be completely accurate, so the same size of line as for copper foil will do.

As you are going to try to butt the glass pieces together in fusing projects, you score along the middle of the cartoon lines.  As much as possible, cutting over the cartoon will give the best result.  Of course, there are many times when the light is not good enough and pattern pieces will be required. 

Another approach is also possible. Having scored and broken the first piece, you can place it on top of the glass to be cut for the adjoining one.  With a very fine felt tip or fountain pen, trace the edge of the first piece. Score down the middle of that line to create the best fitting second piece.  And so on through the whole project where the glass is not too dense to use a light box.


Conclusion

The line widths in a cartoon are determined by the space required between pieces by the assembly method.  The thicker the matrix material, the thicker the line and vice versa. 

Saturday 9 June 2018

Dressing the Came

This is a different kind of dressing than what you do in the morning. It relates to how easy it is to slide the glass into the channel of the came.

If you have consistent difficulty in sliding the glass into the came, you should consider dressing the came before use. Dressing the came consists of running a fid or other hard material along each of the four flanges of the came. In doing this, you are pressing each flange in turn down against the bench or other smooth surface.

Dressing the cames gives a slight bevel or ramp for the glass to slide over the edge of the came and into the channel of the came. You can dress the whole length at once, or as you cut the pieces off from the main length. Dressing shorter pieces is less likely to bend the came away from the straight.


Saturday 2 June 2018

Cutting Lead Came

Cutting came is a gentle process rather than an abrupt chopping effort.
There are at least three kinds of implements in common use to cut lead came.

Lead nippers or lead dykes
Lead nippers/dykes are a kind of adapted side cutters, used for cutting wire and by electricians. But these have the bevel only on one side of the jaws, making them almost useless for anything other than cutting lead. This arrangement only crushes the lead on the cut-off side and also leaves a minimum of lead next to the back of the jaws.


In use, the jaws of the dykes are aligned in the same angle as the heart of the lead, cutting across the leaves of the lead. They do not cut from the top and bottom of the came. These are very quick for right angle or very oblique angles on the came. However they are of little use for acute angles.

Lead knives
For more acute angles, blades are more commonly used. These can be either straight edges or curved blades. The straight edge lead knives are essentially putty knives or stiff scrapers sharpened to an acute angle. This kind of knife is normally wiggled from side to side while applying pressure to work through the came.


Other knives are curved to make rocking back and forth easier. There are a variety of knives such as the Pro or Don Carlos. Some look more like a scimitar than a lead knife! These are used to rock along the line where you are cutting the came.


Whatever kind of knife you are using, be sure to be directly above the knife, looking along the blade to ensure vertical cuts.

Saws
Of course, saws are sometimes used. The blade needs to be coarse toothed to enable the soft lead to drop out of the teeth. These saws can be hand held or table saws. Normally, it is quicker to use lead dykes or knives. However, if you are in production mode, a powered table saw may be worthwhile.