Cementing panels is as old as leaded glass - about 1,000 years - so it is a time-proven process using simple materials. The object of cementing is to make a leaded panel weather/water tight and sturdy. It can be messy and dusty, so putting on an apron and a dust mask are a good idea.
Start on the side that is already facing up after soldering. This normally will be the rough side. This way you do not have to move the panel much until it has stiffened with the addition of the cement.
Cover all open bubbles, rough glass (waffle, ice, etc.) and all painted glass with masking tape. Put the tape over all the relevant areas of the panel, then use a sharp knife (X-acto, scalpel) to cut the tape at the edges of the came. The cement will go under the came, but not into the texture of the glass. This will make the clean up of the glass much easier after cementing.
You can purchase commercially made lead light cement or you can make your own.
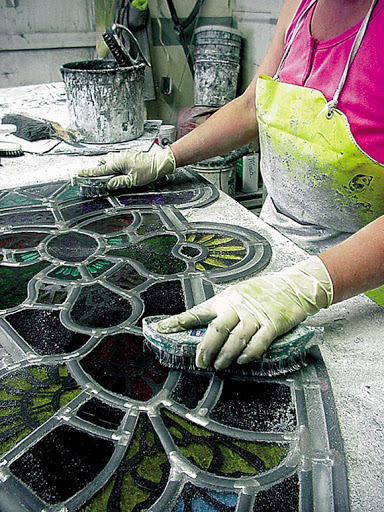
With the panel on the bench, put a dollop of cement on the glass and rub it in all directions with a stiff, but not hard, bristle brush to force it under the lead.
 |
| Bovardstudio.com |
 |
| bovardstudios.com |
Turn the panel over to cement the second side the same way as the first. If the panel is a large one, you may want to use a board to support it in these early turning stages. No gaps can be tolerated in the cementing. Cement leaking out the other side is good evidence that all the gaps between the glass and the came are filled. Again, after cementing, sprinkle new whiting/sawdust over the second cemented side and rub it gently into the exposed cement.
Part 2
Part 3
No comments:
Post a Comment