Showing posts with label Temperature. Show all posts

Wednesday 1 September 2021

Texture moulds


"I could use some help here please. I’ve tried this sun mould 3x and as you can see all 3x I get a hole.  If you could tell me what I’ve done wrong I would greatly appreciate. They were all full fused to 1430F (776C)."
Example of the problem


There are a range of views that have been given on how to make texture moulds work without the glass developing bubbles.

closer view of one example

These are a summary of the suggestions made to the enquirer.

Not enough glass thickness. The view is that glass needs to be 6mm thick to be used on texture moulds, as the viscosity of glass tends to draw glass to that thickness, robbing from other areas making them thin and prone to bubbles.

Glass always wants to go to 6mm.  Not always.  It depends on temperature.  The kiln forming temperatures we use results in a viscosity that tends to equalise the forces at 6 – 7 mm.  Hotter glass will flow out more thinly, until at about 1200C, the glass is 1mm or less thick.

Full fuse two sheets first.  The object is to avoid placing two separate sheets on top of the mould, creating the potential for more bubbles between the sheets, as they may slump into the mould at different rates.

Too hot. As the glass increases in temperature the viscosity is reduced and can no longer resist the air pressure underneath the glass.

Use a lower temperature. The idea is to keep the glass relatively stiff to resist bubble formation.

Bubble squeeze needed to avoid trapped air.  Another way to reduce the amount of air under the glass is to allow the glass to relax slowly at a temperature below which the glass becomes sticky.

Elevate the mould.  The idea is that hot air circulating under the mould will help equalise the temperature of the mould and the glass.

Drill holes at low points. This gives air escape routes under the mould, assuming the mould is slightly elevated.

Go lower and slower.  Use a slower rate of advance toward a lower top temperature with longer soaks to avoid reducing the viscosity, but still get the impression from the mould.


Now for a different viewpoint.

None of the views given above are wrong, but they all (except in one case) fail to consider the fundamentals of obtaining texture from such a mould.

It is apparent that the temperature used was too high because the glass had low enough viscosity to allow the air underneath to blow the bubble.  The suggestions of thicker glass, bubble squeezes, lower temperatures, drilling holes and elevation of the mould are ways of reducing the amount of air or resisting the air pressure.  They are not wrong, but miss the fundamental point.

That fundamental point is that you need to raise the temperature slowly on these texture moulds to allow the glass to fully heat throughout. By doing this most of the air has a chance to filter out from under the glass before it conforms to the edges of the mould.  It is simpler to use the slow advance rather than a quick one with a slow-down for a bubble squeeze.  The glass is more certain to be the same temperature throughout by using a slow rate of advance.  Glass with an even temperature can conform more easily to the undulations and textures of the mould.

Mostly, the recommendations given are to use two layers, or 6mm of glass that has already been fused together.  This gives greater resistance to bubble formation and reduces the dogboning and needling of the edges.

However, you can form in these moulds with single layers.  There are of course certain conditions:
  • You must advance the temperature slowly.  A rate of 100C per hour will be fast enough.
  • You can add a bubble squeeze soak of 30 minutes at about 630C as additional assurance of removing most of the air.  The bubble squeeze is done at a lower temperature than usual, as the glass is less viscous because the slow rate of advance has put more heat work into the glass.
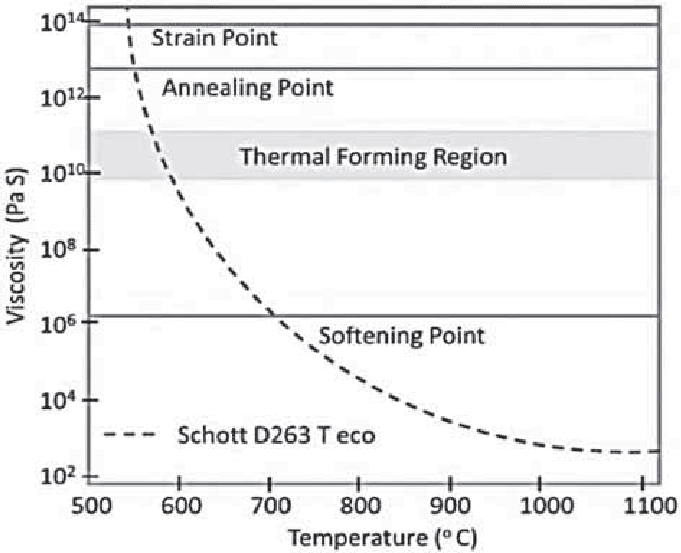
  • The top temperature should not go beyond 720C. Beyond that temperature the viscosity of the glass drops quickly and so becomes subject to bubble formation.


The soak at the forming temperature will need to be long and observation will be needed to determine when the glass has fully conformed to the mould. Quick peeks at intervals will show when the design is visible on the top of the glass. The time will vary by:
  • Mould texture complexity 
  • Type of glass (opalescent or transparent),
  • Heat forming characteristics of the glass,
  • Viscosity of the glass or colour,
  • Etc. 

Be knowledgeable about how to extend the soak or to advance to the next segment of the schedule to take advantage of your observations.

Your observation may show that you can do the texture formation at a lower temperature in future. This will provide results with less separator pickup and better conformation to the mould without excessive marking. 

You will need a long soak in either circumstance. This will be in terms of hours not minutes.  If you do these texture moulds at slumping temperatures, you will probably need at least twice your normal soak.

You can do a lot to fool the single layer glass into doing what you want by using low temperatures and long soaks. See Bob Leatherbarrows's book on Firing Schedules.  He gives a lot of information on how to manipulate glass through heat work - the combination of temperature and time.  You might also consider obtaining my book - Low Temperature Kilnforming.


Most of the search for the right temperature, fails to note that the important element is how you get to the temperature. You can get the same result at different temperatures by using different rates of advance.

Kilnforming is more than temperature, it is also about time and the rate of getting to the temperature. By concentrating on temperature, we miss out on controlling the speed and the soak times. You can do so much more to control the behaviour of the glass at slow rates, significantly long soaks, and low temperatures.

Wednesday 31 March 2021

As Fast as Possible Firings

I have long advocated that it is best to avoid as fast as possible firings because the way controllers work.  They compare the temperatures several times a minute (the number depending on the manufacturer) to determine the rate of increase.  This allows big overshoots at the top temperature with fast rises.  This was reinforced this morning by observing a different factor.
 
I took a piece out at 68°C to put another in.  During the time the kiln was open, the air temperature dropped to 21°C.  I filled the kiln and closed the lid and idly watched the temperature climb before switching the kiln on for another firing.  It took a bit more than two minutes for the thermocouple to reach 54°C with the eventual stable temperature being 58°C.  I had not been aware how long it takes the thermocouple to react to the change in temperature.  Yes, it takes a little time for the air temperature in the kiln to equalise with the mass of the kiln, but not two minutes.
 
With a two-minute delay the recorded temperature can be significantly behind the actual air temperature.  For example, a rate of 500°C per hour is equal to 8.3°C (15°F) per minute or 16.6°C (30°F) overshoot of the programmed temperature. Even at 300°C it is a 10°C (18°F) overshoot.  This effect, added to the way the controller samples the temperatures, means the actual overshoot can be significant for the resulting glass appearance.
 

This is just another small element in why moderate ramp rates can be helpful in providing consistent results for the glass.

Wednesday 17 March 2021

Sintering

This is a process used in glass to stick glass together without any change in appearance of the separate pieces.  It has various names - fuse to stick and lamination are two.

General description
“Sintering or frittage is the process of compacting and forming a solid mass of material by heat or pressure without melting it…. Sintering happens naturally in mineral deposits [and] as a manufacturing process used with metals, ceramics, plastics, and other materials.

“The atoms in the materials diffuse across the boundaries of the particles, fusing the particles together and creating one solid piece. Because the sintering temperature does not have to reach the melting point of the material, sintering is often chosen as the shaping process for materials with extremely high melting points such as tungsten and molybdenum.
 
“An example of sintering can be observed when ice cubes in a glass of water adhere to each other, which is driven by the temperature difference between the water and the ice.”
https://en.wikipedia.org/wiki/Sintering
 
Applied to glass this means that you can make a solid piece out of multiple touching or overlapping pieces that do not change their shape.  This is done by using low temperatures and very long soaks. 
 
The usual process is to take the glass at a moderate rate up to the lower strain point.  The rate of advance is slowed to 50°C or less to a temperature between slumping and the bottom of the tack fuse range.  The operator must choose the temperature, largely by experimentation. 
 
The slow rate of advance allows a lot of heat work to be put into the glass.  This, combined with a long soak (hours), gives the molecules time to combine with their neighbours in other particles.
 
Sintering can be done in the range of 610°C to 700°C.  The lower limit is determined by the strain point of the glass being used and practicality.  

The upper limit is determined by the onset of devitrification. This  has been determined by the scientific studies of sintered glass as a structure for growing bone transplants.  Devitrification reduces the strength of the bonds of the particles at the molecular level.  These studies showed that the onset of devitrification is at 700°C and is visibly apparent at 750°C regardless of the glass used.  Therefore, the choice was to use 690°C as the top sintering temperature. 
 
For reasons of practicality the lowest temperature tested was 650°C.  Indications were that at least an additional two hours would need to be added to the sinter soak for each 10°C reduction below 650°C.  This would make for a 12-hour soak at 610°C.  For me this was not practical.
 
My recent testing has indicated some guidelines for the sintering process:
 
The ramp rate has significant effects on the strength of the resulting piece. 
  • A moderate rate (150°C) all the way to the sintering temperature needs a two-hour soak at the top temperature. 
  • A rapid rate (600°C) - as used in medicine – to the sintering temperature requires approximately six-hours soaking.
  • A rapid rise to the strain point followed by the slow 50°C per hour rate to the sinter temperature requires a three-hour soak.
 
The temperature range of 610°C to 700°C can be used for sintering.  The effects of the temperature used have these effects:
  • With the same rates and soak times, lower temperatures produce weaker glass.
  • The lower the temperature, the longer the sinter soak needs to be for similar strengths.  Generally, the soak at 650°C needs to be twice that of sintering at 690°C.
  • Lower temperatures produce more opaque glass.  In this picture all the glass is clear powder and fine frit in the ratio 1:2, powder:frit.


The annealing of sintered objects needs to be very cautious. The particles are largely independent of each other, only joined at the contact points.  The annealing soak needs to be longer and the cool slower than for simple tack fusing. 
  • Testing showed that annealing as for 12mm is adequate. 
  • There was no advantage of annealing as for 25mm as that did not increase the strength.
 
Porosity
Although the structure of the sintered glass appears granular, it is not porous except at or below 650°C.  At the lower temperatures, the glass becomes damp on the outside and weeps water.  At 670° and 690°C the outside became cool to touch but did not leak water.  This observation depends on evenly and firmly packed frits.
 
Grain structure at 650C

Grain structure at 690C


The keys to successful sintering of glass are the use of a heat work through slow ramp rates, and long soaks throughout the whole firing.

Further information is available in the ebook Low Temperature Kiln Forming.

Wednesday 11 November 2020

Annealing at the Lower End of the Range

Annealing can be done at other than the defined glass transition temperature - also known as the annealing point. Annealing occurs over a range rather than a single magic temperature. Bullseye did not change their glass when they altered the recommended annealing temperature.  Their research has shown that good results are obtained by annealing at the lower end of the range.  

A graph of some aspects of a specific and stiff soda lime glass illustrates this.

Annealing can be between the glass transition (annealing) point and the strain point
credit: Lehigh University

Bullseye's previous annealing temperature was 516C and Spectrum's was/is 510C. These are very close. Bullseye's research is applicable to all soda lime glasses. Therefore, the same principles can be applied to Oceanside fusing compatible glass.  It has already been applied to the Wissmach fusing lines.  This means that you can anneal both glasses at the same temperature.  If you feel the need, you can increase the 482C by 6C to 488 for both, but I don't think it is necessary.

The purpose of the annealing soak is to equalise the temperature within the glass to vary less than 5°C (i.e., +/- 2.5C).  If this is done at the lower end of the annealing range, there is less difficulty of maintaining that small difference throughout the cooling stages. 

Wednesday 4 November 2020

When to Open a Cooling Kiln

Credit: Glass House Store

Questions about when it is possible to open the kiln during the cool down to avoid thermal shock get the answer, “it depends….”

These dependent variables include:

Temperature Differentials
Thermal shock is related to how quickly a piece can cool without developing stress that cannot be contained within the piece.  So, when the temperature differential is a few tens of degrees between room and kiln air temperature it is less risky than when the difference is hundreds of degrees.

This means that there is a relation between room temperature and when you can open the kiln safely.  If the room is at sub-zero temperatures, you will need to wait for a lower temperature in the kiln, so the temperature differentials are no greater than when the room is warm.  Remember the glass can be much hotter than the air that the thermocouple measures.

Cooling rate of the kiln
The natural cooling rate of the kiln (that is, in the unpowered state) will affect when you open.  If your kiln cools very slowly from 150°C, you may feel confident to open the kiln a little to speed the cooling from that temperature.  If you kiln cools quickly - usually in smaller kilns - then you need to wait longer for a lower temperature to be achieved.

Size of the piece
The size of the piece(s) relative to the kiln size has a bearing on when it is safe to open the kiln to speed cooling.  The more space the piece takes up in the kiln the cooler the temperature reading needs to be before you open the kiln.

Placing
The placing of the glass has an affect too.  If the glass is at the front of a front opening or top hat kiln, it will cool more quickly and unevenly than one at the back. A large piece placed more to one edge than another will also require lower temperatures before opening.

Thickness
The thickness of the glass also needs consideration.  The thicker the glass, the hotter it will be in relation to the measured air temperature, and so the longer it needs to be left to cool before opening.

Type of kiln
Your kiln may cool slowly or quickly, but the style of the kiln is important too.  The kiln may be brick lined or fibre lined, or a combination.  The greater the mass of the insulation, the earlier you can open, as the dense brick will radiate heat back toward the glass.

If you have a top hat kiln it is probable that you can open earlier than if you have a top opening or front door opening kiln, as they will dump hot air slower than top and front opening kilns.

The venting method
The way you open the kiln to increase the cooling rate is important.  If you open vents, that provides a gentler flow of cooler air than opening the lid or door.  If you open lids or doors, you need to wait for a lower temperature than for opening vents.

And I am sure there are other considerations.  But these are enough to show that there is not a single answer.  The answer is in relation to the kiln and its contents.

Acceptable Cooling Rates

The speed of cooling that a glass can sustain is indicated by charts giving the rate of cooling for the final rate of decrease to room temperature.  Faster rates might be induced by turning the kiln off at 370°C and opening the door/lid at some slightly lower temperature.

This means that you need to know how fast a cooling rate is acceptable.  The bullseye research suggests that 300°C per hour for the final cooling is as fast as you would want to cool a 12mm thick piece.  This is in a closed environment.  Therefore, you will want to be slower – at least half the speed for a partially opened kiln of say 5cm. 

My predictions for acceptable cooling rates are (with a room temperature of 20°C; a piece evenly thick and 30cm square, but less than half the area of the kiln floor; and a top hat kiln):

6mm -   300°C per hour (although I never use more than 200°C per hour)
12mm - 150°C per hour
19mm - 75°C per hour
25mm – 45°C per hour

Note: Tack fused items with these total heights need to have these rates halved, or use the rate suitable for a piece twice the thickest part.


But!

You cannot open the kiln until the natural cooling rate is at the predicted acceptable rate of cooling or less, to be safe.

The natural cooling rate at various temperatures can be determined by observing temperature falls in relation to time intervals between those observations.  You can make a chart to indicate the cooling rate at different temperatures.  The kiln will naturally cool more slowly at lower temperatures. 


Schedule to room temperature

A protection against too rapid cooling is programming to room temperature.  If your kiln is cooling less rapidly than you predict is acceptable, you are using no electricity – OK, maybe a tiny fraction of a kilowatt to keep the controller operating. But there is no worry of using excess electricity.

The point of programming to room temperature is that if the air temperature in the kiln cools faster than predicted, the controller will turn the kiln on.  You will need to be present for a while after venting the kiln to hear if it turns on and you can lower the lid to a point where the kiln does not turn on, indicating the rate of cooling is less than put into the schedule.

An example:
Assume you predict that 150°C per hour is the appropriate rate of cooling from 370°C. Also assume you open the kiln at 100°C and a minute or so later you hear the kiln start.  Then you know that you have opened the kiln too far causing a more rapid cooling than 150°C per hour and you need to close the opening to less than the current state.  This probably will be a progressive thing.  You will come back, say, half an hour later and open a little more.  Everything seems fine, but 10 minutes later you hear the kiln switch on again.  Oops! You opened too much – you need to close the kiln a little.  This may repeat several times.

The real answer to when you can open your cooling kiln is dependent on many variables.  You will have to decide on how critical these are in relation to the piece(s) you have in the kiln.  Once you have decided on the appropriate rate, you should program that into your schedule for the final segment.  This means when you partially or fully open the kiln the controller will switch the kiln on when the cooling rate is faster than you wanted.

Wednesday 26 August 2020

Uneven Slumps


A common problem in kilnforming is that the glass slumps into the mould unevenly. Several of reasons are given in this post about high temperature or fast slumps for uneven results.

There are two other things that can be done to alleviate uneven slumps.

Place the mould in the centre of the kiln to reduce any uneven heating of the glass.  Uneven heating is a common cause of off-centre slumps.  Where you have persistent uneven slumping with a mould it may be better to fire it on its own so the conditions can be best for it.  Sometimes it is more economical to fire a single item rather than a crowded kiln shelf where the firing conditions must be for an average rather than the optimal firing schedule and conditions for one mould.  Less of the resulting slumped glass is disappointing.

There is an alternative. Cut the glass so the fused piece will be slightly smaller than the mould top. This will allow the glass to sit inside the mould rather than on top. Frequently there is evidence of the glass hanging up on the side of a mould.  Sometimes there are spikes where the glass stuck and stretched. (Another reason for Low and Slow)


A third method has been suggested, but I have not tried it.  This is to lightly bevel the underside of the piece to be slumped.  The basis for this suggestion is that a bevelled edge will fit the mould better by having a slope rather than a relatively sharp edge resting on the mould surface.  I do know the other two suggestions work, but not this one, although it sounds logical.

More detailed information is available in the e-book: Low Temperature Kilnforming.

Sunday 15 December 2019

Heat Work

“Heat work” is a term applied to help understand how the glass reacts to various ways of applying of heat to the glass. In its simple form, it is the amount of heat the glass has absorbed during the kiln forming heat up process.

There is an relationship between how heat is applied and the temperature required to achieve the wanted result.  Heat can be put into the glass quickly, but to achieve the desired result, it will need a relatively higher temperature. If you put the heat into the glass more slowly, it will require a relatively lower temperature.


For example, you may be able to achieve your desired result at 814C with a 400C/hr rise and 10min soak. But you may also be able to achieve the same result by using 790C with a 250C/hr rise and 10min soak. The same amount of heat has gone into the glass, as evidenced by the same result, but with different kinds of schedules. This can be important with thick glass, or with slumps where you want the minimum of mould marks. Of course, you can also achieve the same results with the fast rise with a longer soak at the lower temperature, e.g. a 400C/hr to 790C with a 30 min soak.


In short, this means that heat work is a combination of time and temperature.  The same effect can be achieved in two ways: 
- fast rates of advance and high temperatures
- slow rates of advance and low temperatures.

You obtain greater control over the processes when firing at slower rates with lower temperatures.  There is less marking of the back of the piece.  There is less sticking of the separators to the back and so less cleanup.  There is less needling with the lower temperature.  

The adage “slow and low” comes from this concept of heat work. The best results come from lower temperature processing, rather than fast processing of the kiln forming.

Saturday 2 November 2019

Temperature Equivalents of Orton Pyrometric Cones

The pyrometric cones used by ceramicists can be very useful for checking the temperatures within your kiln. Bullseye have a test described on their website for discovering the eveness of heat distribution in the kiln. The Orton cones can provide an alternate means of testing. This process will also test the accuracy of the temperature readings of you controller/output.


You need to place the cones on supports all around the kiln. Small cones, wich are most useful for this purpose have their own supports built in. The behaviour of the cones will indicate both the temperature achieved - if you fire them according to instructions - and where the hotter and cooler parts of your kiln are located.


You do need to make visual observations to determine when the cone has matured. So you begin checking about 20C - 15C below the indicated maturing temperature. What you will see is the point of the cone bending down. When the point of the cone is pointing directly down, the maturing temperature has been achieved.


You can now check the temperature that is recorded by your read out. Write that down some where. Switch the kiln off now, if you want to see what temperature differences there are within your kiln. You do not need to do any controlled cooling. When cool enough, you can open the kiln and observe where the temperature has differed, by the extent to which the cones are pointing down. If the cone has completely conformed to the edge of its support, it has been over fired. Those that do not point directly down, have not reached the maturing temperature.


The cone numbers that are useful for kiln forming are 022 - 011. Remember that to achieve the temperatures, the cones must be fired at the indicated rate. Any other firing rates will not give accurate temperatures, as the cones are measuring heat work.

Large Orton Cones fired at the rate of 60C/hr over the last 100C will give the following temperature equivalents:
019: 676
018: 712
017: 736
016: 769
015: 788
014: 807
013: 837
012: 858
011: 873

However if you fire large cones at 150C/hr over the last 100C, you will get the following temperature equivalents:
019: 693
018: 732
017: 761
016: 794
015: 816
014: 836
013: 859
012: 880
011: 892

You of course, get different temperatures for the small cones of the same numbers. The small cones must be fired at 300C/hr over the last 100C.
022: 630
021: 643
020: 666
019: 723
018: 752
017: 784
016: 825
015: 843
014: 870
013: 880
012: 900
011: 915

If you decide to use self supporting cones, the evidence you are looking for is slightly different. In this case, the cone has achieved the heat work when the point is level with the base. If you fire the self supporting cones at 60C/hr for the last 100C you will get the following temperature equivalents:
022: 586
021: 600
020: 626
019: 678
018: 715
017: 738
016: 772
015: 791
014: 807
013: 837
012: 861
011: 875

A wall chart is available from the manufacturer

Thursday 31 October 2019

Drop Rings

Mould

It is possible to purchase drop rings of various sizes. It is also easy to construct one from vermiculite board or ceramic fibre board. Merely cut a circle of the desired radius from the board. Leave at least 50mm of board outside the circle, and more for thinner boards.

Kiln wash the top and inner sides of the drop ring


Glass

The glass should be larger than the hole in the ring. This will vary by radius of the hole. The glass will need to be from 50mm larger diameter than the hole for smaller holes to 100mm larger diameter for holes over 300mm.

Glass should be at least 6mm thick for the first 100mm of drop and an additional 3mm for each 50mm more. So, a drop of 200mm would require glass of 12mm thick


Temperatures

The temperature rise should be no more than 150C per hour to about 675C for 6mm glass and less for thicker glass. Remember the glass is much closer to the elements than normal and it is easy to thermal shock the glass.


With close inspection you can see that the edge of the glass rises from the mould as it sinks in the middle.
The outside edges of the glass rise from the mould as the centre begins to drop in the centre.  As the glass gets hotter, this raised edge settles back on to the mould.  If the glass is really near the elements, there is a small risk the glass will touch the elements.  No harm will be done to the kiln, but the glass edge may have some needles.

The rate and amount of slumping is controlled by temperature, span (the width of unsupported glass on the mould) and time. The higher the temperature the faster a piece will slump and the thinner the walls will be. However you can slump at lower temperatures by holding the temperature for a longer time to reduce the thinning of the sides.

Also note that the wider the span, the faster the glass slumps.

If you slump at high temperatures with a drop ring the sides of the bowl tend to be straight and steep. The strain is limited to the region immediately inside the rim. Therefore the glass tends to thin next to the rim and the colours are diluted. If you slump at a lower temperature for a longer period of time the strain is distributed over the entire unsupported area. This results in a more rounded shape for the bowl and even thickness of the glass across the bottom of the bowl.


Experiment

Finding the right combination of time and temperature requires a bit of experience and guess work. If you want a rounded bottom, heat the glass to the point that it starts to bend on the mould and wait for 30 minutes. If it has slumped about 1 inch in that time wait another 30 minutes. You are looking for a slumping rate that is acceptable. If it hasn't moved very much then increase the temperature 15C and check again in 15 minutes. Keep moving temp up and waiting for 15 minutes until the piece has completely slumped. This might take several hours.

If you want straight sides keep heating the piece rapidly.

Stopping
When the piece has slumped to the desired shape, flash cool the kiln to about 30C above the annealing point to stop movement in the glass. Extend the annealing soak and increase the length of the annealing cool time (reduce the rate of temperature fall) over normal slump firings of the same thickness.


Glass falls through drop rings in relation to the size of the glass on the drop ring, the size of the opening, the temperature rise rate and to some extent the colours and amount of opalescent glass used. 

Wednesday 16 October 2019

Heat Work is Cumulative


“…. the first fuse (contour) I brought it up to 1385°F and held for 5 minutes - it did not contour as much as I would like - do I re-fire at same temp and hold longer or go up in temp and hold same amount of time or something else?”

Observe
Of course, the smart answer is “Observe to get it right first time”.   Observation will enable you to determine when the piece is fully fired.  To observe you need only peek at 5-minute intervals to determine if the piece is as wanted. 

Know your Controller
In combination with this you will need to know your controller well enough to be able to advance to the next segment if the piece is done before the segment finishes; or how to stay on the same segment until it is finished and then advance to the next segment.

Of course, there are circumstance when you cannot or do not want to be present at the top temperature of the firing.  Then consider using the delay function to enable you to be present. This gives a countdown until the kiln starts.  The practice is fully described in this blog entry.

Time or Temperature
If you are experiencing an under-fired piece and want to re-fire it to get a better finish, the usual question is whether to fire for longer or at a higher temperature.

The response is – “Neither”.

Re-fire to the same temperature and time as before, unless you are looking for a radically different appearance.  Heat work is cumulative.  You have put heat into the glass to get the (under fired) result.  By firing it again, the heat will begin to work on the glass as it rises in temperature.  The piece, in this instance, is already a slight contour.  The additional heat of this second firing will begin to work just where the first firing did, and will additionally change the existing surface just as the first firing did.  The degree of contour achieved by the first firing will be added to equally in the second firing.  It is of course, a good idea to peek in near the top temperature to be sure you are getting what you want. More information on heat work is available here with its links. 

Rate of Advance

It is important to remember that on the second firing the glass is thicker, and you need to schedule a slower rate of advance until you get past the strain point – about 540°C for fusing glasses, higher for float and bottle glasses.

Future firings

At the finish of the second firing you will have soaked at the top temperature for twice the scheduled time.  You can use this extra time for the next similar firing, or increase the temperature slightly and keep the original firing’s length of soak. 


As pointed out earlier, observation for new layups, sizes, thicknesses, etc., is important to getting the effect you want the first time.


Wednesday 2 October 2019

Glass Bending Temperatures


Glass bending is the process by which glass is shaped without obtaining mould marks on the glass.  It also attempts to shape the glass without changing the thickness of the glass across its length and width. Glass bending can be done as a free drop curve or into a mould. This bending is usually done at much lower temperature than slumping.

Determining the temperature at which glass should be bent is a matter of experimentation with each new shape and thickness of glass.

If the temperature is too high you find distortions are created in the glass.  Sometimes wrinkles develop.  In general, a high temperature leaves a lack of time to compress and stretch evenly into irregular shapes.

If the temperature is too low the whole process takes an impractically long time to complete.

The just right temperature is in the region of 50C above the annealing point of the glass being used.  Experimentation with the shape and thickness of the glass is needed to establish a reasonable time for the bending; and for it to be achieved at a low enough temperature to get the shape required.

An example is this tapered cylinder.
 
Lantern frame for the glass
Mould shaped from the lantern into which the glass is to be bent

Flat template for cutting the glass

The bent glass

The curve was achieved at 590C in 20mins


A 1/8 sphere requiring bending in two directions was achieved at 570 in 45 mins to avoid ripples at edges.


The span as well as the shape affects the temperatures and times.  More information on bending glass is given in this blog entry.