Showing posts with label Low Temperature Kilnforming. Show all posts

Wednesday 20 July 2022

Slump Shrinkage


Glass on rectangular moulds often does not maintain a straight edge.  It pulls in and tends toward the “dog boning” of fused single layer glass even if not so dramatic.

Explanation

The reasons for the pull-in on rectangular moulds are similar to those for dog boning. You should note that squares are special cases of the general class of rectangles. The discussion here applies squares just as much as to rectangles.

If you grid the rectangular glass, it illustrates that the glass in the corners is moving in two directions.  It is moving and slightly stretching into the mould.  At the same time, it is trying to compress into the corner of the mould.  The glass along the sides are moving in only one direction – stretching only slightly and moving toward the bottom of the mould.

There is more compression than stretching in the corners. The sides have only to move in one direction and experience no compression and so move toward the bottom more easily.

Such is my explanation of the experience. 

Avoidance

The real question then is how to prevent this pull-in that is so commonly experienced on rectangular moulds with no rims.  One way would be to avoid such moulds altogether.  This of course, is not practical, so some approaches to compensate or avoid the problem are needed.

It is possible to compensate for this pull-in by slumping a rectangle with slightly bulging sides.  Rather than a regular rectangle, you create one with slightly outwardly curved sides.  Getting the exact amount of curve will be difficult and achieved only after a number of experiments.

The opposite compensation would be to round the corners of the glass, so there will not be so much glass to fit into the corners of the mould.  This again will require experimentation to achieve a predictable result.  And it often would interfere with the appearance of the final piece.

The easiest, but not always successful, way to prevent the pull-in is to alter the scheduling for slumps on such moulds.  It is a well-known property of glass that it does not have a single softening point, but progressively softens with temperature and time.  You can take advantage of this by using four elements in combination. 

·        Use a slow rate of advance to the slump temperature, to allow the glass to evenly absorb a lot of heat on the way to slumping. 
·        Use a low slumping temperature  This may be as much as 30°C less than your usual temperature.
·        Use a long soak at the slumping temperature.  This may be hours.  You need to allow the glass to slump into the mould without stretching.  To avoid stretching, you need a low temperature.  At low temperatures, the glass requires a lot of time to conform to the mould.
·        Observe at 10- to 15-minute intervals once the slumping temperature is achieved.

These processes are outlined in a blog post on dog boning.  Further information is available in the ebook: Low Temperature Kiln Forming.


Avoidance of pull-in of the glass on rectangular moulds is related to scheduling and observance.  There are some compensations that can be tried, but require considerable experimentation to be successful.

Wednesday 22 June 2022

Ramp and Anneal Rates for Tack Fusing

Tack fusing is more difficult than most realise.  Many failures – usually breakages – occur because the complexity of tack fusing is not fully acknowledged.

Ramp Rate 

Calculations

One of the effects is the slower rate of advance that needs to be used.  The rate of advance needs to be slowed to that applicable to 1.5 to 2.5 times the actual total thickness of the assembled piece. 

Reasons

The reason for this firing for apparently excess thickness is the shading effect of the overlying pieces upon the glass below.  Glass is affected by radiated heat, whether the heat comes from above or the sides.  The parts of the base glass that have glass on top cannot receive the radiated heat.  This means the shaded base glass needs time for the heat to be conducted through the overlying glass to it. 

Beginning of heat input

Progress of heat input showing some parts of the base are compeletly heated while others are not

Glass is a good insulator, resisting any heat transmission through overlying glass. Slowing the rate of advance allows the convection of heat to the lower levels to be adequate to avoid heat stress.  The reason for the 1.5 to 2 factors is that experience has shown a simple applied arrangement will be safe with a factor of 1.5 as the calculated thickness.  If you have stacks or lots of difference in thicknesses, you need a slower rate to allow for the conduction of heat.  This is where the 2 times actual thickness factor is useful.

Finding the Ramp Rate

The information on the rate of advance for evenly thick pieces of 6mm to 9mm is widely available.  Determining the rate of advance for thicker items is more obscure.  You can get some guidance from the manufacturers’ websites.  But where the guidance is for thinner pieces or it is unclear, you need to find another reliable source. 

One very reliable source is the Bullseye annealing chart for thick slabs.    Yes, this chart tells you about the annealing of thick items, not about the ramp rate to the working temperature.  But you can infer the initial rate of advance from the final cooling rate.  The principle is that the glass can survive the indicated cooling, so it should also survive that rate of advance from cold to working temperature.

This means that a set up of a 6mm base with two layers of glass pieces on top distributed around the base, is a total of 12mm.  This should be fired as though 18mm (1.5 times actual) or up to 30mm (2.5 times actual).  In the first case the chart indicates the final cool rate is 150°C per hour.  This can be used as the initial rate of advance to at least 540°C (above the annealing range).  If you choose to use the 2.5 times factor, the initial rate will be 65°C per hour.

This approach gives you a reasonable degree of certainty about how fast you can fire your glass from cold.  Note that you still need to have a conservative bubble squeeze segment in your schedule, especially if the lay up includes areas where air might be trapped.


Annealing rates

Annealing times and rates are normally dependent on the thickness of the fired glass.  But published annealing rates are based on both even thickness across the piece and on cooling from two sides – i.e., not on the floor of the kiln.

Calculating for even thickness

If you have taken your stacked piece to a full fuse, you can anneal for the final thickness.  I would be a little more cautious with a contour fuse and anneal as though it were three to six millimetres thicker than when completely flat because you cannot be certain that the piece is evenly flat unless you obeserve.

Calculating for tack fused

If, however, you are firing to a tack fuse you need to look to schedules for thicker pieces.

Reasons

Glass remains an insulator as it cools.  As glass cools, it must conduct the heat through the thick parts at the same rate as through the thinner parts to avoid inducing stress.  Remember the principle of annealing is to keep all the glass with 5°C or less difference in temperature.  The thinner glass gives its heat up quicker than the thick.  This will induce stress and it can be enough to break the glass in the kiln or, more usually, some long time after the glass is cool.  This means you need to control the cooling to a rate that would be suitable for thicker glass. 

At the beginning of the cool the heat loss is from the surface and to a lesser extent through the shelf.
Further heat loss shows the exposed base layer is giving up its heat throughout, although other areas are only beginning to cool.  It will take some time for the three layer stack to cool.  The uneven cooling leads to the introduction of stress.


Determining the rate

The annealing soak length and the rate of the annealing cool are directly related to the thickness calculated for your piece.  You have already chosen a calculated thickness for the rate of advance to avoid breaking the glass.  Use the rates given in the chart for that thickness for your soak and anneal cool.  Any annealing with a shorter soak and a faster cool risks inducing stress and possible breakage.


Rates of advance and annealing are intimately connected.  A tack fused piece must be annealed as though it were 1.5 and up to 2.5 times the actual total thickness.  Annealing of tack fused pieces cannot be skimped.


Further information is available in the ebook Low Temperature Kiln Forming.


Wednesday 1 June 2022

Preventing dog boning

Firing a single layer, even with decorative elements on top, is most likely to “dog bone” due to lack of volume.  With a single layer you are always going to have difficulties with volume control. 

Photo credit: Paul Tarlow

Unless you are satisfied with an angular tack fuse at the lower end of the tack fusing range, you will always run the risk of dog boning. All the other variations of tack fusing use increased temperatures causing the glass to begin to pull in along the long sides to a greater or lesser extent (more with contour fuse, less with angular tack fuse).

Dog boning occurs because as the glass softens and the edges begin to round, the viscosity takes over from the solid phase of glass as a major force.  Viscosity can be thought of as an approximation of surface tension. 

Glass is a material with a plastic range over several hundred degrees.  This means that the hotter the glass becomes, the less stiff it becomes, and the viscosity force thickens the glass toward 6-7mm in the kilnforming temperature range. The greater the temperature, the more the glass pulls into a ball shape, or in the case of sheets, thickens at the edges and thins in the middle.  Higher temperatures reduce the viscosity to the extent that it becomes as thin as one millimetre.

Trick the glass

To avoid dog boning on tack and full fusing, you have to trick the glass with some special scheduling.

The trick employs the concept of heat work.  The nature of glass allows you to put a lot of heat work into a piece by soaking for a long time at a low temperature.  You might think of it as a kind of sintering.

A description of sintering:

The atoms in the [glass] diffuse across the boundaries of the particles, fusing the particles together and creating one solid piece. [This can be done by heat at low temperatures with extended soaks.]  Examples of pressure-driven sintering are the compacting of snowfall to a glacier, or the forming of a hard snowball by pressing loose snow together.   https://en.wikipedia.org/wiki/Sintering

By sintering (sometimes called fuse to stick) or - in kilnforming terms - by the use of heat work you can achieve the result you want without dog boning.

By taking the temperature slowly to about 700°C to 720°C and soaking there for two to four hours you can achieve a rounded tack fuse without dog boning.  You will have to experiment with the exact temperature and length of soak to get exactly what you want.

The length of soak time or exact temperature is not vital.  The two in combination will achieve the effect you want.  The importance of observation of your firing is re-enforced in the cases of sintering.  You cannot be sure until you check during the firing whether the edges of the glass are rounded enough for your purpose. That observation will also tell you whether a slightly raised temperature would be useful.  You will learn the time required to achieve the effect by recording the soak time when you advance to the anneal soak and cool.

Further information is available in the ebook Low Temperature Kiln Forming.


By the use of heat work in kilnforming you can achieve tack fused pieces without dog boning.

Wednesday 18 May 2022

Large Uprisings on Slumps


Help!  Looks like my shallow bowl wanted a boob.  [16” diameter pot melt slumped into shallow 20” mould, 4” above floor, fired at 175°F to 1100°F for 20 minutes,  and 75°F to 1250°F for 15 minutes]

What happened?

Sometimes a slump results in an uprising at the bottom of the slump. In this case, and many others, we know the vent at the bottom of the mould was open and the piece was supported above the shelf.  This indicates that everything should be set up for a good result.  Still, this uprising occurred.  It is not a bubble, as the glass is apparently evenly thick throughout the “boob”. 

The usual, and mostly unexpected, cause is too long or too hot a slump.  The firing, if allowed to continue, would result in a larger uprising and eventually a thickening of the piece at the bottom of the mould associated with a related reduction in the dimensions of the final piece.

What has happened is that the glass has become soft enough for it to slip down the sides of the mould. But it has not been hot enough for long enough to allow the glass to thicken.  The glass at the bottom is pushed up to compensate for the slightly hotter glass on the sides of the mould sliding down on the glass at the bottom.

In this case there is a moderate (97°C) rise from a soak of 20 minutes at 593°C to 676°C, soaking for 15 minutes.  This is a lot of heat work at a relatively high temperature for a shallow mould. 

What to do in the future?

Rate of Advance

Consider what you are trying to achieve at each stage of the scheduling of the process.  In this slumping there really is no need to soak at 593°C. It is a nowhere temperature.  The glass is no longer brittle.  It is at the lower end of the temperature range where the glass is softening anyway.  A simple, steady rise in temperature, as at the beginning, of at or below 100°C will be sufficient to bring the whole substance of the glass to the slumping temperature. If the piece is really thick, consider an even slower but steady rate of advance without any soaks.

Soak Temperature

Also, if the slump can be achieved in 15 minutes, it is too hot.  If the slump is complete in such a short time, it will be marked much more than needed by contact with the mould. 

The cooler the glass at the conclusion of the slump,  the less marking there will be.  Yes, the soak time needed to complete the slump will be longer, but the bottom of the glass will be cooler than a hot fast slump.  You should always be trying to achieve the effect you need at the lowest practical temperature.  The slow rate of advance will assist in completing the slump at a lower temperature, as the amount of heat work put into the piece will be greater.

Observe the progress of the firing

Observation is necessary when doing something different.  Some argue that it is necessary in every slump.  I admit that I do not always observe every slump, but this case again illustrates the need to observe each slump. 
By observing at 10- or 15-minute intervals, you will see when the slump is complete.  You may feel you do not have the time to wait for an hour or so for the slump to be complete, or that it does not fit with your activities.  The answer is to arrange the kiln’s schedule so that when the critical part of the process is reached it will fit with a space in your other activities. https://glasstips.blogspot.com/2016/12/diurnal-firing-practices.html

Can this piece be fixed?


You could put the piece on a shelf and take it to a high temperature slump with a significant soak to flatten it.  You will need to observe when the uprising is flat again, and then proceed to anneal.  However, the pattern placed in or on the glass will be distorted to some extent.  The uprising will flatten with a thicker rim around the base of the rise in the glass.  This may be visible. 

My view of these things is to learn as much as you can about causes and prevention and move on.  You advance your practice more quickly by understanding what went wrong and why than by trying (unsatisfactorily) to rectify a failed piece.  Often you can cut the glass up and use the pieces in other projects.

Further information is available in the ebook: Low Temperature Kiln Forming.

Uprisings at the bottom of slumps are often the result of too much heat work (rate, temperature and time).  Slow rates if advance to low temperatures with long soaks backed by observation prevent the occurrence of these bubble-like uprisings.

Wednesday 20 April 2022

Annealing Previously Fired Items

“Double the annealing soak time for each firing” and “Slow the rate of advance each time you fire” are common responses as a diagnosis when a piece breaks in the slumping process.  It may come from the fact that once fired, It is now a single piece that needs a slower rate of advance on the second firing.  I’m not sure where the idea of doubling the annealing process originates.

You need to think about why you would slow the rate of advance and double the anneal for each subsequent firing of the piece.  This is an investigation of the proposals.

Thickness determines ramp rates and annealing

Annealing soak lengths and cooling rates are related to thickness and complexity.  If no additions or complications are added between the previous and the current firing, there is no reason to extend the soak or decrease the rate of cooling.

You of course, need to consider what lay-up and process you are using in the additional firing.  Have you added any complexity to the piece in the previous or the current firing?  If so, you do need to consider how those changes will affect the firing requirements.

Fire polishing

The question to be asked is, “if the piece was properly annealed in the first firing and shows no significant stress, why do I need to change the firing?”

The answer is, “you only need to slow the heat up because it is a single piece now.”  You do need to know that the existing stress is minimal, of course. A note on stress testing is here.  If there is little or no stress from the previous firing, the annealing and cooling can be the same as the previous firing.  Nothing has changed. You are only softening the surface to a shine.  The anneal was adequate on the first firing, and it will be on the second.

If you are firing a pot or screen melt, you have added a complexity into the firing. This is because of the high temperatures used in the first firing.  It means you may wish to be more cautious about a re-firing to eliminate bubbles, or for a fire polish for the surface.

Frit layers

If you are adding confetti or thin layers of frit or powder you have not significantly changed the piece.  You can re-fire the piece as though you are fire polishing any other piece of the same dimensions.


Additional layers

If you are adding more full layers in subsequent firings, you need to reduce the rate of advance to top temperature.  You also need to extend the soak and reduce the cooling rate according to the new thickness of the piece.  This is because the piece is thicker, so the rate of advance needs to be slower, the time required to adequately anneal is longer, and the cooling rate needs to be slower.  All of these changes in scheduling are to accommodate the additional thickness.

Tack fusing additional pieces

If you are tack fusing pieces to the top of an already fired piece, you need to go slower than you would by just adding a full layer.  Tack fusing pieces to an existing piece adds a significant complication to the firing.  Tack fusing requires a firing for thickness between 1.5 and 2.5 times the actual total height of the piece.  The complexity added is the shading of the base glass from the heat radiating from the elements. 

For example, if your piece from the melt is 9mm/0.375", it would have been annealed with a 90 minutes soak. The first cool would be at 69C/127F per hour, and the second at 125C/225F per hour with the cool to room temperature at 415C/750F. If it shows no significant stress, you can fire polish and anneal in the same way as your initial firing.

But


If you tack fuse pieces on top, then you need to treat the piece as though it were between 15mm/0.625" (a little over 1.5 the thickness) and 25mm/1.0" (a little over 2.5 times) thick.  This would require a soak of 3 or 4 hours.  A cooling rate of between 40C/72F and 15C/27F per hour for the first cooling stage is needed. The second stage between will need a rate between 72C/130F and 27C/49F per hour. The final cooling to room temperature will be between 90C/162F and 240C/432F to room temperature.

Conclusion

If you have made no significant changes in thickness or complexity, the second firing can be the same annealing as the first firing. If you have altered the thickness or complexity of the piece, the second firing will need to be slower.

Further information is available in the ebook Low Temperature Kiln Forming.

Wednesday 6 April 2022

Calibrating your new kiln


My new kiln fires differently than my existing one(s).

Each kiln will be different in minor or major ways.  Suggested schedules are only starting points, even though they worked in your previous kiln. You need to learn about your new kiln’s characteristics in the same way you did with your first kiln. There are a number of ways to do this.

Many people recommend making test tiles for the different levels of fusing that you use and at different temperatures to determine which is the best for your new kiln.  Additionally, you need to note the rate(s) at which you fired these samples to make the test tiles accurate representations of firings.  Yes, these will be good references.  And yes, they are valuable if you have the time for all these firings.

 Idle Creativity


Observation during the firing of test tiles is the best and quickest way to discover how your new kiln is performing at various temperatures.  In one firing you can note the temperatures at which the various tack levels occur, and the contour and full fuse temperatures.  You can even take pictures through the peep hole of your kiln (as long as you don’t put the camera too close to the kiln!).  This procedure will make knowing your kiln much quicker and accurate than unobserved multiple firings.

To make use of the notes of the temperatures where the results were achieved in the test firing, back off 10°C (or 20°F) from the observed temperature and add 10 minutes processing time.  You may find after a few uses of these temperatures you may want to adjust the temperature a bit more, but you will have done the major experimental work in one firing.

It is a good idea to set up other test tiles and run the experiment again at a slower rate of advance.  This will give you information about how the different rates of advance affect the processing temperature and the look and texture of the piece, especially on the bottom.  The texture imparted at different processing temperatures becomes more important in slumping and draping processes.

In another firing you can set up various moulds and observe when the slumps or drapes are complete. Recording this information lets you know slump temperatures for various styles and spans of moulds.  Make sure you record the temperatures that the pieces slump fully into the mould. You can then back off 20°C from those points and add 30 minutes as a starting point for you actual slumping firings.


New kilns require experience to know what the appropriate temperatures are.  Buy setting up test tiles you can observe in one firing the various levels of fuse from tack to full fuse, so saving lots of firing time.

Further information is available in the ebook: Low Temperature Kiln Forming.

Tuesday 15 March 2022

Metal inclusions


Two difficulties with metal inclusions in glass are common: stress and bubbles.

Stress

Metal inclusions always create stress in the glass. Different metals have different expansions and different strengths.  They also have different melting points - some so low that they liquify during the fusing process.

The trick in using metals as inclusions is to minimise the amount of stress. Small amounts of stress can be contained within the glass. The thicker or more mass inside the glass, the greater risk of stress breaks. The stronger or more rigid the metal is, the more stress will be generated.

Minimising stress is most easily achieved by using small amounts of the metal.  Thinning the metal as much as possible also reduces stress.  Flattening wire also helps reduce the amount of stress as well as keeping it in the place you want it without rolling away from its placement.

Bubbles

Bubbles often form around inclusions, especially of metals.  Metals that do not melt at fusing temperatures are stiffer than the surrounding glass.  You can see from the table noted above those metals which melt at higher temperatures than fusing.  These metals will create bubbles around their perimeter and elsewhere over the metal wherever there are wrinkles or undulations as the metal holds air in those places.

Thin metals

One possibility to reduce the bubbles is to thin the metal by hammering flat or use foil thicknesses of the metal.  Many specialist metal suppliers have very thin metals, often called shims.  They are increasingly available in online shops.

Weight

Another is to use enough glass on top to flatten the metal.  You should flatten the metal in the cold state as much as you can.  Then the weight of the glass presses down on the metal both in the cold and heated states. With a good long bubble squeeze, you can force more air out to the sides than with less covering glass.

Placing

A third possibility is placement. The further the metal inclusion is from the edges the more air is likely to be trapped to form bubbles.  If the air has less distance to travel, more is likely to escape.

Pressing

Supporting the edges or corners allows the centre to drop before the edges are sealed.  The weight of glass helps to press the air out to the sides.  Thicker glass (6mm/0.25") on top of the metal inclusion can help push the air away from the metal. You can also provide - within the design - paths for the air to escape. This can be elements such as powder, stringers and other glass accessories that can hold the glass up during the bubble squeeze process, but become invisible at fusing temperatures.

Fire in stages

A fifth possibility is to fire differently.  You can place the metal on a kiln shelf which is covered with fibre paper and put the glass on top of the metal and fire to a rounded tack fuse at the minimum.  To avoid dog-boning, you should cut the capping piece several centimetres larger than the final piece, so you can cut off the distorted edges. Clean the bottom and dry very well after firing and put the base under the top piece that has the metal attached.  Fire the combined piece slowly with a good bubble squeeze.  This can be applied to included vegetable matter too. 

Further information is available in the ebook Low Temperature Kiln Forming.


Inclusions often produce stress and bubbles.  There are some things that can reduce both when encasing metals or vegetation.


Wednesday 9 February 2022

Frosting on slumped glass

 [We’re] Having a few challenges with a stainless-steel S-curve mould (15cm x 10cm [prepared with boron nitride]. … When we slump a piece of glass, we get a frosted effect … in places where the glass was touching the mould at the beginning. I don't think it's devitrification, because the glass itself isn't cloudy, it's just hundreds of little bumps and dimples.

Photo credit: Adrian Cresswell


 This is a mould that combines draping and slumping in the same firing. The glass must drape over the hump and slump into the valley at the same time. This is effectively two processes in the same firing. It does require some compromise in scheduling as a result.

 The evidence presented shows boron nitride – a slippery surface – was used to prepare the mould. In another firing Thinfire – a powdered surface – was used as a separator. Both created this marking on the back. The schedule was not presented.

 This indicates something other than the separator is creating the problem. Note that the marking also occurs at the extreme right end where the glass would be resting on the lip of the mould. The marking does not occur where the glass is slumping down into the curve. It only occurs where the glass is draping.

 As suggested, this is not devitrification. That occurs on the surface rather than on the bottom. This further indicates the difficulty is between the glass and the mould.

 I suggest the marks are from the glass sliding along the mould. These are frequently called stretch marks. The glass is sliding and stretching along the mould. This blog post contains much more information.

 It is of course possible that insufficient boron nitride was placed on the steel and the glass grabbed the steel. It is worth checking, although I don’t think it likely.

 You might think the Thinfire covering of the steel would make everything smooth. However, Thinfire turns to powder and fibreglass particles after about 400°C/753°F. These particles are drawn along as the glass moves against the mould. The particles can bunch and remain as bumps on the surface of the mould. This may account for the rougher surface with Thinfire than boron nitride.

A summary

These stretch marks occur when the glass moves excessively against the mould. This is usually a combination of high temperature and fast ramp rates. Slumping should be done at the lowest practical temperature. The soak should be long, rather than brief.

The Remedy

 Fire more slowly and to a lower temperature. The Bullseye suggestion from their quick tips is for a double curve (or wave) mould of 250 x 210 x 40 mm (9.85" x 8.25" x 1.6"). They suggest a ramp rate of 167°C to 660°C /1221°F with a soak of 10 minutes for a 6mm/0.25” thick piece.

 In my experience this is too fast. Slumping into this mould can be done at 630°C/1167°F with a 30-minute soak in my kilns using the same ramp rate.

 This is a simple mould to slump and drape into. It is essentially two partial cylinders pushed together in opposite directions. The curves are gentle and progressive. There are no sharp changes of direction. These factors mean that the slow and low approach will work well.

 However, in this case the curves will be even tighter as the full length is 150mm x 100mm/ 6” x 4”. The height is not given, but for a self-standing piece, it likely to be a minimum of 40mm/1.6". This makes for a tight curve on the mould. It is likely the glass will slide more than on a gentle curve. My thought is that the steel mould has been produced without knowledge - or testing - of the practicalities of getting the glass to bend to such a small radius. This means that I would be trying a schedule of about 125°C/225°F per hour to a top temperature of about 630°C/1167°F with a 1.0 to a 1.5-hour soak. The glass is going slump much more slowly with this smaller span.

 With gentle heating -slow ramp rate, long soak - the glass gradually conforms to the shape of the mould without stretching over the hump/crest of the mould. Instead, what happens is that the glass slips slightly from the opposite end of the mould. To counteract this, I place the glass 6mm/0.25” over the upraised end of the ceramic mould. This then finishes just inside the mould’s edge.

 With a steel mould, this is not possible without the glass hanging up on the hot and sharp edge. The glass will need to be at the edge or just inside to prevent hanging up on the end of the mould. The glass will slip down the mould a little, but not so much as to cause problems. It is possible to prop a piece of fibre board at the upturned end of the wave mould to support the overhanging glass if the full curve is required.

 The glass on the high part of the mould will not stretch at the low temperature, but gradually conform to the shape of the mould.

 I have much more information on this and other things in the eBook:

Low Temperature Kilnforming; an Evidence-Based Approach to Scheduling


Wednesday 26 January 2022

Trapped Glass


Glass can be trapped in or on moulds in various circumstances. These usually relate to the relative expansion and contraction characteristics of the glass and mould.  The two materials most usually concerned are steel and ceramic.

Releasing glass from steel


Frequently when using steel as dams around glass, the glass becomes stuck inside the steel.  The cause of this is the greater contraction of the steel than the glass.  On cooling, the steel compresses the glass tightly. 

Another circumstance where glass is trapped is while slumping glass into a steel vessel.  If the draft of the sides of the vessel is steep, the glass cannot slip upwards as the steel contracts against the glass, so trapping the glass.

Most successful attempts to remove the glass from the steel are like removing a metal lid from a glass jar.  Heat the metal and try to keep the glass cool.  You can run hot water on the steel while keeping the glass cool.  This will most often allow the glass to be pulled from the steel surround, assuming there was a glass separator applied to the steel.

Putting the whole assembly in the freezer will only increase the grip of the steel as it will contract even more than the glass.


Prevention of trapping the glass involves placing a cushion between the steel and glass.  This is usually 3mm fibre paper.  Sometimes this has a layer of Thinfire added to give a smoother edge to the glass.  Other times, the fibre paper is coated with boron nitride.  There is no need to use both Thinfire and boron nitride, of course.


Releasing glass from ceramic


The difficulty of glass trapping ceramic occurs during draping.  Ceramic expands and contracts less than glass.  This means that the glass will trap a kiln washed ceramic shape with a steep draft.  The glass on cooling, contracts more than the ceramic which means the glass is tightly encasing the ceramic. 

A ceramic draping mould from which  it may be difficult to remove the glass.

Most successful attempts to remove the glass from the ceramic form include either gently warming the glass or freezing the whole assembly.  You could place the glass in a bath of warm water.  This encourages the glass to expand, but does not heat the ceramic.  This usually provides enough gap to ease the glass from the ceramic form.

The other approach is to put the whole into the freezer.  This is utilising the greater contraction of the ceramic to release the glass. This is less immediate than the warming of the glass, of course.

Prevention of trapping glass on ceramic with shallow drafts involves covering the form with 3mm fibre paper to provide a cushion during the contraction.  The fibre paper may need to be attached to the form by binding with high temperature wire, as glues will not survive the heat of draping.

Further information is available in the ebook: Low Temperature Kiln Forming.

Wednesday 19 January 2022

Tack Fusing Difficulties

Many novice kilnformers tend toward the use of tack rather than full fusing in their work.  This is a bit perplexing, as tack fusing is more difficult than full fusing to complete successfully.


Why is tack fusing more difficult? 
The single most important reason is that the pieces of glass on top of the base shade the heat from the area underneath. And they do that unevenly over the base glass. Additionally, the tacked pieces are not fully incorporated into the base and so tend to behave as separate pieces, especially on angular tack fusing.  Both these factors require greater thought and care in scheduling.

Evidence
The evidence for the statement that tack fusing is more difficult than full comes from several areas.

There is a lot of evidence on social media of failed tack fused projects.  It may be argued that it is natural for the difficulties to be highlighted on the self-help groups. And the successes are not so widely shared.  There are other pieces of evidence.

Breaks of base sheet while the overlaying pieces remain intact.  

 This is a result of the overlaying glass shading the heat from the lower layers.  Some writers describe the effect as glass “seeing” heat.  The glass reacts more quickly to radiant heat than to transmitted heat from the air.  As a result, the glass exposed to the radiant heat absorbs heat more easily than the shaded areas.  This leads to uneven heating during the rise in temperature and a build-up of stress which frequently causes breaks from expansion differences in the base glass.

Breaks along the borders of the thick and thin areas of pieces are common in tack fusing.  

 This usually occurs during the cooling.  Thick and thin areas take different amounts of time to release the stored heat.  As in heat up, if the temperature differential is too great, the glass will break.  Research by Bullseye has shown that significant stress can be built up by temperature differences greater than 5°C across the piece.  What temperature difference is required to develop enough stress to cause a piece to break is unknown, although it does relate to the degree of variation in thicknesses and areas of base covered.

Scheduling as for thicker pieces.

 Further evidence is given by several sources stating that tack fusing projects need to be scheduled as though between 1.5 and 2.5 times the actual thickness to be successful.  This need for more careful firing is supported by the success of this strategy which increases the heat work as applied to tack fusing.

Further information is available in the ebook Low Temperature Kiln Forming.


Tack fusing requires more care than flat fusing because of heat shading and thickness differences.  There are some scheduling approaches that can minimise the risks of breakage.

Wednesday 29 December 2021

Mineral Wool Fibres


Refractory Fibres


The general name that includes refractory fibre is mineral wool. It is any fibrous material formed by spinning or drawing molten minerals and ceramics.  These are used as thermal insulation, filtering, soundproofing and as a hydroponic medium, in addition to high temperature insulation as in kilnforming and furnaces.

The initial manufacture of mineral wool was in Wales in the mid-19th century, but the process was so dangerous that it was abandoned. The first commercial production was in 1870’s Germany, manufactured by blowing air through a fall of molten slag metal.  At the end of the century an American developed a technique to turn molten rock into fibres, so initiating the rock wool industry.  The high temperature versions were developed during the second world war, but not commercially available until the 1950’s.

Current manufacturing involves a flow of molten minerals (at ca 1600°C) through which air is forced.  This creates fibres of amorphous structure that can be compressed together without binders.  More advanced production rapidly spins molten minerals similar to the production of candy floss, or cotton candy. This results in a mass of fine, intertwined fibres with a typical diameter of 2µm to 6µm (microns).


Credit: Knauf.com


High-Temperature Mineral Wool


High temperature mineral wools are rated for about 650°C to 1600°C and are made in similar ways to the lower temperature versions.  However, they are more expensive and so are used in refractory circumstances including kiln forming.

The three main types of HTIWs include:

Low Bio-persistent (LBP) Wool, including Alkaline Earth Silicate (AES) wools and others:

Alkaline earth silicate (AES) wool
       Calcium magnesium silicate wool
       Calcium silicate wool
       Magnesium silicate wool
Alkali metal silicate (AMS) wool
       Potassium alumino silicate wool

Alumino Silicate Wool (ASW), also known as Refractory Ceramic Fibres (RCF)
       Aluminium silicate wool
       Aluminium zirconium silicate wool

Polycrystalline Wool (PCW)
       Aluminium oxide wool
       Mullite wool

The main forms that kilnformers are interested in are blanket, paper and board.  The paper and board normally contain binders ranging from latex to cellulose. There are other forms: bulk fibres, modules or blocks formed ready for installation, vacuum formed shapes, cement mastics, textiles, yarns and ropes.


A brief description of these kinds of refractory mineral wools are:

Alkaline earth silicate wool (AES)

AES wool consists of amorphous glass fibres that are produced by melting a combination of calcium, magnesium oxides and silicone dioxide.  Products made from AES are generally used in equipment that continuously operates and in domestic appliances. AES wool has the advantage of being bio-soluble—it dissolves in bodily fluids within a few weeks and is quickly cleared from the lungs and so has been excluded from carcinogenic classifications. It is generally rated up to 1200°C.

Alumino silicate wool (ASW)

This is also known as refractory ceramic fibre (RCF), again consisting of amorphous fibres produced by melting minerals and blowing air across the flow.  In this case, a combination of aluminium oxide and silicon dioxide.  It has a low thermal conductivity, and good resistance to chemicals. Alumino silicate wool is generally used at temperatures from 600°C to 1300°C  for intermittent operation, making it good for kilnforming. 

This was classified in Europe as a carcinogen category 2 – “Substances that should be regarded as if they are carcinogenic to humans” under the Dangerous Substances Directive in 1997. This was translated under CLP Regulation into a carcinogen category 1B “Known or presumed human carcinogen; presumed to have carcinogenic potential for humans, classification is largely based on animal evidence”.

Some of the trade names used are:
  • Kaowool®, a high-temperature mineral wool made from kaolin. It was one of the first types of high-temperature mineral wool and continues to be used. It can withstand temperatures to 1250°C. 
  • Cerablanket®, is a spun blanket manufactured from a high purity blend of alumina-silica and is classified up to 1315°C.
  • Cerachem® and Cerachrome® provide chemical stability and strength and have acoustic as well as thermal insulation characteristics. They are classified to 1426°C.

There are bio-soluble fibres produced under trade names such as Superwool® with temperature ratings of 1300°C and 1450°C.  Superwool® fibres are exonerated from carcinogen classification within Europe and not classified as hazardous by IARC or under any national regulations throughout the world.

Polycrystalline wool (PCW)

Polycrystalline wool was commercialised in the 1970’s and consists of fibres that contain more than 70% aluminum oxide. It is produced by sol–gel method from aqueous spinning solutions. The water-soluble green fibres obtained as a precursor are crystallized by means of heat treatment. This is produced in small quantities for specialised applications.  Its characteristics are that the fibres are of regular defined dimensions, it is chemically and thermally stable, with low shrinkage and high tensile strength, all with less dust produced in handling.  It is a more expensive process than producing RCW papers and blankets.

The polycrystalline wool is generally used at temperatures above 1300°C.  One trade name is Denka Alcen with a temperature rating up to 1600°C. Denka blankets are more resistant to acid and alkaline solutions than conventional alumino-silicate fibre blankets and have good thermal insulation characteristics.

Other than kilnforming, applications are in the ceramics, metals, petrochemicals, aerospace and automotive industry sectors. Typical PCW applications include use as support mats in catalytic converters and diesel particulate filters to reduce exhaust emissions, and as insulation in industrial high temperature furnaces for energy conservation, particularly in high temperature and/or chemically aggressive environments.

Credit: Alibaba.com


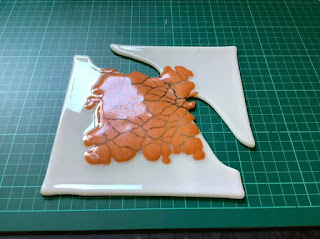
Kilnforming Refractory Papers

There are two fibre papers widely used in kilnforming: Papyros and Thinfire.  These are special cases of the RCF papers and deserve particular attention, although they are subsets of the previously described RCF wools.

Papyros
This is a fibre paper similar in thickness to cartridge paper.  It consists of  aluminium hydroxide, hydrated magnesium silicate (hazard classification: irritant), alumina borosilicate glass (hazard classification: irritant), wood pulp and resin (both binders).  None of the materials used in the composition of Papyros are classified as a possible carcinogenic substance.  It is recommended that eye, breathing and skin protection be used when handling the fired residue to reduce any irritation.  Washing after handling the dusts is recommended.


Thinfire
This fibre paper is also like cartridge paper in thickness and has a slightly finer texture than Papyros.  Its constituents are aluminium hydroxide, glass fibre, polyvinyl alcohol, cellulose, and polyamide resin.  Only the glass fibre is classified as an irritant.  The dust can be an irritant to eyes and skin.  If either are irritated, wash with large amounts of water. It is sensible to use breathing protection while handling the fired residue.


The materials used place both these fibre papers in the AES group of refractory fibres, which are biosoluble.  The use of hydrated magnesium silicate in Papyros gives an extremely small increased health risk over Thinfire.

Credit: cdc.com

Fibre Paper – Health and Safety

Mineral wool fibres and refractory ceramic fibres have been  classified as "possibly carcinogenic to humans" (Group 2B).  In contrast, the more commonly used vitreous fibre wools produced since 2000, including insulation glass wool, stone wool, and slag wool, are considered "not classifiable as to carcinogenicity in humans" (Group 3). The International Agency for Research on Cancer (IARC) elected not to make an overall evaluation of the newly developed fibres designed to be less bio-persistent such as the alkaline earth silicate (AES) or high-alumina, low-silica (ASW) wools. 


Bio-soluble fibres are produced that do not cause damage to the human cell. These newer materials have been tested for carcinogenicity and most are found to be non-carcinogenic.

Due to the mechanical effect of fibres, mineral wool products may cause temporary skin itching. To diminish this and to avoid unnecessary exposure to mineral wool dust, information on good practices is available on the packaging of mineral wool products with pictograms or sentences. Safe Use Instruction Sheets like safety data sheets are also available from each producer.

People can be exposed to mineral wool fibres in the workplace by breathing them in, skin contact, and eye contact. … The National Institute for Occupational Safety and Health (NIOSH) has set a recommended exposure limit (REL) of 5mg/m3 total exposure and 3 fibres per cm3 over an 8-hour workday [the highest existing standard].  The equivalent European standard is set by the Registration, Evaluation, Authorisation and Restriction of Chemicals (REACH).

AES, ASW and PCW have been registered before the first EC deadline of 1 December 2010 and can, therefore, be used on the European market.
ASW/RCF is classified as carcinogen category 1B.
AES is exempted from carcinogen classification based on short-term in vitro study result.
PCW wools are not classified; self-classification led to the conclusion that PCW are not hazardous.

Based on the total experience with humans and the findings of scientific research (animals, cells), it can be concluded that elongated dust particles of every type have in principle the potential to cause the development of tumours providing they are sufficiently long, thin and bio-persistent. According to scientific findings inorganic fibre dust particles with a length-to-diameter ratio exceeding 3:1, a length longer than 5μm (0.005 mm) and a diameter smaller than 3μm (WHO-Fibres) are considered health-critical.

High-temperature mineral wool is processed into products containing fibres with different diameters and lengths. During handling of high-temperature mineral wool products, fibrous dusts can be emitted. These can include fibres complying with the WHO definition.

There is concern about the silica content of refractory fibres.  The silica that is of concern is of a crystalline structure.  The method of production does not produce crystalline silica. The process used to create the fibres is:
Amorphous high-temperature mineral wool [fibres] (AES and ASW) are produced from a molten glass [or mineral] stream which is aerosolised by a jet of high-pressure air or by letting the stream impinge onto spinning wheels. The droplets are drawn into fibres; the mass of both fibres and remaining droplets cool very rapidly so that no crystalline phases may form.

The potential effects on health of the materials in refractory fibres have been tested and found to be non-hazardous.

In after-use high-temperature mineral wool crystalline silica crystals are embedded in a matrix composed of other crystals and glasses. Experimental results on the biological activity of after-use high-temperature mineral wool have not demonstrated any hazardous activity that could be related to any form of silica they may contain.

Thus, no crystalline silica is produced and the risk of silicosis from refractory fibres does not exist.  Certain sizes of any fibre present other risks.

Risks


Consideration of risks and therefore precautions, relate to three factors: Dimension, Durability and Dose.

Dimension

Fiber dimensions are critical, as only fibres of a certain size can reach the lungs…. Mineral fibres with a diameter greater than 3 microns are, in humans, “non respirable”. … Even below this respirability threshold only the finest fibres may be deposited into the gas exchange region of the lungs.

While respirability is determined by fiber diameter, fiber length is also important. Short fibres behave as if they are compact particles and can be cleared by the normal mechanisms which involve cells called macrophages. However long fibres [greater than 5 microns] frustrate this mechanism and, for some still unknown reason, are more biologically active.

Durability

Durability in this context describes the ability of a material to persist in the body and so is more accurately called “bio-persistence”. …  Fibres can dissolve or they may break into shorter pieces which can then be removed to the airways or through the lymphatic system. The rate of removal of different fibres is typically measured … and expressed as their “half-life” – that is the time it takes to reduce the number of fibres in the lungs by 50%.

Dose

The [dose] is the result of [dimension and durability] and is often referred to as “lung burden”.  With chronic exposures the lung burden is the result of … [continued exposure] and … bio-persistence. If the exposure is high enough and clearance slow then a sufficiently large dose will accumulate for adverse health effects to result.


The scientific knowledge about fiber toxicity allows comparison of fibres in terms of their toxicological potency and has also driven several initiatives to reduce potential risks in the workplace.  This has led to development of manufacturing processes for thicker fibres, although this is limited by the lesser thermal efficiency of thick fibres.  Thicker fibres are also more likely to cause skin irritation.  A lot of effort has been put into the development of bio-soluble fibres such as the AES wools which are increasingly available.

Recent research has shown a gradation of increasing bio-persistence is in the order of – least to greater –
AES (Calcium Silicate);
AES (Magnesium Silicate);
PCW;
RCF. 
This same research shows that fibres longer than 20 microns cannot be easily cleared from the lungs.  Breathing protection must filter out all particles larger than 20 microns. 

The WHO research shows that lung health effects can be produced by particles down to 3 microns. This means that filters used must be able to eliminate particles larger than 3 microns to provide effective protection against high exposure.


Handling practices

Sensible precautions when handling refractory fibre papers are eye, breathing and skin protection.  This can be safety goggles, dust mask (see filter size above), and long gloves and long sleeves.  Higher levels of protection can be used, but are not indicated as necessary by the research and classifications of health and safety organisations in the western world.

During clean-up the fibres should be dampened before any brushing of the residue, or vacuumed with HEPA filters to reduce the movement of fibres into the air.  You should also wash exposed skin after handling any of the dust.  Clothes should also be cleaned and washed frequently. 

Do not smoke, eat or drink in areas where the fibre dust is present.


More detailed information is available in the e-book: Low Temperature Kilnforming.

The understanding of the composition and manufacture of refractory fibre papers and blankets should help assess the small risks of using these materials, and the precautions that should be taken in handling both the un-fired and fired forms.