Showing posts with label Glass Separators. Show all posts

Wednesday, 22 July 2020

Crazing


Crazing appears as the multiple cracks similar to what is seen on ceramic glazes.  These occur when there is a great deal of incompatibility between the glaze and the clay body.  This can also be seen in glass.


Crazing as seen on a ceramic object


I have see crazing of glass in two circumstances.  It happens with severe devitrification, to a maximum extent of crumbling under light pressure.  This usually happens with glass not formulated for fusing, and especially on opalescent glass.


The more common occurrence is where the glass has stuck to the supporting structure.  This is frequently the case where the separator has not been sufficient to keep the glass from sticking to the shelf.  This will happen on kiln washed shelves when the coating of the separator has not been even, leaving areas with bare or very thin areas.

The standard of mixing kiln wash in the ratio of 1:5 parts by volume of powder to water is important.  The application should be with a wide soft brush such as a hake brush.  The kiln wash should be painted on in four coats, one in each direction of up, down, and the two diagonals.  A well coated shelf should have an even appearance of the coating.  Only an even film of separator is required to keep the glass from sticking to the shelf, mould or other kiln furniture.


Wednesday, 13 November 2019

Separators sticking to Opalescent glass


It is worth thinking about how fast you fire pieces, especially where your current working temperature and rates of advance are giving difficulties.  One common difficulty is where opalescent glass picks up kiln wash or fibre paper and partially incorporates it, requiring a lot of work to remove it. 


At higher temperatures opalescent glass seems to incorporate some of the separator, especially near the edges.  It does not seem to matter whether kiln wash or fibre papers are used – there is frequently a little pick up.

The difficulty is achieving the profile you want without the higher temperatures.  This is where heat work concepts can assist.  Glass reacts to the heat applied, rather than simply the temperature.  Heat is a combination of time and temperature.  Rapid rates of advance require higher temperatures than slow rates of advance to achieve the same effect.

These facts should make you consider slower rates of advance to achieve the work at a lower temperature and so pick up less of the separators.  Perhaps you could consider a rate of advance of 150°C or 200°C instead of 330°C once you have passed the bubble squeeze temperature.  This would allow you to have a full fuse at ca. 800°C or even a little lower instead of 816°C (for Bullseye).  You will need to observe to find what is the appropriate temperature for the effect you want.  This will apply both with different rates of advance and with different lay-ups.


Wednesday, 30 October 2019

Mould Cleaning

There are a variety of moulds available to kilnformers – slumping/draping, texture and casting are currently popular ones.  Each has a slightly different maintenance regime.

Slumping and Draping
Slumping and Draping moulds are the easiest to maintain, as they are not taken to high temperatures. Normally one application of kiln wash will last very many firings.  The kiln wash needs to be renewed when bare spots appear on the mould.  Some people immerse their moulds in water to wash off the old kiln wash.  This is excessive and requires a long slow drying time for ceramic before you can re-apply the separator.  

Normally, you only need light abrasion such as with a green washing up scrubby to clean off the old kiln wash. You can also use a nylon bristled brush to take off the old kiln wash and prepare it for a new application.


If you are using boron nitride on your slumping or draping mould, you need to brush off the old separator each time you fire the mould according to the manufacturers, although many so not. Certainly renew the boron nitride surface when any defects appear in the surface to ensure the glass does not stick.

Texture Moulds
Texture moulds require cleaning before applying any additional separator to avoid blurring or obscuring the textures of the mould.  It is best to use a kiln wash that does not have a lot of china clay in it, such as Primo, to allow easy brushing of the separator off.  If you use a kiln wash with little or no china clay, you will need to clean and re-apply each time you prepare to fire the mould.  Boron nitride works well for texture moulds, but also needs to be carefully brushed off the mould before re-applying the separator in preparation for the next firing.  This is both to avoid blurring the texture and to ensure there is sufficient separator to avoid sticking.

Casting
Casting moulds that are intended to be re-used multiple times are best coated with boron nitride.  The boron nitride should be lightly brushed off after each use to ensure the detail is retained, and then re-coated.  A nylon brush is good for this.
The materials and purposes of moulds have an effect on the separators used and the methods of maintaining them clean.


Revised 5.1.25

Saturday, 22 June 2019

Applying kiln wash

Applying kiln wash to shelves and moulds have the same requirements.


The kiln wash must be applied evenly

You can use a soft bristled brush like a hake and trail on the kiln wash in four directions – top to bottom, side to side, and diagonally left to right and right to left.


The pigmented kiln wash turns white when fired


You can also spray the kiln wash onto the shelf or mould. This can provide an even coating, but you must be careful to avoid puddling the kiln wash. Pause for a few seconds after each coat to allow the water to be absorbed before applying the next coat. Apply until the shelf or mould surface is not obvious through the kiln wash. There is no need to dry between coats.  The best coverage is achieved by applying all four coats in different directions at the same time.

You can use a sponge to apply to flat surfaces. A light touch is required and it needs to be apply in various directions as with the brush.    

Metal moulds are a special case. The water carrying the kiln wash will simply bead up or run off the metal. First clean the metal to get rid of oils and dirt – sandblasting will do well. Then you need to heat the metal to about 125C – 150C (i.e., above boiling) and brush or spray the kiln wash onto the mould, one coat at a time. Return the mould to the heat source and then apply another coat of kiln wash. Do this until you have an even layer of kiln wash. Be careful not to put so much liquid on the mould that it begins to run. If this happens, you really need to start again.  Also if the metal is too hot, the water will boil off, leaving bare patches.


Apply the kiln wash thinly

You need enough kiln wash to separate the glass from the carrying surface. Any additional kiln wash will not make for a better separation, but may begin to flake off the surface and adhere to the glass more or less tightly.

The usual recommendation for brushing is one part kiln wash to five parts water. I recommend ten parts water to one part kiln wash if you are spraying the kiln wash. If you have a really absorbent surface, such as a vermiculite mould, you can reduce the water to two and a half parts water to one kiln wash. All these measurements are by volume.


The kiln wash finish must be smooth

There are several ways to smooth the surface.

You can rub your hand over the shelf or mould to remove high spots/streaks. You need to remove the dust before using though.

You can smooth the surface using a rolled up nylon stocking. This relatively open weave allows the powder to be captured in the material. It works well on irregular surfaces like a mould. Again you must clear off any remaining dust.

Another way is applicable to flat surfaces. After applying the kiln wash, but before it has dried, make sure the surface is level. Then brush or spray on a layer of hot water. This both puddles and evaporates quickly, leaving a smooth surface on thinly applied kiln wash. If the kiln wash is thick, the drying process will leave cracks as in a dried-out river bed.


Wednesday, 20 March 2019

Kiln wash


When considering how many layers of kiln wash to put on shelves, especially for melts, combing and other high temperature operations, you need to remember what the kiln wash is doing – what its purpose is. 

Kiln and batt wash, shelf and mould primer are all different terms for the same thing – a separator between the glass and the kiln furniture or mould.  The amount needed is enough to completely cover the shelf. This is usually 4 coats - one top to bottom, one side to side, one each diagonal.  If you are spraying the kiln wash, use a coloured kiln wash to help ensure coverage. The shelf is adequately covered when the shelf is a uniform colour although a sense of the original remains while the kiln wash is wet.  Additional coats do not provide additional protection. The disadvantage of thick coatings of kiln wash is that the excess tends to stick to the glass as it is lifted from the shelf or mould.

This post gives guidance about the methods for application of kiln wash.


Saturday, 22 December 2018

Removing Kiln Wash from Shelves

There are at least three ways to remove kiln/batt wash from mullite kiln shelves.

One quick way is to use a broad wallpaper scraper held at a very acute angle to the shelf. This rapidly removes the separator. One down side to this method is that any uneven pressure can put a gouge into the surface of the shelf.


So a more gentle way to remove the wash is to use a drywall/plaster board sanding sheet or other open weave sanding material. This allows the powdered wash to come through the sanding material rather than clog it up. The disadvantage to this is that it takes longer to remove the wash, although it does leave a very smooth shelf after many sandings.


A third way is to wash off the kiln wash. This is relatively quick, but it gets the shelf wet and requires a longer period before the shelf becomes dry. You can, of course put the next application of kiln wash on as soon as the shelf is clean. They both can dry off at the same time.

Power tools used to clean kiln wash from the shelves can induce low points in the shelf which will promote bubbles during fusing.  It is recommended to avoid power tools in removing kiln wash.

Wednesday, 5 December 2018

Slip cast moulds

Hard spots in some moulds are the result of the method of creating the moulds. Most of the ceramic moulds we use in kilnforming are slip cast.


This diagram shows the main stages of slip casting

Slip casting is a way of quickly producing multiples from a mould.  The original shape is surrounded by a one - or multiple - part plaster mould.  This mould is used to contain the clay slip which is poured in.  


The plaster absorbs water from the slip, stiffening the clay in contact with the plaster. After a defined time, the remaining slip is poured out of the mould.  The clay remains in the mould a short time until it begins to contract from the plaster mould and is described as leather hard.  


It is then de-moulded, trimmed and cleaned before it is further dried.  When appropriately dry, it is fired.


Some moulds we receive show a spot where the kiln wash does not cover the surface in the same way as the rest.  This is a result of the method of pouring the slip into the mould.  Slip that is hand poured does not fall in the same place for long.  But industrially poured slip often falls in the same place for the whole of the pour.  This creates a hard spot - an area where the slip is more compacted than the rest of the object.


This hard spot does not affect the appearance or performance of the object.  However, it does not absorb the water from the kiln wash as well as the other areas. And this is when the hard spot becomes apparent. It will still have enough separator to keep the glass from sticking, although visually it appears bare. If concerned, you can coat that area more than the rest after the kiln wash has dried a little.  You need to be careful that you do not introduce an unevenness into the kiln washed surface, as that might appear on the slumped surface of the glass.


Wednesday, 11 July 2018

Smooth Kiln Wash on Shelves

There are a number of ways of applying separators to the kiln shelf.
These go by a variety of names - kiln wash, shelf primer, batt wash, etc. - all are separators to keep the glass from sticking to the shelf. They are all combinations of alumina hydrate and china clay (or kaolin or EPK) in various amounts.  The china clay provides a high temperature binder for the alumina hydrate which does not stick to glass.

These are some examples of glass separators.  The Primo Primer has very little china clay, and is easy to remove.  It is particularly good for small casting moulds.


The object in applying the separator is to achieve a smooth surface a possible. Remember there will always be some texture because of the particle size of the wash.  For the smoothest surface, use the finest powder you can find.  You can, if you want to spend the time and effort, put the powder into a rock tumbler with ceramic balls to get an even finer powder.  Avoid shelf primer that is intended for ceramics, as it is coarser than that sold as a separator for glass.

It also is important to prepare the mixture some hours before application to ensure all the particles of the powder are wetted.  Immediate use often leads to a gritty surface.


There are several methods for applying the kiln wash to the shelf.  The two I use are spraying and brushing.  Which I use depends on circumstances - spraying requires more set up time.


Spraying the separator onto the shelves can give an even coating without brush marks, runs or ridges.  In this example a mould is being sprayed.  To ensure an even covering on a shelf, it should be horizontal and leveled so the kiln wash is evenly distributed.  Numerous light passes with the sprayer is best, as in air brushing.


Applying the kiln wash with a very soft brush such as a hake brush in a variety of directions will ensure full coverage. 


The brush should lightly touch the shelf and provide a number of thin layers.  Applying in four directions - horizontal, vertical, and the two diagonals will ensure full even coverage. There may be some residual brush marks.


To reduce the application marks further, you can brush or spray hot water over the still damp kiln wash. This helps to remove brush marks or the stippling that often comes from spraying and brushing.  It is important that the shelf is perfectly level for this operation.


Another way to reduce the texture after the shelf primer dries is to lightly polish the kiln wash with a ball of old nylons or rub a flat piece of paper with the palm of your hand over the shelf.  Be sure to remove the dust that may be left behind from this polishing.


Boron Nitride


Another separator that has become popular in spite of its expense is boron nitride, often referred to by the trade name Zyp.  This is a high temperature lubricant for industrial kiln operations that has been adapted for the generally lower glass forming temperatures.  This is not suitable for kiln shelves, as it completely seals the porous surface of the shelf.  It is difficult to go back to the cheaper kiln wash separator as the water of the kiln wash solution will not be absorbed into the shelf, leaving a patchy coverage of the kiln wash.  Although both separators should be renewed after each firing (above low temperature tack fusing) the boron nitride is much more expensive and cannot provide a smoother surface than the shelf already has.  My recommendation is that boron nitride use should be confined to moulds or other surfaces where the glass may slide or move in the forming process.

Sunday, 3 June 2018

Kiln Wash

Kiln forming techniques require separators between the glass and the shelf or mould on which it rests during the heating process. These separators have different generic names – kiln wash and batt wash are two.

There are a number of brands of kiln wash. All of them contain two main ingredients – alumina hydrate (sometimes called slaked alumina) and kaolin (also called china clay). Different producers use these ingredients in various proportions. 

A number of makes also include a colourant that changes when fired above certain temperatures to indicate the wash has been fired.  It also distinguishes between the unfired and the already fired kiln washed shelves.

An important thing to remember is that the kaolin changes its composition once it is fired over 600C/1113F. This change of composition is completed by 900C/1620F.  The change is progressive.  It is so slow that slumping and draping moulds coated with kiln wash will last indefinitely. However this change is great enough by 770C/1419F that the kiln wash sticks to the glass on the next firing. Thus, it is essential to change the kiln wash after every firing that reaches tack fusing temperatures or higher.

It is possible to apply a fresh coat of kiln wash over the old one to save time. However, as soon as the kiln wash flakes you must scrape off all the old kiln wash and apply a new coat to the bare shelf or mould.

Some makers use much less of the binder (china clay) than others which makes them better for the popular casting moulds than those for shelves and slumping moulds as they can be brushed away without abrasion.


In addition, boron nitride is a suitable release from moulds.  It is very stable at reltively high temperatures and so can provide a smooth, "slippery" separator between the glass and its supports, whether shelves, moulds or kiln furniture.  It does seal porous surfaces, meaning that air cannot move through the treated surfaces.  It has to be removed with abrasion and so thought must be given to which surfaces it is applied.

Tuesday, 24 April 2018

Thinfire* and Devitrification


There are reports that Thinfire causes devitrification by rising over the edges of the piece.  There as many saying they have no difficulties with the Thinfire curling.  This indicates there are several factors that may be at work.

If the Thinfire curls over the edge of the glass while firing, it will deposit a fine powder on the edge and perimeter of the piece.  This gives an ideal condition for devitrification to form.

Bullseye recommends placing dams or other kiln furniture on the edges of the paper to resist any tendency for the paper to curl.  Of course, if the paper is put upside down, it is much more likely to rise over the edge.  The smoothest surface should face upwards. Now that Bullseye prints their logo on the bottom, this is unlikely to be a problem.

Cutting the paper to the size of the piece is initially an attractive idea.  However, it does not account for the expansion beyond the initial footprint that glass goes through while heating to the working temperature, and before it contracts to its final size.  The Thinfire must be cut larger than the piece. The amount depends on the thickness of the piece.  6mm larger may be adequate for a 6mm thick piece.

Bullseye does not recommend using Thinfire under multiple small pieces of glass because the paper can shrink and move, disrupting the glass placement on the kiln shelf.  Instead using kiln wash as the separator may be better in these circumstances.

There are other things that can affect the deposit of the separator powder from the Thinfire onto the glass.

Venting – It seems to be good practice to open the peep holes or leave the door/lid slightly ajar during the heat up.  These should be carefully closed once the smell of the binder burning out disappears.  This is usually around 500°C.  The idea here is that the combustion products from the binders are allowed out of the kiln without settling on the glass.  I do not find this necessary, but many do, so it is worthwhile trying it out.  When the smell of the burnout of the binders ceases close the lid slowly and place the bungs gently into the peep holes to avoid disturbing any dust within the kiln.

Opening the kiln or ports - Opening or closing the kiln above ca. 500°C, if done quickly, will create a draft that will distribute the powder around the kiln.  Some of this will land on the surface of the glass. Other parts of the Thinfire will be moved up onto the edges of the piece.  This dust and the pieces of Thinfire will create nucleation points for devitrification.  Always open or close any part of the kiln slowly when there are powders or anything else which can be disturbed by a gentle waft of air.

Over firing - Another element that can bring Thinfire onto your pieces are a too hot a firing.  During high temperature firings, the glass will expand and thin more than usual.  During the cooling phase, the glass will draw back to being 6-7mm thick. This means the glass will have expanded over the Thinfire and drawn some of it back onto the edges as it thickens and retreats.  The solution for this is to reduce the top temperature and possibly lengthen the soak time, but do not do both at the same time.  First see what a lower temperature with a 10-minute soak will do.

Of course, if you are not having problems with Thinfire or Papyros, continue your practice as normal.


*I have used the term “Thinfire” almost exclusively throughout, but remember all these notes apply to Papyros too.

Wednesday, 7 February 2018

Needling in Bottle Moulds

Sometimes people experience sharp, needle-like points on the bottle after it is slumped.

Causes

As the bottle expands and softens, it conforms to the surface of the mould.  When the cooling begins, some parts of the glass are trapped in the tiny pits of unevenness that always exist in the mould or in the separator.  As the glass retreats, the glass is stretched until it breaks off, leaving the sharp needles.

Prevention

Remedies relate to separators and temperatures.  This of course, assumes you already have a good coating of kiln wash or similar separator on the mould.

Separators

These additional separators can be fibre paper or powders.  Thinfire laid on the bottom of a bottle mould can provide additional separation between the bottle and the glass.  This works, because with a slow rate of advance, the Thinfire will have turned to powder before the bottle begins to slump. This powder will not interfere with any designs on the mould.  Papyros will work on smooth moulds, but not so well with textured bottle moulds, because of its more fibrous nature.

This use of powered paper indicates that you could use a cheaper solution.  Just dust a fine film of kiln wash on the mould.  I do this by placing the powdered kiln wash in a sock and shake the sock above the mould.  This will allow an almost invisible layer of fine powder to fall onto the mould.  This is enough to provide an additional layer of separation between the glass and the mould.

Temperature

It is quite common for people to slump bottles at tack fusing temperatures to do both the flattening and the slumping at one firing. This is quite hard on the mould and softens the glass enough to promote the needling. 

It may be better to use two firings – one to flatten using tack fusing temperatures, and one to form the bottle at slumping temperature.  This lower temperature will avoid the needling, as the bottle will not soften enough to form the needles during the slumping. The reason many people avoid this is because the bottles tend to devitrify on second firings.  If you do this two-stage slumping, you will need to apply a devitrification solution to the upper surface of the flat bottle to try to prevent it.


You can take a different solution to the two-stage firing.  As lower temperatures reduce the possibility of needling, you can simply soak for a longer time at the slumping temperature than a normal one stage tack and slump.  You will need to peek in at intervals to determine when the slump is finished, of course.  After a few firings though, you will get a good idea of the amount of time required to complete the slump. An additional advantage is that at the lower temperatures, devitrification is less likely.

Wednesday, 11 October 2017

Separator Cost Comparisons


Many people are concerned about the cost of kiln forming, but use fibre paper rather than kiln wash or powders, although it is many times more expensive. This may be a matter of convenience.  This leads me to an exercise in comparing relative costs and benefits of various separators.

Separators are essential to keep the glass from sticking to the shelf or mould that supports the glass. There are several forms of separators –
·         papers,
·         liquids and
·         powders.

Papers
The papers include the very smooth Thinfire and Papyros papers and the rougher papers ranging from 0.5mm to 6mm.  All these contain a binder of some kind. 

·         Papyros, Thinfire
·         Refractory fibre papers - .5 to 6mm

These are mainly suitable for flat surfaces.
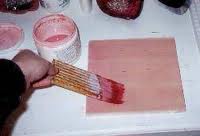
Liquid
·         Kiln wash – there is a variety. Most have kaolin - china clay - as a binder.  A few do not.  These you can just brush off the shelf or mould after firing.
·         Colloidal Boron Nitride – a popular formulation is called Zyp.

These are suitable for both flat and curved surface applications.


Powder separators include:

·         Chalk
·         Talc
·         Alumina hydrate

These have applications directly onto the shelf or mould and onto refractory separators.  If used between glass sheets as in bending, very little is required.  This is similar when applied to existing refractory papers.  As a shelf bed, much more is required.

This analysis of separators shows the first choice is about the application, as some are not useful in a given situation.  But in all cases, there are choices in what separator to use.

I used a popular UK website to obtain comparative prices for the various materials.

Papers
Papyros paper is listed at £18.46. This is enough for 5 shelves at 52 cm sq.  The per shelf cost, assuming two uses per sheet, equals £1.85.

Thinfire is listed at £10.16. This is enough for 5 shelves at 52c m square. The per shelf cost, assuming one use, equals £2.03.

Liquids
400 g Bullseye kiln wash is listed at £3.96.  This enough for about 80 shelves at 52cm sq.  The per shelf cost equals £0.05.

400g of Primo primer is give as £6.06.  This also is enough for about 80 shelves at 52cm sq.  The per shelf cost equals £0.075 (i.e., 7 and a half pence).

Boron Nitride enough for about 25 shelves at 52cm square is listed at £63.93.  The per shelf cost equals £2.56.

Powders
25kg calcium carbonate is listed at £14.61. This is a one-use material.  Applied at half a centimetre thickness, it is enough for 700 shelves at 52cm square.  The per shelf cost is £0.02.

300gms talc is listed at £2.99.  this is enough for 8 shelves.  As this is a multi-use material, assume 10 uses.  This gives a per shelf cost of £0.035.

Alumina hydrate is listed at £9.99 for 500gms. Again, this is a multi-use material, so assume 10 uses.  This gives a per shelf cost of £0.04.

Ratios of cost between the least and most expensive (given the assumptions) is as follows:
·         Chalk =1
·         Talc = 1.75
·         Alumina Hydrate = 2
·         Bullseye shelf primer = 2.5
·         Primo shelf primer = 3.75
·         Papyros fibre paper = 92.5
·         Bullseye fibre paper = 101.5
·         Boron Nitride spray = 128


This illustrates that convenience most often wins over expense, as the boron nitride, Papyros and Thinfire seem to be the most popular separators.

Wednesday, 6 September 2017

Boron Nitride

What is boron nitride? What makes it a good separator?

Boron nitride is a heat resistant refractory compound of boron and nitrogen with the chemical formula BN. It is also chemically stable at elevated temperatures.  It exists in various crystalline forms that are similar to a structured carbon lattice. The hexagonal form corresponding to graphite is the most stable and soft among BN forms.  It is the form most useful in kiln forming as a smooth release separator, especially for steel.  It is also used as a high temperature lubricant, and has a wide use in cosmetic products.

There is a cubic form that is similar to diamond (called c-BN), but softer.  It has a superior thermal and chemical stability.  There is a harder form called wurtzite, but which is rare. Neither of these is of much use in kiln forming.

Hexagonal BN
Hexagonal BN (h-BN) is the most widely used form of boron nitride. It is a good lubricant at both low and high temperatures (up to 900C, even in an oxidizing atmosphere). Another advantage of h-BN over graphite is that its lubrication properties do not require water or gas trapped between the hexagonal sheet layers. So, h-BN lubricants can be used even in vacuum, e.g. in space applications. The lubricating properties of fine-grained h-BN are used in cosmetics, paints, dental cements, and pencil leads.  In kiln forming, the high temperature lubricating properties are made use of as separator between metal, ceramic and other supporting materials for the glass.

“Hexagonal BN was first used in cosmetics around 1940 in Japan. However, because of its high price, h-BN was soon abandoned for this application. Its use was revitalized in the late 1990s with the optimization h-BN production processes, and currently h-BN is used by nearly all leading producers of cosmetic products for foundations, make-up, eye shadows, blushers, kohl pencils, lipsticks and other skincare products.”   
https://en.wikipedia.org/wiki/Boron_nitride

It has wide application in materials to give them self-lubricating properties.  Boron nitride has the properties of stabilisation of materials, reducing expansion and resistance to electrical conduction, making for wide use in plastics and electronics among a wide variety of other products.

Health and Safety
There are some health issues related to its use.  It is reported to have a weak association with the formation of fibrous material in the lungs and so result in pneumoconiosis when inhaled in quantity in particulate form.  It is best to wear a dust mask when applying and to do it outdoors, as simple ventilation will not prevent dust settlement indoors.

Tuesday, 24 January 2017

Mandrels for Screen melts


In creating screen melts, the steel or other support left in the project can leave such a degree of stress that the piece will began to fracture over time.  The use of thin stainless steel rods as used in mandrels for bead making is an alternative, as they can be pulled out.


The separator used on the mandrel can be bead release.  If you have it that will work very well. This illustration shows a bead maker coating a mandrel from a bottle of mixed bead release.


If you do not have bead release on hand, you can use kiln wash.  To give the thick coating required to easily pull the steel out you need to mix the kiln wash differently. 

The normal mix of kiln wash would be 5 parts water to one of powdered kiln wash.  As you want this to be thicker so it will stay on the mandrel, you can mix it in a 3:1 ratio.  This will be sufficiently thick to keep it running off the mandrel and be able to extract it after kiln forming.

Mandrels prepared for bead making.  In coating them for a melt, you need to have the whole length coated.

To avoid the mess of pouring the wash over the mandrel, you can fill a stringer tube with the mixture and dip the mandrel into it. You can place the end of the mandrel into a polystyrene insulation block or a bit of clay to let it dry as done by bead makers.

Once dry, you can arrange these coated mandrels in any shape of grid you choose.  Lay them across your supports whether fibre board or brick with about 25mm on the support at each end.  Lay all of one direction down first and the follow with the second, or more layers.  Place you glass on top of the grid created and fire.