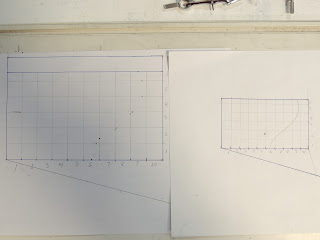
Setting out an enlargement grid can be done without the mathematics of ratios. It uses an old method of estimated interval size and angles relating to the ends of the estimation and the width of the design. This gives the method in simple images.
Start with your original design
Draw line at a shallow angle from one corner
Fix a long straight edge under that right angle
and fix it so it does not move
·
Transfer the marks on the sloped line to the
edge of the image.
This gives ten equal divisions. Adjust the
divider opening to the width of the division.
Use dividers with this opening to transfer the division
size to the other edge.
Do this on all four edges if a rectangle.
Do the same process for the enlarged size.
Estimate the size of the division. Mark that estimate on the slope as for the original design. Fix a right angle between the end of the slope marks and the corner of the design. Fix the straight edge and mark off the divisions on the enlarged size. Transfer these divisions with the new division opening of the dividers
Draw the grid.
Note where the design crosses the grid lines. Transfer marks onto the enlarged grid proportionally. To avoid confusion, mark one line in at a time.


No comments:
Post a Comment