Showing posts with label Flip and Fire. Show all posts

Wednesday, 17 January 2024

Mending a crack

 I had a piece crack due to an annealing oops. I put powder on it and put it back in at a higher temp with a much longer anneal time. It looks great on the front, but I can still see where the crack was on the back. Is it supposed to be like that? I didn't think to put powder on that side.

If you think about why you get crisp lines at the bottom of a strip construction and a more fluid appearance on the top, you will be near the answer of why a repair looks ok on top but shows the crack on the bottom. The temperature on the bottom of the glass is less than on the top at the working temperature. And less again than the air temperature which we measure. This means that the bottom part of the glass has less chance to fully recombine. This, combined with the resistance to movement of the glass along the shelf, results in evidence of the crack being maintained.

Credit: Clearwater Glass Studio


There are some things that can be done to minimise the evidence of the crack. Make sure you know why your piece cracked before you try to mend it. An annealing crack will need different treatment than a thermal shock crack or a compatibility crack. Simply refiring the piece may only make the problem worse.

One approach is to place a sheet underneath. Make sure the broken glass is well cleaned and firmly pushed together. Dams may be useful to keep the glass compressed together. Glass expands both horizontally and vertically during the fusing process. Confining the glass will transfer most of the expansion in a vertical direction. This additional (small) vertical movement may help in forming the glass seamlessly. The broken glass now being supported by an unbroken sheet will enable the movement required to “heal” the crack.


If you do not want to change the surface, you can fire upside down. To do this you need to have a loose bed of powdered kiln wash, or whiting (a form of chalk) that is thick enough to press the textured side fully into the separator. Make sure the glass is pressed together without any separator getting into the crack. One way to ensure the crack does not open is to use a small amount of cyanoacrylate (super) glue which will burn away during the firing.  Put a sheet of clear glass over and fire. Thoroughly clean the face after this repair firing. The ultimate top needs to be fire polished to remove the evidence of the crack, and if it has picked up any marks from the powder.

You could, of course, fire upside down in this way but without the additional sheet, to avoid making the piece any thicker. This may or may not work well. If the base layer is one layer thick, it may pull in at the sides and pull apart at the crack where it is one layer thick.  It is also possible that bubbles will develop in the thin parts of tack glass because of the uneven thicknesses.

A final note. Placing powder on the back will not improve things. The powder will not fully incorporate with the glass and so leave a rough surface without concealing the crack.
Avoiding breaks

To repair or not

The process of repairing

Wednesday, 21 September 2022

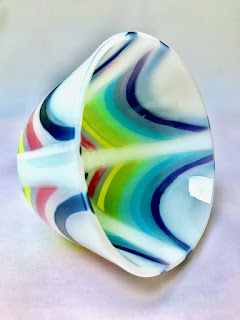
Drop Vase Design for Opalescent Glass

Credit: Missy Mac Glass on Folksy

When making a drop vase in opalescent glass, the design needs to be on the outside.  This will require ensuring the design will be on the bottom when suspended on the drop ring.

It is possible to build the whole piece as normal with the design on the top and fire it.  Then you can turn it over to make sure the design is facing downwards. 

To get a crisper design for the outside the flip and fire technique can be used.  Build from the outer layers to the inner layers.  You are building upside down. Place the design to be seen on the outside of the drop vase down on the prepared shelf first.  Follow this up by placing the inner layers in order from the most outside to the most inside layers.

These instructions rely upon firing the blank first rather than building on the drop ring.

However, you can build on the ring if you need to save one of the two long firings.  Only one modification is required.  Place a sheet of clear down first.  Assemble the design as for a flip and fire technique, i.e., outside layers first, inside layer last.  

This will require a slow heat up to ensure you have allowed enough time for the air to be squeezed from between all the layers and that all the glass at the same temperature before the drop begins.  Sprinkling a fine layer of clear powder over the clear is a good way to assist allowing the air out.  Place the design pieces down before applying the powder. 

This is not the best way to make drop vases, but it can work with care in placing the decorative pieces and applying the powder.

Wednesday, 10 November 2021

Single Layer Circle with Decorative Rim


A question arose:

If you fuse a single 20cm diameter sheet of 3mm glass to full fuse, [with a decorative rim] what happens? … Would the lack of two layers in the centre be a problem for the 6mm rule?

This layup risks trapped air and a large central bubble.  The explanation involves the combination of volume control and weight.

Volume control

The volume control relates to the single 3mm layer in the centre.  The glass will thin in the centre and thicken at the perimeter.  This leads to the risk of thinning to the degree that bubbles are created in the centre.  The edges will also draw in as the viscosity - surface tension - of the glass pulls the glass toward a 6mm thickness.

Weight

The explanation is also about weight.  The decorative rim adds weight to the outside of the piece.  This weight will “seal” the rim of the glass to the shelf, reducing the possibility of air escaping from under the central portion of the piece.  This weight effect on the rim increases the risk of a large central bubble.

Profile

Another influence on the result of the fuse is the degree of fuse.  At full fuse the viscosity of the glass is less and so resists the force of expanding air much less than when cooler. Even at rounded tack fuse, the glass will be unable to resist the formation of bubbles. As the glass thins and viscosity decreases, any air at all will cause a bubble.

Changes for the future

Avoidance of bubbles in this piece relate to design, scheduling and technique.

Design

It is possible to design a piece of this nature to avoid the volume control issue.  The base piece could have a smaller circle or rectangle centralised on top inside the proposed perimeter.  The rim can then have the decorative elements placed.  If they are spaced widely, frit can be used to fill significant gaps.  The piece can then be placed in the kiln for a full fuse.

Scheduling

You can also fire the piece as originally described very slowly to a low temperature.  This uses the concept of heat work. By applying the heat over a long period, you can achieve the same effect as would be achieved by a faster rate of advance to a higher temperature. 

There are at least two ways to increase the heat work.  You can use a very slow rate of advance to a point slightly above the softening point of the glass.  This will be the lower end of the slumping temperature range of your glass.  The soak may be for hours.  You will need to observe when the effect you want is achieved.

You also can choose the same lower slumping temperature and reach it in your standard fashion.  This will require an even longer soak time to achieve the same result.

In both these low firing approaches, you will need to observe to determine when the piece is finished.

Technique

The “flip and fire” technique may also work on the single layer with an added rim.  To do this you build the piece upside down on the shelf.  It helps to draw an outline of design on Thinfire, or Papyros.  Place the decorative elements and cap them with the clear.  Take the whole to a rounded tack fuse.  When cool, clean well and fire to a tack fuse again.  This will give something less than a full fuse, but it will be more than a tack, as the heat work is cumulative.

Further information is available in the ebook Low Temperature Kiln Forming.

Summary

A single layer piece with a decorative rim is most likely to produce bubbles in the centre.  There are some ways to overcome this: design, scheduling, and technique. Design is the most likely to be successful.

Wednesday, 20 May 2020

Pin holes in melts


Pin holes in screen and pot melts are the result of very small bubbles rising to the surface.  These bubbles are sometimes within the glass melted, but more often come from small amounts of air trapped within the flowing glass.  These are perceived to be unsightly, or make it impractical to make a functional piece from the melt.

There are ways to minimise bubble formation or to deal with the formed bubbles.

Bubble Formation
In pot and screen melts, the glass spirals as it touches down onto the shelf. This spiralling action can trap small amounts of air as each successive spiral forms beside the previous one. Efforts at prevention of tiny bubbles in the final piece need to concentrate on this fact.

A preliminary element in bubble prevention is to have a long bubble squeeze to allow the glass to settle in the pot or on the screen so that the rest of the process can proceed with a minimum amount of air trapped within the flowing glass.

Two-Stage Drop
In some cases. it is possible to have the glass flow from the pot onto an angled shelf where the spiralling glass has to flow from the initial touch down to the edge and then flow onto the shelf.  This allows any tiny bubbles initially trapped to escape before the final drop onto the shelf.  This provides two mixing processes and means that a lot of clear glass needs to be included to avoid a complete mix of the colours.  It requires careful selection of the original colours to avoid a brown or black result.  It also requires a big kiln with sufficient height for a two stage drop.

This two-stage drop is of course, not suitable for a screen melt where you wish the glass strands to remain.  Nor is it suitable when you wish to have many “pools” of colour mix in the final piece.

Where the two-stage drop is not practical or suitable other methods can be used.  These relate to scheduling, cold working the surface and re-firing the piece.

Schedules
Scheduling relates to using a soak at full fuse temperature before proceeding to the anneal.  The melt will occur at 850°C to 950°C.  You can cool as fast as possible to a full fuse temperature of about 810°C and soak there for an hour or more.  This allows the small bubbles to surface, break and heal.  Schedule the rapid cool to the annealing soak, once the high temperature soak is complete.  This will eliminate lots of the bubbles, but not all.


A sample friring schedule from bubble squeeze upwards and then down to a high temperature bubble reduction soak


Cold Work
Cold working the melt is about abrading the surface to open the bubbles that are just emerging to form a small dome at the surface.  Sand blasting is a common form, as usually kiln wash or fibre needs to be removed from the bottom of the melt, and some devitrification from the surface.  It would be possible to continue to grind the surface of the glass to eliminate the small depression in the glass caused by the now opened bubble, but this is likely to expose more bubbles that were at a slightly deeper level. What next?

As you will need to do a fire polish firing after blasting or grinding the surface, you can use a full fuse temperature to allow the surface to become plastic enough to fill the bubble holes.  Remember to schedule the firing as though the piece were at least 12mm thick.  You may find that more bubbles are exposed in addition to the ones healed at the conclusion of this second firing.

An alternative is to fire upside down.  You will have noted that there are no bubbles on the bottom of the melt.  This is because the bubbles have risen through the heated glass.  This physical fact can be used in the second firing.  Fire with the melt surface to the shelf.  It is best to have a clean and newly kiln washed shelf, or fibre paper (not Thinfire or Papyros) under the glass. Fire the glass to a full fuse or high temperature tack fuse with a significant length of soak to allow the bubbles near the original surface to move toward the interior of the glass.  After firing, the glass will need thorough cleaning before being fire polished. This should leave you with a pin hole free piece.

Conclusion
Achieving a pin hole free pot or screen melt requires several stages of coldworking and firing.  This makes melts inexpensive in materials (it is scrap of course) but expensive in time and firings.


Wednesday, 2 January 2019

Seedy base glass


Sometimes your clear base has bubbles, or as the trade calls it, seeds.  When capped with opalescent glass, in certain circumstances, these tiny bubbles can become larger and rise to the surface, pushing the opalescent aside as it rises.  This leaves a clear spot in the midst of the opalescence.

Clear cap
One way of reducing this problem, is to avoid it altogether.  This can be done by placing the clear on top of the opalescent as a cap.  This way the bubbles, if any, are rising through the clear.

Flip and Fire
If you can’t, for one reason or another, cap the piece with clear, you can fire upside down. Again, the bubbles are rising through the clear.  When the firing is complete, you can flip it over to the right side.  You will need to clean thoroughly and take to a fire polish temperature to get the shiny surface back.

Another way is to fire to a lower top temperature with a longer soak.  This means the glass can take up the profile you want without becoming so soft that the bubbles can rise through the glass.  You will need to observe to determine when the glass has the right profile, and then advance to the cooling and anneal phases.

Low and Slow
This last way of reducing the possibilities of bubbles rising through toward the top is based on the characteristics of glass.  As glass becomes hotter, it becomes less viscous and so allows the air to rise toward the top of the glass surface.  Using a low temperature gives a more viscous glass to resist the bubble movement.  The long soak at the chosen lower temperature allows the surface of the glass to take up the profile you want, as the surface is hotter than the bottom of the glass, therefore reducing the possibilities of bubbles rising.  It does take a longer soak at the top temperature, but it also reduces the marking on the bottom of the piece.

This low temperature process is using the principles of heat work.  The effect on the glass is a combination of temperature and time.  The higher the temperature, the less time is required.  The longer the time, the less heat is required.  The heat work put into the glass to achieve the effect you desire is determined by the combination of temperature and time used in firing the glass.  This principle of heat work is why you can achieve the same effect at very different temperatures, depending on the length of time a piece is soaked.

Wednesday, 6 December 2017

Flattening a Bubble


Sometimes a large shallow bubble appears from under the glass.  If it has not thinned there are some things you can do. 

First – do not drill holes.

One flattening method is to place the piece on 1mm to 3mm fibre paper and fire to a slump temperature.  The fibre paper of these thicknesses will allow air out from under the glass.  With sufficient time, the bubble will flatten.  It will take some time as the weight of the bubble is slight.

Another method is to fire upside down.  It does not matter whether the bubble is central or not. This will likely take less time than the first method, but requires an additional firing.  To use this method, place the glass upside down on the shelf with an appropriate separator underneath.  Take slowly to around 620C maximum for as long as it takes to flatten. A low slumping temperature will reduce any marking that later needs to be fire polished away.

When flat and cool, clean and fire polish.


If the bubble has become large and thin, this proposed process will not work. My suggestion for these is to avoid the effort to do an unsatisfactory repair.  Instead use it for one of the many inventive process that use unsuccessful projects.

Wednesday, 22 November 2017

Reducing a Bubble


A query about reducing a bubble appeared on the internet recently.  The bubble was from between the shelf and the single layer glass.  It was a relatively shallow dome that did not seem to have thinned the glass much.

There is quite a bit of information on reducing the incidence of bubbles. Among them are my blog posts on the subject.
Avoidance   

My view is that large thin bubbles cannot be repaired successfully.  As the bubble forms and grows, it pushes a proportion of glass to the side.  This thickens the glass at the edge of the bubble.  Bursting the bubble and filling it with something (e.g., a piece of glass, or frit) leaves marks at the thickened edge of the bubble, so it remains a mark in the finished piece.


Method 1
However, glass with a low uprising between the shelf and the glass can be successfully repaired, if the uprising is low and the glass has not thinned. In the case mentioned, the risk in simply re-firing right side up is that the bubble will increase in size. The weight of the glass may not be sufficient to pull it down except at higher temperatures – which is where the risk of increasing the size of the bubble occurs.

Instead, flip the piece over. Allow the weight of the glass to flatten the uprising. You can use a much lower temperature to flatten the glass by taking advantage of the weight of the whole piece.  This lower temperature means that you will not mark the surface so much as at higher temperatures. Don’t worry if the uprising is not central, you do not have to balance the glass on the point of the bubble for this process to work.

Take the piece to 620°C maximum for as long as it takes to flatten. The rate of advance should be slow – not more than 100°C per hour.  This steady, slow input of temperature will allow the glass to relax at lower temperatures than rapid increases. 

You should use the smoothest separator surface that you can – Thinfire or Papyros, or a smoothed kiln wash.  This together with a low temperature will give minimum markings. 

You must observe the process from about 560°C to be able to stop the slump when the piece is flat and advance to the annealing segment of the firing.


Method 2
This post gives a further alternative. Use two shelves to compress the uprising flat. Although the post is talking about thinning a pot melt, the principle is the same.  Place fibre paper around the edge equal to the thickness of the glass piece and place another prepared kiln shelf on top. You do not need to invert the surface of the piece to do this.  It may be that you will need a fire polish to remove any marks on top.


A plea
Do not drill holes. Especially not in the case of a shallow bubble.  The glass has not significantly thinned and so can be rescued.  Drilling a hole will only leave an unwanted mark.

Wednesday, 15 November 2017

Removing Fibre Paper Marks


We all at times take short cuts or economies which lead to less than desirable outcomes.  One of these is to piece together fibre paper.  Often the marks of the join – which are always there – are just too obvious to leave.  The question becomes whether the fibre paper join marks can be eliminated.

Yes, there are at least two ways to remove these marks.  

One is to cold work the bottom with a flat lap or wet belt sander.

The other is to use the kiln to re-fire the piece.

One method would be to put fresh fibre paper or kiln wash on the shelf and fire.  This will require temperatures near the full fuse to achieve enough heat at the bottom of the glass to effect a significant change in the markings.

My suggestion for removing fibre paper marks - while it is still flat - is to fire upside down to fire polish to get rid of the marks without much changing the desired final texture of what will be the top. This is because the underside of the glass will not have the same heat effects as the top side. This also has the advantage that you can observe when the marks are eliminated.

When fired, flip over, clean the piece well to remove any fibre or kiln wash, and take to a quick fire polish to remove any marks - if necessary - caused by the upside-down firing.  This quick fire will be a slow rise to ca. 600°C, and then quickly to the 740°C to 770°C range.  This will cause the minimum change in the surface of the piece.

You will need to observe when both the evidence of the line disappears, and in a subsequent firing, when the final top surface of the piece is fire polished.


Wednesday, 3 May 2017

Removing Bubbles

Inclusions and Bubbles

The inclusion of material between two or more sheets of glass has the risk of creating bubbles.  The size of these often relate to the size of the inclusion.  The inclusion can be glass (powders, frits, cut pieces), mica, metals, foils, etc.

The important element in eliminating bubbles is to have a long slow bubble squeeze from the bottom of the forming temperature to the top slumping temperature.  If this is combined with supports at the edges or a fine film of clear powder, it will help reduce the interior bubbles to a minimum.  The supports at the edges may be as small as fine frit (and some use powder over the whole surface).

But, once you have bubbles in the piece, what can you do?

You can drill a hole in the bubbles, or break the bubbles and fuse again, but there will be distortions visible in the resulting piece.

Another method to reduce the effect of bubbles, is to flip the piece and fire upside down to drive the bubbles to the bottom of the piece.  Be careful to use low fusing temperatures to avoid enlarging the bubble.  At the finish, the bubble will still be in the glass but will not be protruding above the top surface.

It may also be possible to combine the two processes.  Drill a small hole in the bubbles and fire upside down.  If you do this you need to place the glass on porous fibre paper, not just Thinfire or Papyrus, to allow the air to be compressed out of the bubbles.  You also need to allow a significant amount of time around the slumping temperature for this to happen.

Once you have fired upside down, you will need to fire polish the surface again. Do not despair at multiple firings.  A lot of people fire their pieces many times to achieve the effects desired.


Wednesday, 22 February 2017

Flip and Fire

"Flip and Fire" is a term was devised by Brian Blanthorn to describe a process to achieve crisp details in the final piece.

The process takes advantage of two things - heat and weight. The glass on the shelf side moves less than the top as it is not quite so hot, and the weight of the glass above keeps the lines the way they were cut. The glass on the top of the piece begins to move first and fill the gaps that are left between the pieces.


This piece has been assembled with the final upper surface on the shelf and the base sheet placed on top.


The simplest method to achieve straight lines is to fire the piece with the final surface down to the shelf. After fusing, turn over and clean any surface contamination, usually by sandblasting. Wash and polish dry. Then fire the new surface to a fire polish temperature.


The same piece fire polished after cleaning the fused glass.


This technique works best on pieces that are of one uniform thickness.


There are other factors at play in obtaining crisp lines. 

Fusing straight lines

In addition to the "flip and fire" approach, there are a number of other factors that contribute to sharp, crisp lines in a piece made with strips of glass laid on edge and fused.

Smooth glass will fuse straighter than strips of textured glass. The individual strips fit closer together, leaving less room for lines to wander and create a wavy appearance.

The quality of the cut of the strip is important. Straight strips with right angle edges and no flares make for crisper lines.

The thinner the strips, the less opportunity for movement in the fusing when they are placed on edge. Ideally, the strips should be 6mm wide. This is the thickness that glass tends to take up when full fused. The greater the width beyond 6mm, the less likely the lines will be straight.

The viscosity of the glass affects the crispness of the lines. A glass that is less viscous will tend to be more wavy than a more viscous glass. E.g., black glass, a less viscous glass than white, will tend toward waviness more than the white. This is not a variation between manufacturers; it is a variation within a compatible range of glasses.

The firing surface will have an effect. Firing directly on a kiln washed shelf will give crisper lines than firing on fibre paper of whatever thickness.

Damming the composition before firing will produce straighter lines. The dam holds the strips in place during the heat up and restricts any flow that would be caused by strips thicker than 6mm.

Wednesday, 29 April 2015

Large Bubbles

cambridgecreativenetwork.co.uk
Some times you want large bubbles, but when you don't, you need to know about the causes of, and ways to prevent, bubbles.

Causes and prevention of most large bubbles relate to volume control, layup, rate of advance and top temperature.

Volume control. We all know that glass tends toward being 6-7mm thick at full fuse temperatures. Any less volume and the glass thickens at the edges, so trapping air under the glass which will push up and through given enough time and temperature.

Layup. The lack of volume control is compounded by layups which do not allow the air to escape from under the edges of the piece.

Rate of advance. These two problems are compounded by asap, or even just rapid, increases in temperature. The glass softens quickly and the air finds it easier to push the glass up than to escape from under the edges. Slowing down is part of the answer.

Top temperature. A high top temperature softens the glass to the extent that any lack in volume control, layups that have hollows or traps for air, and rapid increases in temperature all allow the expanding air (and there will always be some) underneath the glass to push up and often through the glass.

These factors reinforce the Low and Slow mantra.

Other factors can promote bubbles, although the ones above are the most common. Debris between the glass and the shelf, or between glass layers can cause bubbles, given the right conditions. Small shallow indentations in the shelf can be the source of bubbles from underneath the glass. This can be identified by observing where the bubbles occur in relation to the shelf.

There are some things that can be done to reduce the likelihood of bubbles:


Wednesday, 18 March 2015

Straight Lines on Thicker Pieces

When you use a partial layer on two or three layers, you will get wavy lines as the thicker glass spreads more than the thinner. E.g., if you have 3 layers, especially near the edges, the fully fused glass will spread out, while the two layer areas will keep their volume. If you have straight lines at the edge, they will no longer be straight at fusing temperatures.

To keep the lines straight on thick pieces, build the design upside down, so that the final top design is down to the shelf. The shelf side is the coolest part of the glass being fired, so it will distort less. In addition, the weight of the glass above will assist in keeping the design elements in place.

This is often referred to as “flip and fire” 

Wednesday, 16 July 2014

Organic Burnout Marks

Occasionally there is a haze at the centre of the back of large pieces of fired glass. This seems to happen when a large piece of glass is placed over fibre paper (of whatever thickness) that has not been pre-fired. 

 This is based on my experience of doing large pieces on thinfire or other fibre paper with a relatively fast rate of advance. What seems to happen is that the edges of the glass soften enough and early enough that not all the binder in the fibre papers can burn out and the combustion gasses escape from under the glass. The resulting haze is the remnants of the combustion product fired to the surface of the glass.

I have found that flipping the piece over and taking the glass to a low temperature fire polish is enough to return the glass to its usual appearance. You can, for extra insurance, apply a devitrification spray, although I have not found it necessary.

You could, of course, work the back of the glass with pumice and cerium oxide to bring back the original shine without firing. But my impression is that the areas with haze are fractionally depressed into the back surface. This means that a lot of glass has to be removed to reach and polish the hazy areas.


Wednesday, 7 May 2014

Capping


This term most often refers to placing a single piece of glass over the whole of the project. The decisions relate to whether to do it at all, in what circumstances and in what order. Whatever you place on top of the project is what the eye will first see. A tinted top layer will give that tint to all the pieces making up the object. So most often the top is a piece of clear glass.

Many times the purpose of capping is to give the volume of glass required to keep the piece contracting as a result of the surface tension of the glass trying to pull itself up to 6mm thickness.

When using opalescent glass as the main component in the work, you should consider capping with clear. Opalescent glass is slightly more prone to devitrification than transparent glasses, so any work to be fired a number of times might be best fired with a clear cap. It also protects against any bubble formed between the other glass and the cap showing as a clear spot within the opalescent as it pushes the colour aside and reveals the clear below.

There are some times when you should consider placing the clear on the bottom. If your design layer is made up of lots of pieces where air might be trapped, but is uneven enough to be the likely cause of bubbles, then the clear should go on the bottom to ensure there is sufficient volume. An alternative is to do a high tack or full fuse of the whole upside down on fibre paper, then clean up and fire right side up with the capping glass.

Sunday, 10 March 2013

Glues in Kiln Forming


Glues have two major uses in fusing. One is to stick things together after being fused (cold fusing). The other is to hold things together before fusing.

Holding things together while preparing the piece to be transferred to the kiln is a major use of low tack adhesives and glues. All of these burn off a lot lower than the temperature at which the glass begins to stick together. So, if you are gluing overhanging pieces, for example, they can move after the glue has burned off.  If you are assembling pieces that will not stay in place while you are putting it together, glue will not help get the final result you want.  If you are gluing to keep things stable while you move it to the kiln, you may find everything is ok.

However, glue tends to boil off if the temperature is raised too fast. During this process, the effect of the boiling will move the glass pieces that are most unstable. This also occurs if you use too much glue. You should only use as much as will stick the pieces together. Also too much glue leads to black spots and sometimes bubbles between the layers of glass.


The adhesives commonly used are the Bullseye product “Glastac”, Elmer’s glue, diluted PVA - or school - glue. All of these take varying times to dry and hold the glass pieces in place. So, a popular alternative is hair spray. This is a lacquer which dries almost instantly. It provides a thin film of adhesive and burns off in the kiln with no residue. You should use the varieties with no additives.


Glue most often leads to problems or unexpected results, so several ways have been used to achieve the desired results.

One way to deal with unstable components on small pieces is to make a large piece with a repetition of the design and cut it up after fusing in to the sizes you want.  Clean the pieces very well, and then fire them again to at least fire polish to remove any cutting or grinding marks.

An alternative to using glue, especially at the edges where the pieces are likely to move, is to use dams. My practice is to make the dams slightly taller than the unfired piece and line with fibre paper. I put 3 mm fibre paper against the dam, and thinfire against the glass. Both of these should be 3 mm narrower than the final height of the fused piece will be. This is to allow the glass to make a rounded edge as it will not be able to stick to the fibre as it sinks down to its final height.

Bullseye hot dams as an example of damming

Another alternative to using glue is to fire the piece upside down, so that the pieces do not have to be supported. This does require some planning and forethought. You can draw the design in reverse on thinfire, using different coloured pencils for the various layers to help in building the piece up in reverse. You then cap the assembled pieces with the piece that will become the bottom. Take the whole to a tack fuse. Then clean very well to remove any residues from the shelf. It is possible to sandblast and then clean to make sure there are no residues left. Of course this is not possible if you are using dichroic or iridised glass. Also note that iridised surfaces and thinfire do not get on well – there is extreme pitting in the iridised surface. 


Example of pieces glued and ready for the flip

 Once the piece is cleaned, fire again to get the desired surface texture.


Cleaning a piece after first firing