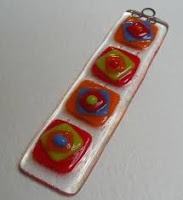
Showing posts with label Contour fusing. Show all posts

Wednesday, 21 August 2024

Slower Ramps on Additional Firings

"Every time you fire a previously fired piece you need to slow down."

This is not accurate. If you have not changed anything significant, the annealing does not need to be extended.  The clearest example is a fire polish.  Nothing has been added. The physics and chemistry of the piece have not changed.  If only confetti or a thin frit/powder layer is added, nothing significant for scheduling has been added.  As nothing significant has changes the annealing used in the previous firing can be used again.

Of course, you do need to slow the ramp up rates on the second firing.  This is because you are firing a single thicker piece.  On the first firing, the pieces are individual and can withstand slightly faster rates. But on third and subsequent firings, if nothing significant has been changed, there is no need to slow rates further.

There is a post which describes this further.


"When adding more thickness more time is needed."

This is the occasion when the annealing soak needs to be extended.  Placing a full sheet of clear glass on the bottom, or less usually, the top, and taken to a full fuse, requires slower ramp rates.   The annealing time for a full fuse can be taken directly from the annealing tables for thick slabs.  

The fusing profile for any additional items has a strong affect on the length of the annealing soak.  If the glass is now of uneven thicknesses, and greater care in assigning ramp rates is needed.  The profile for the piece also determines the amount of additional annealing time required.  A sharp tack of a single additional layer will require annealing as for 2.5 times the total height of the piece at the start or the firing. A rounded tack will need two times and a contour fuse will require 1.5 times.  A full fuse can be carried out for the new total height of the piece without any multiplying factors.

 If the intention with multiple firings is to achieve a variety of profiles within one piece, a slightly different approach is required.  A blog post here describes the process.


The general approach to multiple firings is that unless there are changes to the thickness or profile of the glass, no changes in annealing time is required.  


Wednesday, 7 August 2024

Longer Soak or Higher Temperature?

 ‘Is it better to extend the soak or add more firing time when the firing program isn’t quite enough? What are the meanings of “soak,” “hold,” “ramp,” “working temperature” and “top temperature”?’  

Let’s start with some of the terms.

Soak” and “hold” have the same meaning in scheduling.  Schedules are made up of a series of linked segments.  Each segment contains a rate, temperature, and time.  The time is often called a “hold” in the schedules.  That time can have several effects.  It can allow enough time for a process, such as slumping, to be accomplished.

Although “soak” is entered into the schedules in the same way as a hold, it has a different concept behind it.  The hold when used as a soak allows the set temperature to permeate the whole thickness of the glass.  An example is in annealing. An annealing hold/soak is set.  This is to allow the glass to become the same temperature throughout. 

The ramp is the rate at which the controller is set to increase/decrease the temperature.  This is normally the first element in the segment.

Top” and “Working” temperature are the same thing.  It is the temperature at which the desired effect is achieved.  They have slightly different nuances.  Top temperature is normally considered as a point where the desired profile will be achieved in a few minutes.  The working temperature is also that, but includes the idea that it will take time for the effect to be achieved.


Which should you alter first – soak time or temperature?

Most important is that you alter only one at a time.  If you alter the two elements at the same time, you do not know which was the cause of the result.

In general, you lengthen the soak if the effect is not achieved at the temperature and in the time set.  There are two reasons for this.  Glass has fewer problems at lower temperatures.  Secondly, the controllers are set up in such a way that it is easy to extend the time. Check your manual for the key sequence to extend the time.  It is more difficult to alter the temperature during a firing. 

To determine if you need more time, you peek into the kiln as the kiln approaches the top temperature.  If the profile has not been achieved by the time set at your working temperature, you enter the combination of keys to keep the kiln at the top temperature until you see the effect you want.  Then enter the combination of keys to skip to the next segment.


Whether you alter time or temperature, depends on what you are doing.  Soak plus temperature equal heat work.  With heat work you can accomplish the same effect at lower temperatures.  It may be that taking more time (usually slower ramp rates) to get to the same or lower temperature, will give the results desired.

For slumping, draping and other low temperature processes extending the hold/soak is appropriate. It reduces the amount of marking that is created by the mould or surface supporting the glass.

When tack, contour, or full fusing, you should be aiming to finish the work in about 10 minutes. Soaking/holding significantly longer increases the risk of devitrification.

For high temperature processes such as pot and screen melts and some flows, increasing the temperature is probably the right thing to do, to avoid the devitrification possibilities of long holds of open face high temperature work.

These can only be guidelines.  Your instincts and experience will help you determine which is the right thing to do in the circumstances.


Wednesday, 19 July 2023

To Repair or Not to Repair

 Breaks during slumping sometimes occur. What can be done?

Cause of Break

The first element in assessing the piece is to determine why it broke

Should it be Repaired?

The second element is whether it should be repaired or re-used. Is it worth the effort of repairing? This will be about the importance and the time and effort you have already put into the piece.

Can it be repaired?

This is a third element of assessment. If the break resulted from incompatibility, any attempt at refusing will also break for the same reason. If inadequate annealing caused the break, it may be possible.

It is sometimes suggested that those pieces which fit together exactly, should be fused together flat and re-slumped. This ignores the fact that the glass will have stretched or deformed from the flat piece it once was.

  • ·   This re-fusing may be successful for shallow and simple slumps. But the piece will not be corrected by fusing the broken pieces from deep or complex slumps as a result of the stretching and thinning or thickening in the slumping process.
  • ·   The glass pieces will have an imperfect join when flattened because of deformations from the changes during the slumping.
  • ·   If the base is a single layer, the separate pieces will pull apart during the re-fusing process due to the lack of volume.
  • ·   The fusing process will make a tack fuse much flatter than originally intended. A contour fuse - at minimum - will be required to join the pieces.

For all these reasons, any flattening, fusing and then attempting a slump again is unlikely to be successful.

Fusing in the mould

In recognition of these problems about flattening, re-fusing, and slumping again some people suggest mending by firing in the mould. This would get over the difficulty of changes of shape. However, the required contour or full fuse will leave marking on the back and may lead to thickening at the bottom. It is also hard on your ceramic moulds if you fire quickly.

Changing the Shape

If it is desired to flatten an unbroken slumped piece for use in a mould of a different shape without much change in tack profile dimensions, there are two things to do. The maximum temperature to be used to get the glass flat and retain the degree of tack is the sharp tack - or lamination - range. It will require a significantly long soak at top temperature - hours.

This long soak time is a consequence of the effects of weight and span. The effective weight is less at the unsupported edges than at an unsupported centre. The slumped piece has most of its weight on the shelf now. This makes the flattening have to use a higher temperature or a longer soak. The effective span and weight at the edge is almost zero. This requires long soaks and frequent observation to know when the flattening is complete. Both these effects make the flattening of a piece without altering the profile a lengthy process.


More information is available in the ebook: Further information is available in the ebook: Low Temperature Kiln Forming.


Repairing a broken slumped piece of glass requires knowing why it broke, can it be repaired, is it worth repairing. Difficulties related to the changed shape, temperature to fuse, and changes in tack profile.

Wednesday, 8 February 2023

Annealing Tack Fused Pieces

"I'd like advice about annealing. I'm about to start a series that are to be wall hangings. The outside 100mm is only 3mm thick and the centre is 6mm and occasionally 9mm thick. They are going to be A3 and A2 size. I intend to tack fuse. I'm happy to experiment with the tack fuse temperature (I think about 677°C). How long should I anneal it? That's my question."

Determining the Tack Temperature

The high end of slumping, and the low end of sintering is 677°C/1252°F. Unless your kiln fires very hot, this is not hot enough for a tack fuse. Make some small-scale mock-ups in clear. Schedule the kiln to a full fuse on a rate not more than 300°C/540°F per hour. Peek into the kiln at 10°C/18°F intervals from 677°C/1252°F upwards. When you see the profile you want, note the temperature. When scheduling the tack firing, reduce the target temperature by 5C and add a 10-15 minute soak to get approximately the same result as you observed in the test firing.


Scheduling to Avoid Dog Boning

You have a border of 100mm/4.0” that is only one layer thick. This has the risk of becoming irregular at the corners compared to the sides (dog boning). To avoid dog boning of the 3mm base, the lowest temperature you can use is important. This is the main reason for the peeking – to determine the temperature at which dog boning begins. It is not only the degree of rounding of the edges you are looking for, but also the degree of retraction of the sides of the piece. When you note the beginning of the dog boning, you have reached just beyond the temperature to avoid that.

You will of course have to set the mock-up in such a way that you can see at least one side through the peep hole. The front will not give you accurate information, but if the side is in your sight line, you will see when it begins to deform. This peeking will keep you occupied for about 3/4 hour. Make sure you have gridded paper and pencil to hand to record information in between peeking.

It may be that the glass has not begun to round when the dog boning starts. In this case you will need to make the border larger and cut the glass back to straight lines. 20-30mm/0.75-1.125” extra all around will make it easy to trim the excess cleanly.

Annealing

I do not know the degree of tack you are aiming to achieve. It is important to the scheduling of the anneal. A sharp tack profile will require annealing for longer than a contour profile for your thicknesses. These suggestions assume the total height is 9mm/0.375”. If it higher, the soak and cooling times and rates will be longer and slower.

A sharp tack profile will need:

  • Annealing for 270 minutes (4.5 hours) with a cool rate of:
First 55°C/100°F cool at 13°C/23°F per hour.
Second 55°C/100°F cool at 23°C/41°F per hour.
Final cool at 78°C/140°F per hour to room temperature.

A rounded tack profile will need:

  • Annealing for 180 minutes (3 hours) with a cool rate of:
    • First 55°C/100°F cool at 25°C /45°F per hour
    • Second 55°C/100°F cool at 45°C /81°F per hour
    • Final cool at 150°C /270°F per hour to room temperature.

A contour tack profile will need:

  • Annealing for 120 minutes (2 hours) with a cool rate of:
    • First 55°C/120°F cool at 55°C /99°F per hour
    • Second 55°C/100°F cool at 99°C /178°F per hour
    • Final cool at 330°C /216°F per hour to room temperature.


More detailed information is in my eBook Low Temperature Kilnforming, An Evidence-Based approach to Scheduling. It is available from VerrierStudio on Etsy or through Bullseye

It is not cheap, but at 300pp worth it (in my opinion!). It discusses the three profiles of tack fusing - sharp, rounded, contour. It also deals with slumping, sintering, freeze and fuse, and bas relief or texture mould firings. The method for determining schedules is outlined and specific sample schedules are listed.

Wednesday, 11 January 2023

Annealing Requirements for Shaped Pieces.

 Experiments related to slumping show that shaped items such as slumped, textured and kiln carved glass need annealing for at least one layer thicker than they are. The annealing for one layer thicker than the calculated thickness provides the most stress-free result for the finished product. Annealing for the calculated thickness does not always produce a stress-free result.  

Full Fuse

 This indicates that an evenly thick 6mm thick piece will get the best result from an anneal as for 9mm.

Texture Moulds

 A piece of glass on a texture mould with 3mm or more differences in height requires careful annealing. The more defined/sharper the texture, the greater care will be required. A 6mm blank on a mould with 3mm variation taken to a well-defined texture needs to be annealed as though it were 18mm thick. A sharp tack requires annealing as for a piece 2.5 times its actual thickness plus another 3mm.  This gives the 18mm/0.75” thickness annealing requirement for the 6mm thick piece.

Kiln Carvings

 The same kind of calculation applies to kiln carved items as for sharply textured pieces. Pieces with less sharply defined profiles can be treated as one of the more common tack fused profiles.


Credit: Vitreus-art.co.uk

Tack Fusings

 A rounded tack fused piece of a 6mm base with 3mm tack elements that is being slumped will need annealing as for 21mm.  Twice the actual thickness plus 3mm giving the annealing requirement as for 21mm/0.827”.

 A contour tack of the same dimensions as given in the first example will require annealing as for 19mm/0.75”. The annealing requirement when slumping is for 1.5 times the thickness plus another 3mm.

In General

 The general approach to annealing shaped pieces is to calculate the thickness for the anneal and add one layer more to get a good anneal for slumped and other formed pieces. 


 The research and the reasoning behind this approach is given in LowTemperature Kilnforming, An Evidenced-Based Guide to Scheduling available from the Etsy shop VerrierStudio and from Bullseye

Wednesday, 31 July 2019

Terminology for degrees of fusing

Can anyone describe what a contour fuse is?

No one can satisfactorily describe, to a high level of acceptance, what a contour fuse is. For me it is just before a full fuse. That will not be acceptable for many, just as describing something as a rounded tack fuse is not a contour fuse for me.  A sharp-edged tack fuse is sintered glass. This will be important to observe as you move to other glass processes such as pate de verre.


There is not yet an accepted terminology and will not be as long as people choose to invent new descriptions for what are essentially the same things.

The closest you can get to a sensible range of descriptors is in the Bullseye document "heat and glass" where the temperature ranges are the important constants.
  
The fourth column of this document gives names for the process. It would be a good idea to adopt these terms, as Bullseye is the company doing the research in the area of kilnforming.

Bullseye terminology gives the following:
A slump or bend occurs in the 540C – 670C range
Fire polishing and sintering occur in the 670C – 730C range
Tack fusing (a rounding of edges) occurs in the 730C – 760C range
A rounded tack fusing that begins to sink into the base glass occurs in the lower end of the 760C – 816C range.
Contour fusing occurs in the middle of the 760C – 816C range.
Full fusing (flat) occurs at the upper portion of the 760C – 816C range.