Showing posts with label Viscosity. Show all posts

Sunday 22 May 2022

Measuring Glass Viscosity


Measuring Glass Viscosity

Posted  on 


Glowing glass

What is glass viscosity?

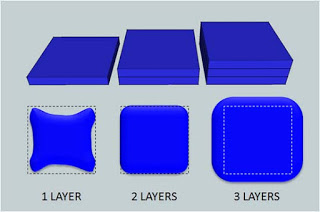
Viscosity is a measure of a liquid’s fluidity, and is measured through a substance’s resistance to motion under an applied force. It is also known as the thickness of a fluid. It is calculated by dividing shear stress (the force per unit area required to move one layer of fluid in relation to another) by shear rate (the measure of the change in speed at which intermediate layers move with respect to one another). The result is usually expressed in poise (P), the equivalent of 0.1 Pa∙s (pascal second). 

Glass viscosity varies inversely with temperature. As it is heated, viscosity decreases and it flows more easily. This is because the thermal energy produced causes the structural molecules to move faster and break the bonds between those molecules. As the temperature decreases, viscosity increases, causing the structural bonds to re-form.

The relationship between temperature and viscosity is linked directly to the chemical composition of a glass. Manufacturers need techniques to measure and model this relationship for a range of glass compositions and temperatures. The viscosities of most commercial glasses like soda lime and borosilicate are measured between 800°C and 1400°C.

Why is glass viscosity important?

The visocisity of a glass significantly affects other physical properties, such as softening, melting and crystallization characteristics, as well as the temperature and pressure ranges within which the glass can be worked. Knowing the relationship between temperature and viscosity is key to determining the correct melting and heat treatment regimes in glass production and processing.

Manufacturers monitor temperature and viscosity throughout the manufacturing process in order to know how the glass will behave. For example, viscosity can directly affect refractory corrosion and the ability to homogenize a melt. It is important during the fining process to ensure the batch chemicals are properly melted and air bubbles are forced out. Additionally, a glass’s viscocity gives manuacturerses the ability to predict how the glass will perform in the glass forming process such as casting monolithic parts, spheroidization, or fiber generation.

Measuring viscosity

Most viscometers work by comparing a stationary object and a flowing fluid, or a moving object and a stationary fluid. They measure the drag resistance during this movement. There are a range of viscometers available.

Rotation viscometers are commonly used to measure the viscosity in the range of 1 to 104 Pa·s. They employ a platinum alloy spindle immersed in a crucible of molten glass. Spindle torque is measured and used to calculate viscosity. The crucible can either be stationary and the spindle rotates, or the crucible rotates and the spindle is stationary. Generally, data points are taken as a function of temperature to describe the viscosity curve for the glass.

Falling sphere viscometers can be used to measure the viscosity in the range of 1 to 106 Pa·s. They measure the time taken for a falling sphere of known density and radius to move between two points. This method employs principles from Stokes’s Law, which takes into account the drag force on a falling sphere.

Parallel plate viscometers measure the rate of change in thickness of a cylindrical specimen between parallel plates moving perpendicular to their common central axis. This method is often used to measure the viscosity in the range of 105 to 108 Pa·s.

Fiber elongation viscometers measure the elongation rate of a fiber of known dimensions under a known load. This method can be used for viscosities ranging from 105 to 1012 Pa·s and it is widely used to determine the Littleton softening and annealing reference points.

Transformation range viscosities (108 to 1013 Pa·s) are often measured by the beam-bending method. Beam-bending is a method in which the rate of viscous bending of a simply loaded glass beam is measured over an extend period of time.

Glass analytical services from Mo-Sci

Mo-Sci is able to undertake several types of chemical and physical characterization on glass samples, including high-temperature viscosity measurements. Our fully equipped glass laboratories are set up to conduct analytical tests for manufacturing, quality control, failure analysis, and R&D. We also employ a large collection of standards against which most glass samples can be compared and measured.

References

  1. The Physics Hyper-Textbook, Viscosity  https://physics.info/viscosity/
  2. The Glass Packaging Institute, Viscosity https://www.glass-ts.com/services/temperature-viscosity
  3. Glassglobal Consulting, Glass properties https://www.glassglobal.com/consulting/reports/glass/properties.asp:
  4. Bright Hub Engineering, Types of Viscosity Measurement Devices https://www.brighthubengineering.com/fluid-mechanics-hydraulics/83996-viscosity-measurement-equipment/
  5. ASTM C965 – 96(2017), Standard Practice for Measuring Viscosity of Glass Above the Softening Point https://www.astm.org/Standards/C965.htm
  6. Designation: C1351M − 96 (Reapproved 2012), Standard Test Method for Measurement of Viscosity of Glass Between 104 Pa·s and 108 Pa·s http://materialstandard.com/wp-content/uploads/2019/09/C1351M-96-Reapproved-2012.pdf 
  7. ASTM C1350M – 96(2019), Standard Test Method for Measurement of Viscosity of Glass Between Softening Point and Annealing Range (Approximately 108 Pa·s to Approximately 1013 Pa·s) by Beam Bending, https://www.astm.org/Standards/C1350M.htm
  8. Mo-Sci Corporation, Analytical Services https://mo-sci.com/research/analytical-services/

Wednesday 15 September 2021

Digest of Principles for kiln forming

Some time ago people on a Facebook group were asked to give their top tips for kiln forming.  Looking through them showed a lot of detailed suggestions, but nothing which indicated that understanding the principles of fusing would be of high importance.  This digest is an attempt to remind people of the principles of kiln forming.

Understanding the principles and concepts of kilnforming assists with thinking about how to achieve your vision of the piece.  It helps with thinking about why failures have occurred.

Physical properties affecting kiln work

Heat
Heat is not just temperature. It includes time and speed.

 Time
       The time it takes to get to working temperatures is important.  The length of soaks is significant in producing the desired results.

 Gravity
       Gravity affects all kiln work.  The glass will move toward the lowest points, requiring level surfaces, and works to form glass to moulds.

 Viscosity
       Viscosity works toward an equilibrium thickness of glass. It varies according to temperature.

 Expansion
       As with all materials, glass changes dimensions with the input of heat.  Different compositions of glass expand at different rates from one another, and with increases in temperature.

       Glass is constantly tending toward crystallisation. Kiln working attempts to maintain the amorphous nature of the molecules.

 Glass Properties
·        Glass is mechanically strong,
·        it is hard, but partially elastic,
·        resistant to chemicals and corrosion,
·        it is resistant to thermal shock except within defined limits,
·        it absorbs and retains heat,
·        has well recognised optical properties, and
·        it is an electrical insulator. 

These properties can be used to our favour when kiln working, although they are often seen as limitations.

Concepts of Kiln Forming
Heat work
       Heat woris a combination of temperature and the time taken to reach the temperature.

 Volume control
       The viscosity of glass at fusing temperatures tends to equalise the glass thickness at 6-7mm. 

 Compatibility
       Balancing the major forces of expansion and viscosity creates glass which will combine with colours in its range without significant stress in the cooled piece.

 Annealing
       Annealing is the process of relieving the stresses within the glass to maintain an amorphous solid which has the characteristics we associate with glass.

 Degree of forming
       The degree of forming is determined by viscosity, heat work and gravity.  These determine the common levels of sintering, tack, contour, and full fusing, as well as casting and melting.

 Separators
       Once glass reaches its softening point, it sticks to almost everything.  Separators between glass and supporting surfaces are required.

 Supporting materials
       These are of a wide variety and often called kiln furniture.  They include posts, dams, moulds, and other materials to shape the glass during kilnforming.

 Inclusions
       Inclusions are non-glass materials that can be encased within the glass without causing excessive stress.  They can be organic, metallic or mineral. They are most often successful when thin, soft or flexible.

A full description of these principles can be found in the publication Principles for Kilnforming


Wednesday 1 September 2021

Texture moulds


"I could use some help here please. I’ve tried this sun mould 3x and as you can see all 3x I get a hole.  If you could tell me what I’ve done wrong I would greatly appreciate. They were all full fused to 1430F (776C)."
Example of the problem


There are a range of views that have been given on how to make texture moulds work without the glass developing bubbles.

closer view of one example

These are a summary of the suggestions made to the enquirer.

Not enough glass thickness. The view is that glass needs to be 6mm thick to be used on texture moulds, as the viscosity of glass tends to draw glass to that thickness, robbing from other areas making them thin and prone to bubbles.

Glass always wants to go to 6mm.  Not always.  It depends on temperature.  The kiln forming temperatures we use results in a viscosity that tends to equalise the forces at 6 – 7 mm.  Hotter glass will flow out more thinly, until at about 1200C, the glass is 1mm or less thick.

Full fuse two sheets first.  The object is to avoid placing two separate sheets on top of the mould, creating the potential for more bubbles between the sheets, as they may slump into the mould at different rates.

Too hot. As the glass increases in temperature the viscosity is reduced and can no longer resist the air pressure underneath the glass.

Use a lower temperature. The idea is to keep the glass relatively stiff to resist bubble formation.

Bubble squeeze needed to avoid trapped air.  Another way to reduce the amount of air under the glass is to allow the glass to relax slowly at a temperature below which the glass becomes sticky.

Elevate the mould.  The idea is that hot air circulating under the mould will help equalise the temperature of the mould and the glass.

Drill holes at low points. This gives air escape routes under the mould, assuming the mould is slightly elevated.

Go lower and slower.  Use a slower rate of advance toward a lower top temperature with longer soaks to avoid reducing the viscosity, but still get the impression from the mould.


Now for a different viewpoint.

None of the views given above are wrong, but they all (except in one case) fail to consider the fundamentals of obtaining texture from such a mould.

It is apparent that the temperature used was too high because the glass had low enough viscosity to allow the air underneath to blow the bubble.  The suggestions of thicker glass, bubble squeezes, lower temperatures, drilling holes and elevation of the mould are ways of reducing the amount of air or resisting the air pressure.  They are not wrong, but miss the fundamental point.

That fundamental point is that you need to raise the temperature slowly on these texture moulds to allow the glass to fully heat throughout. By doing this most of the air has a chance to filter out from under the glass before it conforms to the edges of the mould.  It is simpler to use the slow advance rather than a quick one with a slow-down for a bubble squeeze.  The glass is more certain to be the same temperature throughout by using a slow rate of advance.  Glass with an even temperature can conform more easily to the undulations and textures of the mould.

Mostly, the recommendations given are to use two layers, or 6mm of glass that has already been fused together.  This gives greater resistance to bubble formation and reduces the dogboning and needling of the edges.

However, you can form in these moulds with single layers.  There are of course certain conditions:
  • You must advance the temperature slowly.  A rate of 100C per hour will be fast enough.
  • You can add a bubble squeeze soak of 30 minutes at about 630C as additional assurance of removing most of the air.  The bubble squeeze is done at a lower temperature than usual, as the glass is less viscous because the slow rate of advance has put more heat work into the glass.
  • The top temperature should not go beyond 720C. Beyond that temperature the viscosity of the glass drops quickly and so becomes subject to bubble formation.


The soak at the forming temperature will need to be long and observation will be needed to determine when the glass has fully conformed to the mould. Quick peeks at intervals will show when the design is visible on the top of the glass. The time will vary by:
  • Mould texture complexity 
  • Type of glass (opalescent or transparent),
  • Heat forming characteristics of the glass,
  • Viscosity of the glass or colour,
  • Etc. 

Be knowledgeable about how to extend the soak or to advance to the next segment of the schedule to take advantage of your observations.

Your observation may show that you can do the texture formation at a lower temperature in future. This will provide results with less separator pickup and better conformation to the mould without excessive marking. 

You will need a long soak in either circumstance. This will be in terms of hours not minutes.  If you do these texture moulds at slumping temperatures, you will probably need at least twice your normal soak.

You can do a lot to fool the single layer glass into doing what you want by using low temperatures and long soaks. See Bob Leatherbarrows's book on Firing Schedules.  He gives a lot of information on how to manipulate glass through heat work - the combination of temperature and time.  You might also consider obtaining my book - Low Temperature Kilnforming.


Most of the search for the right temperature, fails to note that the important element is how you get to the temperature. You can get the same result at different temperatures by using different rates of advance.

Kilnforming is more than temperature, it is also about time and the rate of getting to the temperature. By concentrating on temperature, we miss out on controlling the speed and the soak times. You can do so much more to control the behaviour of the glass at slow rates, significantly long soaks, and low temperatures.

Wednesday 21 July 2021

Viscosity of Colours

“I have been advised in the past, that blue fires quicker. I was told this by a Master glass maker.”

Viscosity has some relation to colour and intensity.  But you should note black & stiff black are both of the same intensity, and are fusing compatible, but have different viscosities.  This shows that colour is not the only determinant of viscosity, as the stiff black shows the viscosity can be adjusted within the same colour.  The quotation above indicates that the reasons behind any declarative statements need to be investigated.

Some factors in viscosity
Opalescent colours tend to be more viscous than their transparent counterparts.

It is the metals that develop the colours that produce much of the difference in viscosity.  The same metal can produce different colours in different furnace conditions, so viscosity cannot be assumed to be directly related to colour. 

Some people in the past have done their own tests on viscosity and colour relationships, but I have no access to them.  More recently Bob Leatherbarrow shows (Firing Schedules for Kilnformed Glass, 2018, chapter 7.2.5, p.88) some slumping tests done with opalescent glass. It shows how much less viscous black is than white, and that white is the most viscous.  The other results show red a little less viscous than white, then some greens, yellows and oranges, other greens, purple, pinks (in that order) and of course, the least viscous is black.


Transparent glasses tend to be less viscous than opalescent glasses.


How does this information relate to kilnforming practices?  It indicates that a piece with the less viscous glasses requires lower temperatures or less heat work to complete the forming of the glass than more viscous glasses.

When you have a combination of more and less viscous glasses in a piece you need to fire more slowly to ensure all the glass is thoroughly heated through and will deform equally.  You will need to observe and be prepared to move the piece on the mould to straighten it up.

Do your own viscosity tests
You can do your own tests for viscosity differences by arranging 10mm wide strips all the same length (about 30cm) of different colours. These should be placed on a kiln washed pair of narrow batts set parallel to each other 25cm apart and about 15cm high.  Fire at about 150°C per hour to about 650°C, setting the soak to 30 minutes.  Observe at intervals from 620°C.  Stop the firing when the least viscous has almost touched the floor of the kiln. When fired all together at the same time you can see the relative viscosity of the colours tested.  You can label these and store them, or tack fuse these labelled curves to a piece of base glass for future reference.


Tuesday 31 December 2019

Gravity


One of the fundamental elements in kiln forming is gravity. When glass is hot it moves according to the effects of gravity and you have to remember that gravity has a big effect on all your firings.

The effects mainly cause:
  • Uneven thickness on shelves that are not level.
  • Uneven slumps into moulds which are not level or the glass is not levelled.
  • Uneven forming due to varying viscosities. Gravity acts on the softest parts of the glass first.
  • Faster or slower forming due to span width. With greater span, gravity pulls the glass into the mould more quickly than with a small span.
  • Gravity acts on things of greater thickness more quickly than those of lighter weight. So a thick piece will form more quickly than the same sized thin piece.
  • Surface tension (affected by viscosity and heat) is affected by gravity also. The glass will attempt to draw up or spread out to about 7 mm if there is enough heat, time, and low viscosity.
  • The effect of gravity causes upper pieces to thin lower ones, as it presses down while the glass is plastic. This has the effect of making the colour of the lower piece less strong.

More information on each of these effects can be found throughout this blog.

Thursday 31 October 2019

Viscosity Changes with Temperature


This image is taken from Pate de Verre and Kiln Casting of Glass, by Jim Kervin and Dan Fenton, Glass Wear Studios, 2002, p.27.

It shows in graphic form how the viscosity of glass decreases with increases in temperature. The temperatures are given in Fahrenheit.  

The coefficient of expansion also changes with temperature. 

This graph is also from Kervin and Fenton
 It is these two forces of viscosity and expansion that must be balanced around the annealing point to give a stable and compatible range of fusing glass.

Wednesday 17 October 2018

Annealing vs toughening


The statement “annealing stained glass makes it stronger” appeared on the internet some time ago.  Of course, without annealing there is no glass, it would simply crumble.  Annealing is the process of allowing the glaseous state to be achieved.

I think the statement is more about the difference between annealed and toughened/tempered glass.  In summary, it relates to the amount of stress within the glass.  Well annealed glass has less stress than inadequately annealed glass and so is more stable.  Toughening is a process that balances stress and tension in the glass.

The processes are for different purposes and follow different processes. 

Annealing
Annealing of glass is a process of slowly cooling hot glass to relieve residual internal stresses introduced during manufacture. Annealing of glass is critical to its durability. Glass that has not been properly annealed retains thermal stresses caused by rapid cooling, which decreases the strength and reliability of the product. Inadequately annealed glass is likely to crack or shatter when subjected to relatively small temperature changes or to minor mechanical shock. It even may fail spontaneously from its internal stresses.
To anneal glass, it is necessary to soak it at its annealing temperature. This is determined mathematically as a viscosity of 1013 Poise (Poise is a measure of viscosity). For most soda lime glass, this annealing temperature is in the range of 450–540°C, and is the so-called annealing point or temperature equalisation point of the glass. At such a viscosity, the glass is too stiff for significant change of shape without breaking, but it is soft enough to relax internal strains by microscopic flow. The piece then heat-soaks until its temperature is even throughout and the stress relaxation is adequate. The time necessary for annealing depends on its maximum thickness. The glass then is cooled at a predetermined rate until its temperature passes the strain point (viscosity = 1014.5 Poise), below which even microscopic internal flow effectively stops and annealing stops with it. It then is safe to cool the product to room temperature at a rate limited by the thickness of the glass.
At the annealing point (viscosity = 1013 Poise), stresses relax within minutes, while at the strain point (viscosity = 1014.5 Poise) stresses relax within hours.  Stresses acquired at temperatures above the strain point, and not relaxed by annealing, remain in the glass indefinitely and may cause either immediate or delayed failure. Stresses resulting from cooling too rapidly below the strain point are considered temporary, although they may be adequate to promote immediate failure.

But annealed glass, with almost no internal stress, is subject to microscopic surface cracks, and any tension gets magnified at the surface, reducing the applied tension needed to propagate the crack. Once it starts propagating, tension gets magnified even more easily, causing it at breaking point, to propagate at the speed of sound in the material.

In short, the aim of annealing is to relieve the stress to create a stable piece of glass. The above describes when and how that occurs.

Toughened/Tempered Glass

Toughening or tempering glass starts with annealed glass to form one type of safety glass.  This done through a process of controlled thermal or chemical treatments to increase its strength compared with normal glass. Tempering puts the outer surfaces into compression and the interior into tension. Such stresses cause the glass, when broken, to crumble into small granular chunks instead of splintering into jagged shards as annealed glass does. The granular chunks are less likely to cause injury – thus safety glass.

Toughened glass is stronger than normal glass.  The greater contraction of the inner layer during manufacturing induces compressive stresses in the surface of the glass balanced by tensile stresses internally. For glass to be considered toughened, the compressive stress on the surface of the glass should be a minimum of 69 megapascals (10,000 psi). For it to be considered safety glass, the surface compressive stress should exceed 100 megapascals (15,000 psi).
It is the compressive stress that gives the toughened glass increased strength. Any cutting or grinding must be done prior to tempering. Cutting, grinding, and sharp impacts after tempering will cause the glass to fracture.
Toughened glass is normally made from annealed sheet glass via a thermal tempering process. The glass is placed onto a roller table, taking it through a furnace that heats it well above its transition temperature of ca. 540°C (depending on the glass concerned) to around 620°C. The glass is then rapidly cooled with forced air drafts while the inner portion remains free to flow for a short time.
An alternative chemical toughening process involves forcing a surface layer of glass at least 0.1 mm thick into compression by ion exchange of the sodium ions in the glass surface with potassium ions (which are 30% larger), by immersion of the glass into a bath of molten potassium nitrate. Chemical toughening results in increased toughness compared with thermal toughening and can be applied to glass objects of complex shapes. 

This blog entry is largely based on Wikipedia
https://en.wikipedia.org/wiki/Toughened_glass
and other sources.


Wednesday 13 June 2018

Volume control

Glass has a surface tension (viscosity) that draws the glass toward 6-7 mm thick at kiln forming temperatures. 

To test this out, prepare three stacks of glass squares.  They all should be the same size.  Record the measurements. Place them in a stack of one, a stack of two and the last of three squares.  Fire them to a full fuse.  Compare the sizes of the original to the fired. Note the expanded size of the three-layer stack, the same size of the two-layer stack and the reduced footprint, and dog-boning of the single layer.

Credit: Paul Tarlow

Glass in a single layer behaves differently from the thicker set-ups. When the glass is hot it begins thickening at the edges. The viscosity of the glass is drawing from both from the edge and from the centre.  This means the footprint of the glass is getting smaller. The result is needling. The glass retreats leaving small threads where the glass was held in the small imperfections in the separator’s surface. 

If you do not need a full fuse, you can reduce this needling effect. Reduce the temperature and extend the soak.  This means that the glass does not expand on the heat up so much, and the greater viscosity reduces the needling effect.


If you need a thick piece of a certain size, you need to dam the glass to overcome the tendency to expand.  With experience, you can get to know how much a three-layer (or more) set up will expand and cut the glass accordingly.  In this way, you can often do without dams. There will be some thinning at the edges and a rounding of the corners.


An excellent document on volume control is the Bullseye Tech Note 5.  


Note that this 6mm rule applies at normal kilnforming temperatures.

At higher temperatures, the viscosity is less so the glass will become thinner than 6-7mm.  My experience has shown that at around 1200°C the glass will spread to about 0.5mm thickness.  This is just to point out there is a relationship between temperature and viscosity, and therefore thickness. As the temperature rises, so the viscosity reduces. This relationship allows the glass to become thinner.  At normal kilnforming temperatures, the 6mm rule applies, at higher temperatures it does not.


Further information is available in the e-book: Low Temperature Kilnforming.

Wednesday 4 April 2018

Relative stress in Tack and Full Fused Glass


There is a view that there will be less stress in the glass after a full fuse than a tack fuse firing.

This view may have its origin in the difficulties in getting an adequate anneal of tack fused pieces and the uncritical use of already programmed schedules. There are more difficulties in annealing a tack fused piece than one that has all its elements fully incorporated by a flat fuse. This does not mean that by nature the tack fused piece will include more stress. Only that more care is required.

Simply put, a full fuse has all its components fully incorporated and is almost fully flat, meaning that only one thickness exists.  The annealing can be set for that thickness without difficulty or concern about the adequacy of the anneal due to unevenness, although there are some other factors that affect the annealing such as widely different viscosities, exemplified by black and white.

However, tack fused annealing is much more complicated.  You need to compensate for the fact that the pieces not fully fused tend to react to heat changes in different amounts, rather than as a single unit.  Square, angled and pointed pieces can accumulate a lot of stress at the points and corners. This needs to be relieved through the lengthening of the annealing process.

The uneven levels need to be taken into consideration too.  Glass is an inefficient conductor of heat and uneven layers need longer for the temperature to be equal throughout the piece.  The overlying layers shade the heat from the lower layers, making for an uneven temperature distribution across the lower layer.

The degree of tack has a significant effect on annealing too.  The less incorporated the tacked glass is, the greater care is needed in the anneal soak and cool.  This is because the less strong the tack, the more the individual pieces react separately, although they are joined at the edges.

More information is given on these factors and how to deal with them in this post on annealing tack fused glass.


If you have taken all these factors into account, there will be no difference in the amount of stress in a flat fused piece and a tack fused one.  The only time you will get more stress in tack fused pieces is when the annealing is inadequate (assuming compatible glass is being used).

Wednesday 31 May 2017

Breaks after the Piece is Cool

People sometimes fire a piece only to have it break after it is cool.  They decide to re-fire with additional decoration to conceal the break.  But it breaks again a day after it has cooled.  Their questions centre around thermal shock and annealing. They used the same CoE from different suppliers, so it must be one of these elements that caused the breakage.


Thermal Shock

This is an effect of a too rapid heat change.  This can occur on the way up in temperature or on the way down.  If it occurred on the way up to a fuse, the edges will be rounded.  If it occurred on the way up to a slump the edges may be sharp still, but the pieces will not fit together because the slump occurred before the slump.  It the break occurs on the way down the pieces will be sharp.  The break will be visible when you open the kiln.  More information is here.


If the break occurs after the piece is cool, it is not thermal shock.

If the break occurs some length of time after the piece is cool, it can be an annealing or a compatibility problem.  They are difficult to distinguish apart sometimes.

The annealing break usually crosses through the applied pieces and typically has a hook at each end of the break.  If the piece has significant differences in thicknesses, the break may follow the edge of the thicker pieces for some distance before it crosses it toward an edge. This kind of break makes it difficult to tell from an incompatibility break.

An incompatibility break may occur in the kiln, or it may occur days, months or years later.  Typically, the break or crack will be around the incompatible glass.  The break or crack may follow one edge of the incompatible glass before it jumps to an edge.  The greater the incompatibility, the more likely it is to break apart.  Smaller levels of incompatibility lead to fractures around the incompatible glass pieces, but not complete breaks.

There is more information about the diagnosis of the causes of cracks and breaks here.


Annealing

Another possible cause of delayed breakage is inadequate annealing.  Most guidelines on annealing assume a flat uniform thickness.  The popularity of tack fused elements, means these are inadequate guides on the annealing soak and annealing cool.  Tack fused items generally need double the temperature equalisation soak and half the annealing cool rate. This post gives information on how the annealing needs modification on tack fused items. 


Compatibility

The user indicated all the glass was of the same CoE.  This is not necessarily helpful. 

Coefficient of Linear Expansion (CoE) is measured between 0°C and 300°C. The amount of expansion over this temperature range is measured and averaged. The result is expressed as a fraction of a metre per degree Celsius. CoE90 means that the glass will expand 9 one-thousandths of a millimetre for each degree Celsius.  If this were to hold true for higher temperatures, the movement at 800C would be 7.2mm in length over the starting size.  However, the CoE rises with temperature in glass and is variable in different glasses, so this does not tell us how much the expansion at the annealing point will be.  It is the annealing point expansion rate that is more important.  More information is here.

Compatibility is much more than the rate of expansion of glass at any given temperature.  It involves the balance of the forces caused by viscosity and expansion rates around the annealing point.

Viscosity is probably the most important force in creating compatible glasses. There is information on viscosity here.  To make a range of compatible glass the forces of expansion and viscosity need to be balanced.  Each manufacturer will do this in subtly different ways.  Therefore, not all glass that is claimed by one manufacturer to compatible with another’s will be so. 


All is not lost.  It does not need to be left to chance.

Testing glass from different sources is required, as you can see from the above comments.  It is possible to test the compatibility of glass from different sources in your own kiln.  The test is based on the principle that glass compatible with a base sheet will be compatible with other glasses that are also compatible with that same base sheet.  There are several methods to do this testing, but this is the one I use, based on Shar Moorman’s methods.  

If you are investing considerable effort and expense in a piece which will use glass from different sources or manufacturers, and which is simply labelled CoE90, or CoE96, you need to use these tests before you start putting the glass together.  The more you deviate from one manufacturer’s glass in a piece, the more testing is vital. 

In the past, people found ways of combining glass that was not necessarily compatible, by different layering, various volume relationships, etc.  But the advent of manufacturers’ developing compatible lines of glass eliminated the need to do all that testing and experimenting.  While the fused glass market was small, there were only a few companies producing fusing glass.  When the market increased, the commercial environment led to others developing glass said to be compatible with one or other of the main producers of fusing compatible glass.

If you are buying by CoE you must test what you buy against what you have.

The discussion above shows that even with the best intentions, different manufacturers will have differences that may be small, but can be large enough to destroy your project.  This means that unless you are willing to do the testing, you should stick with one manufacturer of fusing compatible glass. 

Do not get sucked into the belief that CoE tells you anything important about compatibility.