There are a variety of ways to remove kiln wash. Many depend on whether the surface is flat,
smooth curves, angles or textured. Some
are applicable to both.
Flat surfaces are the easiest to deal with.
Abrasive methods
work well with a variety of tools.
They can range from large paint scrapers to smaller ones
with a Stanley blade inserted.
Coarse open mesh plaster board (dry wall) sanding sheets are
very useful. There are frames that you can fix them to, but sanding without the
frame works well too.
Using power tools to sand the shelf is not advisable. It is too easy to remove lots of material,
including the surface of the shelf – even the hard, ceramic ones. This leads to minor depressions in the shelf
and consequent bubble difficulties when firing.
Do not be tempted to sandblast as that will, almost
certainly, create small depressions in the surface of the shelf. Sand blasting is only possible on steel
moulds.
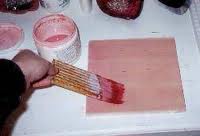
Wet
Wet methods are applicable if you are concerned about the
dustiness of the process. You can dampen
the kiln wash on the shelf and sand or scrape as above. You will create a paste or slurry in front of
the scraper which can be bagged and put in the waste.
You can also use a lot of water and the green scrubby
washing up pads. Unless you use a lot of
water, the kiln wash builds up in the scrubbing pads.
Some people use vinegar or chemicals such as lime away with
the water. Both are acids – lime away being much the strongest. I am sure these are used on the basis that
kiln wash is based on lime. However, the
material that makes the kiln wash stick to the shelf is china clay which is
barely affected by the chemicals. In addition,
the alumina hydrate is impervious to many chemicals available to kiln workers.
One drawback to using wet methods, is that the shelf is
wetted and needs drying before use. The
amount of water used in applying kiln wash is minor in relation to washing or
soaking the shelf to remove the kiln wash.
Do not be tempted to use pressure washers. Yes, they will
remove the kiln wash, but also leave little divots in the shelf which will
cause later problems.
Smooth curves
Kiln wash on moulds with smooth curves can be removed with
flexible sand papers or the plaster board sanding screens. Normally, the coating of kiln wash is thin
and does not require a lot of pressure or effort.
It is possible to dampen the kiln wash and take it off with
scrubbing pads. Make sure you do not use
excessive pressure. If you have wetted
your ceramic mould, you need to dry it very carefully, to avoid having the
mould break in the next firing. This is because
trapped water can turn to steam and the pressure will break the ceramic. It is
best to let the mould air dry for a week or so before putting it into the kiln
to thoroughly dry at about 90°C for a couple of hours.
Do not be tempted to use a pressure washer or water pick, as
both can erode the surface of a ceramic mould.
Curves with angles
Moulds with angled areas such as at the bottom or corners of
a rectangular mould need a flexible abrasive to clean out the angles. You can fold a piece of sand paper to use the
folded edge to do the final cleaning out of the angles.
The same can be done wet, but all the precautions about wet
removal of kiln wash need to be observed.
Textured
Textured moulds require much more care in cleaning the kiln
wash away, to avoid damaging the images and textures. The flat upper surfaces can be dealt with as
though it was a flat kiln shelf. The
indentations need to be more carefully treated.
Folded pieces of sand paper can be used to clean the delicate areas.
To ease cleaning of textured moulds it seems best to use
kiln washes without china clay as the binder.
These will brush out of the mould with a fibreglass bristled brush. It is now popular to use boron nitride - often sold as Zyp - as a coating for these moulds. This needs to be brushed out and renewed with each firing.
Removing kiln wash
from glass
Kiln wash stuck to the glass can present greater problems,
because you want to avoid marking the glass.
It is best to start with the least aggressive abrasive, such as a green
scrubby, and progress toward more aggressive and abrasive methods. When using the more aggressive methods, try
the finest grit first to see if that will work, as it makes for less work
cleaning up the grinding marks from the glass.
For flat glass, you can work with a succession of finer
loose grits, or a succession of finer diamond hand pads.
Flexible diamond impregnated sheets can be used for curved surfaces. Again, this requires a succession of finer grits to get to the polished stage.
You can use small hand held rotary tools with diamond and
felt pads to polish out stuck kiln wash.
This helps to remove some of the labour of polishing the glass.
Some people advocate the use of acids to remove the kiln
wash. However, you must remember that
glass is an alkaline material and acids will tend to mark the glass. Vinegar is a mild acid, but prolonged exposure
will etch the glass. Strong chemicals
such as lime away or etching cream or hydrofluoric are all strong acids and
will mark the glass after brief exposure to them.