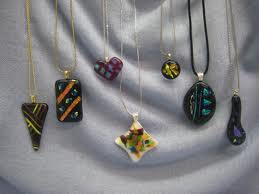
Sunday, 10 March 2013

Glues in Kiln Forming


Glues have two major uses in fusing. One is to stick things together after being fused (cold fusing). The other is to hold things together before fusing.

Holding things together while preparing the piece to be transferred to the kiln is a major use of low tack adhesives and glues. All of these burn off a lot lower than the temperature at which the glass begins to stick together. So, if you are gluing overhanging pieces, for example, they can move after the glue has burned off.  If you are assembling pieces that will not stay in place while you are putting it together, glue will not help get the final result you want.  If you are gluing to keep things stable while you move it to the kiln, you may find everything is ok.

However, glue tends to boil off if the temperature is raised too fast. During this process, the effect of the boiling will move the glass pieces that are most unstable. This also occurs if you use too much glue. You should only use as much as will stick the pieces together. Also too much glue leads to black spots and sometimes bubbles between the layers of glass.


The adhesives commonly used are the Bullseye product “Glastac”, Elmer’s glue, diluted PVA - or school - glue. All of these take varying times to dry and hold the glass pieces in place. So, a popular alternative is hair spray. This is a lacquer which dries almost instantly. It provides a thin film of adhesive and burns off in the kiln with no residue. You should use the varieties with no additives.


Glue most often leads to problems or unexpected results, so several ways have been used to achieve the desired results.

One way to deal with unstable components on small pieces is to make a large piece with a repetition of the design and cut it up after fusing in to the sizes you want.  Clean the pieces very well, and then fire them again to at least fire polish to remove any cutting or grinding marks.

An alternative to using glue, especially at the edges where the pieces are likely to move, is to use dams. My practice is to make the dams slightly taller than the unfired piece and line with fibre paper. I put 3 mm fibre paper against the dam, and thinfire against the glass. Both of these should be 3 mm narrower than the final height of the fused piece will be. This is to allow the glass to make a rounded edge as it will not be able to stick to the fibre as it sinks down to its final height.

Bullseye hot dams as an example of damming

Another alternative to using glue is to fire the piece upside down, so that the pieces do not have to be supported. This does require some planning and forethought. You can draw the design in reverse on thinfire, using different coloured pencils for the various layers to help in building the piece up in reverse. You then cap the assembled pieces with the piece that will become the bottom. Take the whole to a tack fuse. Then clean very well to remove any residues from the shelf. It is possible to sandblast and then clean to make sure there are no residues left. Of course this is not possible if you are using dichroic or iridised glass. Also note that iridised surfaces and thinfire do not get on well – there is extreme pitting in the iridised surface. 


Example of pieces glued and ready for the flip

 Once the piece is cleaned, fire again to get the desired surface texture.


Cleaning a piece after first firing

Tuesday, 5 March 2013

Bones as Inclusions in Glass


The major components of bones are calcium and organic materials making up the marrow. If the bones are not old and weathered a very bad smell will be produced. The organic material will cause bubbles. Finally, it takes a long time to burn out the marrow, so it is best to use bones that have weathered for a number of years.

Calcium “erodes” during firing, so fine and thin bones will leave a shadow of ash (or a big bubble if there is not a long bubble squeeze. The bone has to be encased or trapped by the glass as it will not stick permanently to the glass on its own.

It can make dramatic shapes if the bones are arranged in novel ways to represent other things. The whole of the bone does not need to be encased, as the thicker parts will be strong enough to support themselves.

Monday, 25 February 2013

Hanging Sun Catchers


Unless you are using some manufactured system or a frame, the most frequent way to provide hanging points is to create a loop from copper wire.


Hangers should originate in a solder bead that goes some way into the piece. The loop's tail should lie a significant distance into the solder line to ensure it does not pull the piece apart. If this is to remain invisible, some planning will be required to allow the small extra space between the foiled glass.


The loops for hanging a piece of any size should not be soldered to the perimeter foil without reference to the solder bead lines, as the adhesive and foil are insufficient to hold the weight of the piece without tearing.

Here the hanging loops could have been moved just a little to engage with the solder joints at the left ear and at the tail to make stronger hanging points

Here the hanging points are at the solder joints giving strong hanging points

Reinforcement of free hanging or projecting elements can be done by placing wire around the piece with a significant excess going along the perimeter in both directions. The supporting wire can go into the solder line, if it is a continuation of an edge of the free hanging piece.

In this case a twisted copper wire around the perimeter gives strong hanging points

The strongest method is to wrap the wire around the whole perimeter of the piece. Choose easily bent copper wire. This will be pretty fine, but when soldered, will be strong enough support the whole piece.

The hanger can be made by leaving a loop of wire free. This way you can hang from any convenient place on the perimeter. This loop can be made by a single 180 degree twist in the wire, or by bending a loop into the perimeter wire. In all cases you will need to tin the wire to blend it with the rest of the piece.

This perimeter wire can be simply butted at the start/finish of the wire. It could be overlapped, but this is unnecessary on any piece where this method is adequate for support. The start can be at the top or bottom, although I prefer the top, so the wire is continuous from loop to loop. The reason for continuing beyond the loops is to provide support to all the edges of the sun catcher.

This single point hanger is at the strong point of the piece

The left hanger is strong, but the right is weaker than if it had been attached to the right of the body

This piece needs wire around the piece, especially to stabilise the tail and ears

Wednesday, 20 February 2013

Cleaning Magnets


When making frit in steel containers the metal fragments need to be removed using magnets. It can be very difficult to get the fragments off the magnets.


A solution has been suggested. Put the magnet into a small plastic bag before use. After cleaning all the metal from the frit, take the bag to the bin and remove it from the bag. The metal fragments will drop off into the waste bin, leaving a clean magnet.

Friday, 15 February 2013

Single Layer Firing


Preparing a Single Layer for Further Kiln Work

There can be circumstances where you do want to fire a single layer in building up your project. This is more often difficult on rectangular than round pieces.

Some of the considerations are:
Temperature
Heat work
sizing
Cleaning after firing

Firing a 3 mm piece to anything over a laminated tack fuse normally leads to the edges drawing in creating a “dog bone” effect and often leading to bubbles in the interior at higher fusing temperatures. So one approach is to fire at low temperatures and accept relatively sharp edges on the piece.

Diagram of the full fused results of different thicknesses 


However the concept of heat work can help in this situation. Glass reacts to the accumulation of heat, so that slow advances or long soaks can achieve the desired results at a lower temperature without – in this case – getting the “dog bone” effect. This does require a bit of experimentation. Keep good records of all the stages of experimentation as the effects achieved with various combinations of temperature and time will come in useful later.

It is possible that using the concept of heat work will not be sufficient to achieve the desired results. Then you need to consider placing your design in the centre of a larger piece. Fire this to the lowest possible temperature to achieve your results and then cut the fired piece to size. You will need to fire polish or cold work the edges to get a suitable finish on the edges.


The central white piece shows the results of single layer firing that could be altered by the above technique


If you are going to re-fire any of these single-layer pieces, you need to clean them very well. Any dust or other contamination will be incorporated into the final piece. This is especially true if you are combining a flip and fire technique with this single-layer firing.

Sunday, 10 February 2013

Slump Point Test


A slump point test is useful when you wish to determine the approximate annealing point of an unknown glass. The methodology follows:

Prepare a strip of the glass 305mm x 25mm. Suspend this strip above the shelf on 25mm pieces of kiln furniture. Leave a 275mm span between the kiln furniture. A piece of kiln furniture also needs to be placed on top of the glass to keep it in place.

Example of an extreme case of testing for slump point

Fire at 200C per hour to ca. 550C, then fire at 50C/hour to about 700C. Observe frequently from 600C. Record the temperature when the middle of span touches the shelf.  This is also the slumping temperature of the glass when fired this way. 

Subtract 40C from the “touch down” temperature for the approximate annealing point temperature.


Tuesday, 5 February 2013

Ceramic vs. Glass Kilns


The purposes of these two types of kiln differ, so insulation properties differ too. Ceramic kilns have high density brick insulation to retain the heat and slowly cool the contents from the top temperature to avoid breakage. Glass kilns have light weight insulation – whether brick or fibre - to cool quickly from the top temperature to avoid devitrification.


Considerations


Controllers are necessary for controlled soaks and cooling on glass kilns. Much simpler controls are sufficient for ceramics firings. So a ceramics kiln needs to have a controller added. This is a significant cost. If buying a ceramics kiln new for glass work, ensure it has a controller that can be used for glass.


A bathtub or coffin type kiln with controller


Heat distribution is different in the two. Glass kilns are shallow to get even heat distribution to the surface of the glass. Ceramic kilns have elements around the sides and frequently in the top, but may not have any in the door, if it is not top loading. This means the heat distribution in a ceramic kiln is not as even as in a glass kiln, which is not a problem for ceramics as so much heat is retained at the target temperature, it equalises as the kiln cools.


Ceramic kilns with elements on sides rather than top

Loading
Ceramic kilns up to 450 mm deep tend to be top loading, the ones with greater depth tend to have doors. Glass kilns are shallower and tend to have top – just the lid opens - , clamshell – the lid is the whole chamber which opens giving direct access to the floor of the kiln - or bell type – where the lid also forming the chamber is lifted from the base of the kiln and often the base is on wheels so another base of prepared work can be wheeled into place for firing before the kiln has completely cooled.


Large top hat kiln showing direct access to the kiln floor

Baffles are required in ceramic kilns because the heat is greater nearer the elements on the initial advance in temperature. These baffles avoid premature sealing of the edges of pieces causing large bubbles.

Firing on multiple levels is possible in ceramic once you have built up the experience.

Schedules have to take into account the greater mass of insulation in ceramic kilns.


Kiln with fibre insulation all around

Annealing and cooling tends to require different strategies to encourage the ceramics kiln to cool fast enough in the devitrification range, but can have the power turned off earlier after the annealing soak, because of the slower cooling.


Large front loading ceramic kiln

Ceramic kilns are ideal for casting.

Cost – ceramic kilns tend to cost less than glass ones and second hand ones have been more widely available. That may be changing now with the increasing popularity of glass fusing. 

The electricity costs are marginally higher in ceramic kilns than glass, because the mass of brick to be heated up is greater..

Space - Ceramic kilns tend to take up less floor space because they are deep or tall rather than broad.

Small top loading kiln with combination brick and fibre insulation

Wednesday, 30 January 2013

Removing Kiln Wash

Kiln wash can get stuck on items for a variety of reasons

A variety of ways to remove the kiln wash are:


Grind the kiln wash off with diamond hand pads, or small rotary tool with wet sandpaper. You can then proceed to continue to grind with successively fine grits until a polish is achieved, or you can fire polish after a thorough cleaning.


Example of scrubbing kiln wash off


You can sandblast off the kiln wash and then proceed in either of the fashions above.


You can soak small pieces in tri-sodium citrate and then if necessary scrub with a wire brush – a brass wire brush is preferable to steel one to avoid scratching the glass.

Another solution is to place small items in an ultrasonic cleaner basket with water and a little soap or proprietary cleaner. Leave for an hour or two and they should be free of the kiln wash.

A link to some methods of cleaning shelves is here.

Friday, 25 January 2013

Grinder Chipping Glass


There are a number of reasons that may cause the grinder to chip the glass surface. Some of the things to check are:

Too much pressure
It may be that you are pressing the glass into the grinder head too hard. The grinder head should do the work. Firm rather than hard pressure should be applied. If the grinder slows, it is an indication that far too much pressure is being applied.

Insufficient water supply
There may be too little water reaching the head to lubricate the diamonds and keep the glass cool. If you are getting a white paste or a powder on or near the glass, you need to increase the water supply.

Worn or damaged grinder bit/head
Inspect your bit carefully for smooth areas showing that the diamonds have been worn away. Also look for dents, and other irregularities on the surface, indicating that the bit is damaged. Any dents or smooth places on the bit cause a vibration that is similar to a tiny hammer tapping the edge of the glass.

Grit size
It is possible that you may be using too coarse a grit on the grinder bit/head. The more coarse the grit is the larger the chips will be taken off the edge surfaces. Smaller grits take smaller chips off the edges, and so are less obvious.

New bits
Examples of the range and grit differences in grinding bits
If it is a new bit that is causing the chipping, consider dressing it. New bits often need to be dressed – removing protruding diamonds, or cleaning and exposing new ones on a worn bit. To dress the bit you can grind some scrap glass, brick, or use a dressing stone to lightly grind some of the abrasive material away. This most often settles the bit and avoids chipping.

Sunday, 20 January 2013

Cutting thick glass

Use the correct angle of cutter wheel for the thickness. 

Use a similar pressure to cutting 3 or 6 mm glass. It is natural to think that as the glass is thicker, you need to use more pressure. The different angle of the cutter wheel is designed to transfer the standard pressure more directly downward.

Use cut runners made for thick glass to help break the glass. Run score from both ends of the score, especially on curved scores.
Example of cut runners for thick glass

Alternatively, turn the over and use hammer and rounded screw driver to run the score (similar to tapping method for thinner glass). Place the screw driver blade directly over the score line and tap it with a hammer. This will start the run. Continue it by placing the screw driver over the score at the end of the open score and tap again to continue the run.