Showing posts with label Ceramics. Show all posts

Wednesday 29 November 2023

Stuck Kiln Wash


Moulds

Kiln wash on ceramic moulds lasts a very long time. But sometimes you want to use a different separator. First you need to prepare yourself and the area for the process.

Preparation

It is best to wear a mask while removing kiln wash or other separators to reduce the amount of dust you inhale. Wearing an apron or other outer wear will keep the dust off your clothing.

Spread a cloth, newspaper or other covering around the area. This is to be able to easily gather the removed kiln wash and place it in the waste.  Have a vacuum sweeper at hand to remove powder rather than blowing it around the workspace.  Of course, if you can do this outside, there is much smaller risk of contamination.

Removal Methods

The method of removing kiln wash depends in part on what the mould material is.

Metal

You can sandblast, manually sand, or wash off the kiln wash from metal moulds.

Ceramic


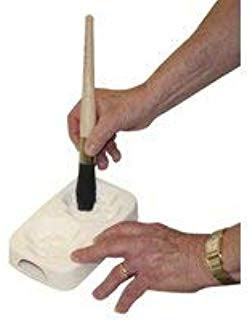
Sandblasting is not a safe method for ceramics, as it is so easy to damage the surface of the mould. Removing the kiln wash while dry is a good first approach. It saves having to wait long times for air drying and long kiln drying of the damp mould. You can lightly sand off the kiln wash from smooth surfaced
moulds, and for detailed areas use rounded point wood and plastic tools. This can be backed up with a stiff nylon brush to clear out the narrow or detailed areas.

When these dry methods are insufficient, there are wet approaches. I recommend dampening the kiln wash rather than immersing the mould in water. The same tools can be used as for the dry removal.

Soaking or washing the mould does not remove the kiln wash as easily as you might think.  It is especially to be avoided where the mould has an internal hollow, as it may take days to dry sufficiently to apply other separators.  To put it in the kiln risks breaking the mould by the steam build up during the initial rise in temperature.

If you must soak the mould, I recommend that you use a 5% solution of citric acid because it has a chelating action on the kiln wash.

More information on removing kiln wash from moulds.

Remember that once the mould or shelf has been coated with boron nitride, it is almost impossible to go back to kiln wash again.  The boron nitride irreversibly fills the porous element of the ceramic, making it difficult for the kiln wash to adhere to the mould.

Shelves

The easiest surfaces to remove kiln wash from are flat or ones nearly so.

Dry Methods

Abrasive methods work well with a variety of tools. They can range from large paint scrapers to smaller ones with a Stanley blade inserted. 


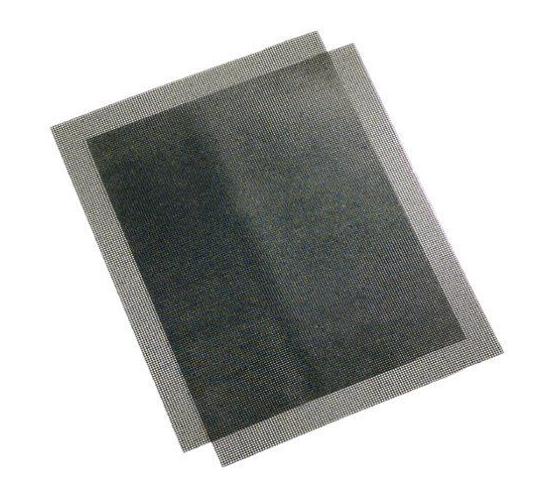
Coarse open mesh plaster board (dry wall) sanding sheets are very useful. There are frames that you can fix them to, but sanding without the frame works well too.


Using power tools to sand the shelf is not advisable.  It is too easy to remove lots of material, including the surface of the shelf – even the hard, ceramic ones.  This leads to minor depressions in the shelf and consequent bubble difficulties when firing.

Do not be tempted to sandblast either, as that can easily create the small depressions in the surface of the shelf that subsequently lead to bubbles. 

Wet methods

Wet methods can be used if you are concerned about the dustiness of the process.  You can dampen the kiln wash on the shelf and sand or scrape as with the dry methods.  You will create a paste or slurry which can be bagged and put in the waste. You can also use the green scrubby washing up pads.  Unless you frequently rinse the pads, the kiln wash builds up and clogs the pads. making them ineffective.


Some people use vinegar or chemicals such as lime away with the water. The material that makes the kiln wash stick to the shelf is China clay and the separator is alumina hydrate. Both of these elements are almost impervious to the chemicals available to kiln workers. Instead, use citric acid. It has a chelating action which will incorporate the particles of the kiln wash. This will require some scrubbing, but avoids the smells of vinegar and the risks of other chemicals.

Do not be tempted to use pressure washers. Yes, they will remove the kiln wash. But it will also leave divots in the shelf which will cause later problems with bubble creation.

A big drawback to using wet methods, is that the shelf becomes wetted throughout and needs careful drying before use. 

Both the wet and dry methods can be used on smooth, gentle curved moulds. These include wave moulds, shallow moulds without flat bottoms, cylinder moulds, and such like.

More information on Kiln Wash Removal from shelves is available here,

and here.

Boron Nitride

A note on the reversibility of boron nitride. This is sold under a variety of trade names such as Zyp, More, MR97, etc., and sometimes under its chemical name.

Some people are applying boron nitride to ceramic moulds for the "smoother" surface.  Boron nitride is an excellent separator for metal moulds and casting moulds whether metal or ceramic. But it has limitations, including the price and the requirement for a new coating at each firing.  Some are beginning to wonder if they can go back to kiln wash after having used the boron nitride.

The general experience has been that you can't apply kiln wash on top of the boron nitride. It just beads up and flows off, because the boron nitride creates a non-wetting surface that survives relatively high temperatures. The kiln wash which is in water suspension has no opportunity to adhere to the mould.

The most accepted way to get rid of the boron nitride is by sandblasting. Sandblasting risks pitting the mould. Manual sanding seems to enable the ceramic mould to accept kiln wash. Perhaps enough of the surface is removed to reveal the porous nature of the ceramic mould. You do need to be cautious about taking the surface of the mould away when using abrasive removal methods. The ceramic is relatively soft in relation to the abrasive materials.

The difficulty of removing boron nitride from ceramic moulds means that you must think carefully about which moulds you coat with it.  If the mould has delicate or fine detail, removing the boron nitride risks the removal of the detail.  This indicates that this kind of mould, once coated, should not be taken back to the bare mould.

If you are using boron nitride to get a smoother surface to the object, consider using a lower slumping or draping temperature. This will minimise mould marks very effectively. And without the expense of boron nitride.

More information on removal of boron nitride is given here. 

More information about mould treatment is available in the ebook: Low Temperature Kiln Forming and at Bullseye ebooks

Wednesday 13 July 2022

Ceramic Drape Moulds

Characteristics of materials

One of elements you need to consider in selecting a mould for draping is the characteristics of the ceramic material in relation to the glass being draped.  

Ceramic

Ceramic materials have what are called inversions. These are  points at which the ceramic has a quick change in expansion both on the heat up and cool down.  The two major ones are cristobalite inversion temperature at around 225°C and the quartz inversion at about 570°C.  The Crystobalite inversion is a sudden change of about 2.5% and the quartz is a sudden change of 1%.  These are very sudden and dramatic changes in comparison to the average of around 0.1% over the temperature range of 570°C to 800°C.  The crystobalite inversion does not occur until ca. 225°C.  This means that the whole structure of the ceramic is contracting less than the glass – exhibiting a CoE of ca. 66 rather 90 to 96.

Ceramic drape mould from Creative Glass Guild

Glass

We are used to saying glass expands and contracts at a standard rate, depending on the glass this may be a CoE of 83 to one of 104.  This is not the case.  The coefficient is an average calculated between 20°C and 300°C.  If you change the temperature range, the coefficient will also change.  And if you look at the range 570°C to 580°C you find the CoE is around 500.  This means that as the glass cools into the annealing range, it is contracting about 7 times faster than the ceramic. 

This dramatic difference in contraction means that the glass is attempting to crush the ceramic by enclosing it tightly.  Sometimes it does it so strongly that the strength of the glass is exceeded, and it breaks.

Possibilities

It is possible to drape over ceramic in certain conditions.

Influence of draft

The term “draft” indicates the slope of the sides of the form.  The steeper the sides, the more likely the glass is to trap the ceramic mould.  To be useful, the draft of the mould needs to be sufficient for the glass to slide upwards on the mould as it cools. This means the mould needs smooth sides and be well covered with a separator.

Compensations

You can compensate for steep drafts by wrapping the ceramic form in 3mm refractory fibre paper.  You can bind this with high temperature wire to ensure it stays throughout the firing. The fibre paper can be compressed and so provides a cushion between the rapidly contracting glass and the slowly contracting ceramic.

These need a circle of 3mm fibre paper over the open top of the kiln posts that have no draft at all before use. Of course, they need to have a circular piece of fibre paper over the hole in the post.


The use of ceramic forms to drape over requires care about the draft of the ceramic or addition of a cushion to avoid the greater contraction of the glass than the ceramic grabbing the mould so tightly it cannot be removed.

Wednesday 26 January 2022

Trapped Glass


Glass can be trapped in or on moulds in various circumstances. These usually relate to the relative expansion and contraction characteristics of the glass and mould.  The two materials most usually concerned are steel and ceramic.

Releasing glass from steel


Frequently when using steel as dams around glass, the glass becomes stuck inside the steel.  The cause of this is the greater contraction of the steel than the glass.  On cooling, the steel compresses the glass tightly. 

Another circumstance where glass is trapped is while slumping glass into a steel vessel.  If the draft of the sides of the vessel is steep, the glass cannot slip upwards as the steel contracts against the glass, so trapping the glass.

Most successful attempts to remove the glass from the steel are like removing a metal lid from a glass jar.  Heat the metal and try to keep the glass cool.  You can run hot water on the steel while keeping the glass cool.  This will most often allow the glass to be pulled from the steel surround, assuming there was a glass separator applied to the steel.

Putting the whole assembly in the freezer will only increase the grip of the steel as it will contract even more than the glass.


Prevention of trapping the glass involves placing a cushion between the steel and glass.  This is usually 3mm fibre paper.  Sometimes this has a layer of Thinfire added to give a smoother edge to the glass.  Other times, the fibre paper is coated with boron nitride.  There is no need to use both Thinfire and boron nitride, of course.


Releasing glass from ceramic


The difficulty of glass trapping ceramic occurs during draping.  Ceramic expands and contracts less than glass.  This means that the glass will trap a kiln washed ceramic shape with a steep draft.  The glass on cooling, contracts more than the ceramic which means the glass is tightly encasing the ceramic. 

A ceramic draping mould from which  it may be difficult to remove the glass.

Most successful attempts to remove the glass from the ceramic form include either gently warming the glass or freezing the whole assembly.  You could place the glass in a bath of warm water.  This encourages the glass to expand, but does not heat the ceramic.  This usually provides enough gap to ease the glass from the ceramic form.

The other approach is to put the whole into the freezer.  This is utilising the greater contraction of the ceramic to release the glass. This is less immediate than the warming of the glass, of course.

Prevention of trapping glass on ceramic with shallow drafts involves covering the form with 3mm fibre paper to provide a cushion during the contraction.  The fibre paper may need to be attached to the form by binding with high temperature wire, as glues will not survive the heat of draping.

Further information is available in the ebook: Low Temperature Kiln Forming.

Wednesday 20 October 2021

Texture Moulds and Glass Sizes


I had an overhang [on a texture mould] and I heard a pop and opened kiln and saw it cracked off the mold. … [The piece] is 2 layers Bullseye irid placed face down and Tekta [on top]; the mold was sprayed 3-4 times with zyp and Thinfire; and I put mold on kiln posts. [I] fired to 1440[F].

Diagnosis 

The overhang of the glass caused the break. As the glass heats it expands. The ceramic does not expand as much as the glass.  This means even more glass will hang over the edge than at the start.  As the glass reaches slumping temperatures, it begins to drape over the edge. At the same time the glass on the interior is beginning to slump into the textures.  When the glass has fully taken up the texture, the overhanging glass will be touching the outer sides of the mould. This means at the end of the heating and soaking part of the firing, you have the ceramic mould partially and tightly encased in glass.  The glass has formed around the ceramic.

Credit: theavenuestainedglass.com

The physics of the two materials are that glass expands more than ceramic. On cooling, the glass grips the sides of the ceramic mould tightly. This is because it shrinks more than the ceramic.  In this case, the ceramic was stronger than the glass and the strain caused the glass to break.  Upon occasion the opposite can happen.

Two other notes.

The temperature of 781°C is higher than needed.  You will need to do a bit of experimentation to find the right combination of temperature and time for each mould.  You could consider 630°C as an initial temperature with a 90-minute soak.  Bob Leatherbarrow (p.161) describes a method of scheduling a sequence of slightly higher temperatures with soaks.  If the texture is not forming (as determined by observations), you can advance to the next segment with a higher temperature and see how that goes.  When the appropriate amount of texture has been achieved, advance to the cooling to anneal segment.

Iridised surfaces provide a very good separator.  With the iridisation down against the mould, it may be unnecessary to use Thinfire, especially when you already have used boron nitride as the separator.

Further information is available in the ebook: Low Temperature Kiln Forming.

Wednesday 6 October 2021

Removing kiln wash from moulds

“How do I remove kiln wash from a mould that I have decided would work better with ZYP?”

Once coated with kiln wash, slumping or draping moulds do not need to be re-coated until the surface is damaged.  Then it is best to remove all the kiln wash to prepare a new smooth surface for the kiln wash.  You may, of course, as the enquirer above states, want to use a different kind of separator.  The cleaning of the kiln wash from the mould will be the same process whatever you want to do with the mould next.

There are many ways to get the old kiln wash off.  Some of them depend on the material from which the mould is made.

Metal

If the mould is made of stainless steel or other metal, the easiest method is to sandblast with lots of air and a minimum of grit.  You can also use sandpapers or open weave sanding screens. The methods used on ceramic moulds, as described below, can also be used on metal.

Ceramic

Sandblasting is not safe to use on ceramic moulds, as the sandblast medium can erode the surface very quickly and often unevenly.

Preparation for manual removal of kiln wash.

It is best to wear a mask during this process to reduce the amount of dust you inhale. Spread a cloth, newspaper or other covering to be able to easily gather the removed kiln wash and place it in the waste.  Have a vacuum sweeper at hand to remove powder rather than blowing it around the work space.  Of course, if you can do this outside, there is much smaller risk of contamination.

Dry

I suggest that removing the kiln wash while the mould is dry should be the first stage. 

Flat surfaces can be cleaned with a straight edged wooden stick, or wooden clay modelling tool.  Firmly push it along at a slight angle from the vertical to remove most of the kiln wash. 

On curved surfaces you will need a rounded tool such as a plastic burnisher or all nova tool for the coarse work.  This can be followed up by using a stiff sponge to clean up any stray kiln wash still adhered. If the kiln wash is persistently sticking to the mould, you can cut a small piece from an open weave sanding screen and use it to gently remove the most difficult remaining kiln wash.  Do not use more than light pressure, as with heavy pressure, the screen can begin to remove the surface of the ceramic mould.


Texture moulds and those with a lot of detail or right-angle corners need a bit more attention.  You can use a variety of non-metal tools to get into areas of detail.  Some of these are a rounded chopstick, a wooden skewer, a plastic knitting needle, and other similar items with rounded points.  These can be backed up with a small stiff nylon brush.  It is while working on these detailed areas that the vacuum sweeper will be most useful to clear out the debris and enable you to see how well the kiln wash is being removed.

Wet

Some people do not like the idea of the dust created from the removal of the kiln wash being in the air at all.  And sometimes, the dry removal is not complete.

My recommendation is to dampen the kiln wash that is on the surface of the mould.  This will cause some difficulties in removal, because a slurry is created along with the flaking of the baked-on kiln wash.  The same tools can be used to clean the mould as when dry.  The vacuum sweeper will not be of use though.  Once the kiln wash appears to be cleaned away, the mould needs to dry to enable removal of the remaining kiln wash.  Once dry, you can use dry sponges, or the small nylon brush to clean the remaining film of kiln wash from the mould.  This cleaning may reveal areas where the kiln wash is still adhering. These can be dealt with wet or dry, although I prefer dry.


Soaking or washing the mould does not remove the kiln wash as easily as you might think.  It is especially to be avoided where the mould has an internal hollow, as it may take days to dry sufficiently to apply other separators.  To put it in the kiln risks breaking the mould by the steam build up during the initial rise in temperature.

If you must soak the mould, I recommend that you use a 5% solution of citric acid because it has a chelating action on some of the components of kiln wash.


Remember that once the mould or shelf has been coated with boron nitride, it is almost impossible to go back to kiln wash again.  The boron nitride fills the porous parts of the ceramic making it difficult for the kiln wash to adhere to the mould.


Further information is available in the ebook: Low Temperature Kiln Forming.


Wednesday 12 May 2021

Materials for making dams


Rectangular or straight sided shapes


Broken shelves
Accidents happen to mullite shelves causing breaks or cracks.  Rather than throwing them out, you can cut them into rectangles or 50mm strips with a tile saw.  The resulting shapes need to be kiln washed to keep glass from sticking.  They can be used flat or stood on their edges with supports on the outside.

Thick ceramic tiles can be used in much the same way.  You do need to remove the glaze from the tile to make sure they don’t stick to the glass.  Or you could use the unglazed side toward the glass. Again, the tiles need to be kiln washed.

Stainless steel can be used as a dam.  It will need treatment with a separator such as boron nitride or kiln wash.  In addition, it needs to be lined with refractory fibre paper to cushion the force of the greater contraction of steel than glass.

These materials cannot easily be adjusted in length to fit the size of the glass piece being dammed.  Instead, arrange them in a swastika like formation. 


This photo also shows how shorter lengths can be incorporated to make the whole dam.

Vermiculite board is a refractory material that can be used to form dams by cutting with a wood working saw.  The saw you use to cut the vermiculite will be dulled and only be useful for cutting vermiculite in the future.  Do not use any expensive cutting equipment!  
Credit: Bullseye Glass Company


Refractory fibre board is available in many thicknesses.  It can be cut with craft knives even though it dulls the blades quickly.  The thicker boards can be used without rigidising.  This avoids the need to kiln wash and allows adjustments in length.  If you do rigidise fibre board, you must coat it with a separator such as kiln wash or boron nitride.

Weighted fibre paper can be used.  It is sometimes the quickest and easiest to use, as there normally is a stash of scraps around the studio.  It is easily cut with a craft knife.  You can build up the thickness of the dam by layering pieces on top of one another.  Sometimes people put metal wire or pins in the layers to ensure there is no movement between the layers. I’ve found that if weighted, the fibres interlock enough that the layers do not shift.  But you need to line the layered fibre paper dams with vertical strips of fibre paper, so the glass does not take up the layered dam profile on its edge.

Note that you need to use breathing protection when cutting all these materials.


Curved and circular pieces


Many times, the shape to be dammed is not formed of straight lines.  Different materials need to be used in these cases.

Formed stainless steel is a good durable and reusable material.  You need to line the shape with fibre paper if it completely contains the shape, because it contracts more than the glass and can crush the piece.  It is expensive to have made and so needs to have multiple uses to justify the cost.  A cheaper alternative is to make your own shape using stainless steel strapping as used for shipping crates and pallets. 

Fibre paper is an excellent material for damming irregular shapes.  It can be cut into complicated shapes, and it can be layered to attain the required height. You can weight it if you are taking things to a high temperature and fear that the glass will flow under the fibre paper.

You can also use the thicker fibre papers upright by backing up with multiple pieces of kiln furniture to maintain the shape you desire.

Vermiculite board is a good material for making shapes, although not as complicated ones as possible in fibre paper.  Vermiculite can be shaped with wood working materials, but cheap ones should be used as they are quickly dulled. You can rough out a shape with a jigsaw and refine it with various wood working tools, including coarse sandpaper.  Because it is a relatively rigid material, a lot of inventiveness can be used in forming the edges by altering angles from the vertical, incising designs into the edge, etc.  Be certain that you have adequately kiln washed or put other separator on the board, as it will stick to the glass if left bare.

Fibre board is a less rigid material than vermiculite, but is easier to work with simple craft tools.  It is simple to use for a unique one-off shape. It only needs smoothing and does not have to have a separator applied because it does not stick to the glass.  If you create a shape that you will want re-use, you can rigidise the board after shaping, but it will require separators then.


Note that when working with refractory materials, you need to wear respiratory protection and clean surfaces with a HEPA vacuum or by dampening dusty surfaces and wiping them clean.  Dispose of cleaning materials safely.

Saturday 17 April 2021

Effects of Dams on Scheduling

 I recently made a statement about the effects of various dam materials on the scheduling.  This was based on my understanding of the density of three common refractory materials used in kilnforming – ceramic shelves, vermiculite board and fibre board.  I decided to test these statements.  I found I was wrong.

I set up a test of the heat gain and loss of the three materials.  This was done without any glass involved to eliminate the influence of the glass on the behaviour of the dams.  The dam materials were laid on the kiln shelf with thermocouples between.  These were connected to a data logger to record the temperatures.


The schedule used was a slightly modified one for 6mm:

300°C/hr to 800°C for 10 minutes

Full to 482°C for 60 minutes

83°C to 427, no soak

150°C to 370°C, no soak

400°C to 100°C, end


The data retrieved from the data recording is shown by the following graphs.


Highlights:

·        The dam materials all perform similarly. 

·        This graph shows the dams have significant differences from the air temperature – up to 190°C – during the first ramp of 300°C/hr. (in this case). 

·        There is the curious fall in the dams’ temperatures during the anneal soak.  This was replicated in additional tests.  I do not currently know the reasons for this.

·        The dams remain cooler than the air temperature until midway during the second cool when (in this kiln) the natural cooling rate takes over.

·        From the second cool to the finish, the dams remain hotter than the air temperature.


Some more information is given by looking at the temperature differentials (ΔT) between the materials and the air.  This graph is to assist in investigating how significantly different the materials are. 

This graph is initially confusing as positive numbers indicate the temperature is cooler than the material being compared and hotter with negative numbers.


As an assistance to relating the ΔT to the air temperature some relevant data points are given.  The data points relate to the numbers running along the bottom of the graph.

Data Point   Event

    1                Start of anneal soak.

    30              Start of 1st cool (482°C)

    45              Start of 2nd cool (427°C)

    65              Start of final cool (370°C)

    89              1st 55°C of final cool (315°C)

    306             100°C


At the data points:

·        At the start of anneal soak the ΔT between the dams is 16°C with the ceramic shelf temperature being 18°C hotter than the air.

·        At the end of the anneal soak of an hour, the air temperature is 20°C higher, although the ΔT between the dams has reduced to 12°C.

·        At the end of the 1st cool the ΔT between the dams has reduced to 9°C and the ΔT with the air is 3°C.

·        At approximately 450°C the air temperature becomes less than the dams. 

·        At 370°C the hottest dams are approximately 17°C hotter than the air.  The ΔT between the dams is 10°C.


More generally:

·        The air temperature tends to be between 17°C hotter and 17°C cooler than the ceramic dams during the anneal soak and cool.  The difference gradually decreases to around 8°C at about 120°C.

·        Ceramic and fibre dams loose heat after annealing at similar rates – generally having a ΔT between 4°C and 1°C, with a peak difference of 9°C at the start of the second cool. This means the heat retention characteristics of ceramic strips and fibre board are very close.

·        Between the annealing soak and about 300°C the vermiculite is between 12°C and 9°C hotter than the same thickness of fibre.  Vermiculite both gains and loses heat more slowly than the ceramic or fibre dams do.  This means that vermiculite is the most heat retentive of the three materials.


Conclusions

·        Dams will have little effect during the heat up of open face dammed glass.  The slight difference will be at the interface of the glass and the dams where there will be a slight cooling effect on the glass.  Therefore, a slightly longer top soak or a slightly higher top temperature may be useful.

·        The continued fall in the dams’ temperature during the anneal soak indicates that this soak should be extended to ensure heat is not being drained from the glass by the dams to give unequal temperatures across the glass with the risk of inadequate annealing.  I suggest the soak should be extended to that for glass of 6mm thicker than actual to account for this.

·        The ability of ceramic and fibre dams to absorb and dissipate heat more quickly indicates that they are better materials for dams than vermiculite board.  The slightly better retention of heat at the annealing soak, indicates that ceramic is a good choice when annealing is critical.


Scheduling Effects 

Based on these observations, I have come to some conclusions about the effect of dams on scheduling.

·        There is no significant effect caused by dams during the heat up, so scheduling of the heat up can be as for the thickness of the glass.

·        The lag in temperature rise by the dams indicates a slightly longer soak at the top temperature (with a minor risk of devitrification), or a higher temperature of, say 10°C can be used.

·        The (strange) continued cooling of the dams during the annealing soak indicates that extending the soak time to that for a piece 6mm thicker than actual is advisable.

·        The cool rates can continue to be as for the actual thickness, as the dam temperatures follow the air temperature with little deviation below the end of the first cool. 

·        Ceramic dams perform the best of the three tested materials.


Wednesday 22 January 2020

Using Ceramic to Drape


Characteristics

Before choosing a ceramic shape to use in draping of glass, you need to consider the characteristics of the two materials.  This is one circumstance where CoE is actually useful. 

The expansion of the two materials is different. Soda lime glass typically has an expansion rate - in the 0°C to 300°C range - of 81 to 104.  Ceramic has an expansion rate - in the 0°C to 400°C range - of 30 to 64.  This is important in the final cooling of the project.  As the glass expands more than the ceramic on the heat-up, so it also contracts more during the cool.  This means that the glass will shrink enough to trap the ceramic or even break if the stress on the glass is too much. 


Shape

The shape of the ceramic form will have a big effect on the usability of it as a mould.  Ceramics with right angles between the flat surface and the sides will not be suitable for draping without modifications or cushioning.  The forms suitable for draping need to have a significant draft to work well.

Ceramic forms such as rectangles, cubes, and cylinders do not have any draft in their form.  
A cube shape unsuitable for draping

Ceramic cylinders with straight sides

Although rounded at the base, the sides are too straight to be a draping mould


The glass will contract around these forms until they are stuck to the ceramic or break from the force of the contraction around the ceramic.

You can experience this trapping effect in a stack of drinking glasses.  Sometimes one glass sticks inside another even though there is a slope (i.e., a draft) on the sides of the glasses. This happens mostly when you put a cold glass inside a warm one.  On cooling the warm glass contracts to trap the cooler one. You can separate these by running hot water on the bottom glass, so that it expands and releases the inner, now cool, one. 


Effect of Shape

The ceramic contracts at about half the rate the glass contracts (on average), unlike steel which contracts faster than the glass. This means steel contracts away from the glass, while the glass contracts against the ceramic, on the cooling.

Because the glass is in its brittle or solid phase during the last 300°C to 400°C, this contraction tightens the glass against the ceramic, causing stress in the glass, even to the point of breaking.

However, if you choose ceramic forms with significant draft, you can drape over ceramic.  This is possible when the slope is great enough and the form is coated with enough separator, to allow the glass to slip upwards as it contracts more than the form. Experience with different draft forms will give you a feel for the degree of slope required. 
 
These pyramid shapes have sufficient draft to allow the glass to move up the mould during cooling.


Compensation for Lack of Draft

You can compensate for the insufficient draft of ceramic forms by increasing the thickness of the separators for the form.  The hot glass will conform to the hot ceramic, so there needs to be a means of keeping the glass from compressing the form while cooling.  This can most easily be done by wrapping the form that has little or no draft with 3mm ceramic fibre paper.  It is possible to get by with as little as 1mm fibre paper, but I like the assurance of the thicker material.


Kiln posts wrapped in 3mm fibre paper and secured with copper wire

The fibre paper can be held to the form by thin wire wrapped around the outside of the fibre paper. The advantage of the 3mm fibre paper is that the wire will sink below the surface of the paper.  You can tie off the wire with a couple of twists.  Cut off the ends and push the twist flat to the fibre paper to keep the glass from catching onto the wire.  If you want further assurance, you can put a bit of kiln wash onto the wire.


Conclusion

The choice of ceramic shapes to drape glass over is very important.  It needs to have sufficient draft and separator to allow the glass to slip upwards as it contracts more than the ceramic during the cooling.  You often can use items with no draft if you wrap fibre paper around the sides of the form.